EBF Setup and Admin Guide
How to Install EBF
Supported Operating Systems
Debian 11
Ubuntu 20.04.2/22.04
Supported Web Browsers
Google Chrome (Version: 132.0.6834.83)
Microsoft Edge (Version: 132.0.2957.115)
NOTE The EBF software has been tested and is supported on the above set of web browsers. It may or may not function as intended with untested or unsupported browsers. While we strive to ensure broad compatibility, the performance and behavior of the software cannot be guaranteed on browsers that have not been explicitly tested or are outside of our supported list. For optimal performance, please use one of the recommended browsers.
Hardware Requirements
Desktop/Server machine with matching OR better(preferable) than below configuration
CPU - 64-bit Machine with minimum 1.8 GHZ CPU frequency
RAM - 8GB
Storage - 100 GB
Ethernet cables
EBF
Three (3) per Zombie
Two (2) per DUT/Board/Device
USB to Serial Cable
One (1) per DUT/Board/Device
Zombie connects the DUT serial console using a USB port only.
IT Requirements
Three(3) reserved IP addresses not in use by any other machine in the Corporate/Lab Network.
Internet connectivity for EBF Desktop/Server Machine ( for installation / upgrade only )
Host OS Installation
Installation Procedure for Debian 11
Debian download link:
Then follow the steps below to install Debian on the target machine.
1 Allocate at least 100GB of hard disk space.
2 Leave blank for the domain name.
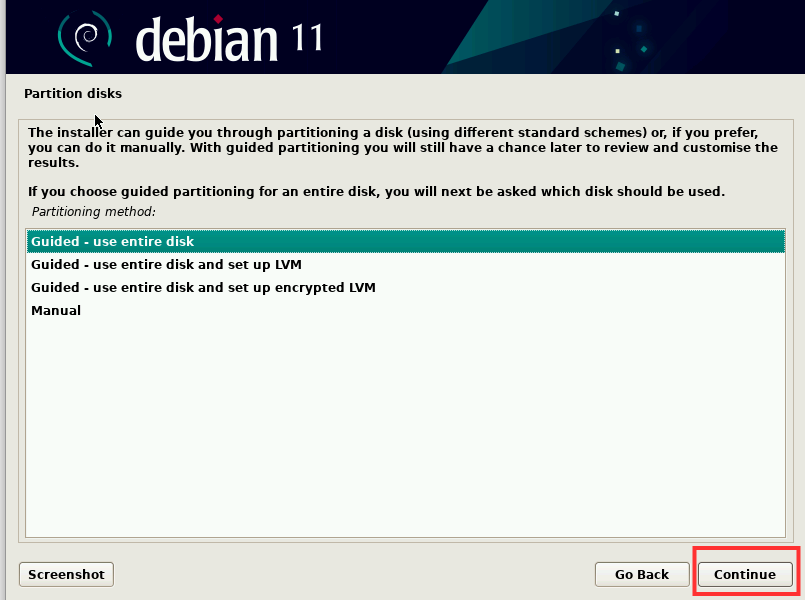
3 For partitioning options, we have taken all in a single partition.
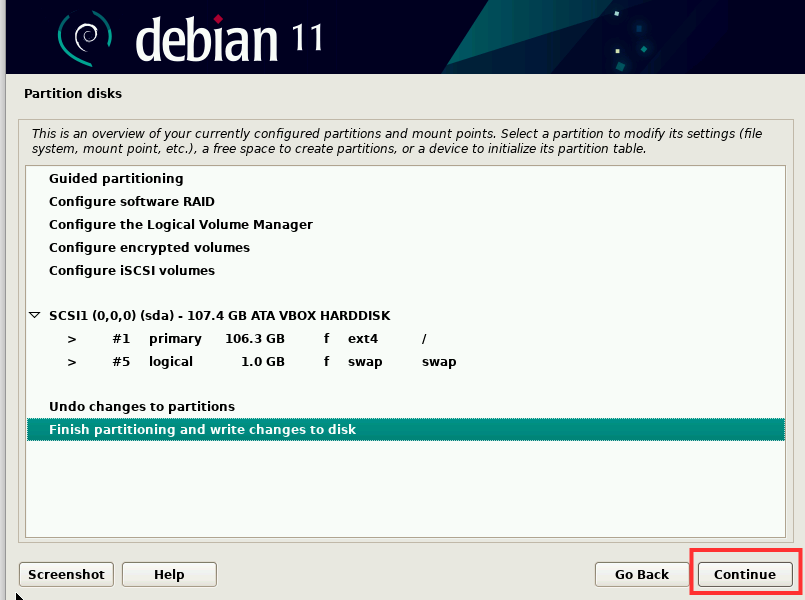
4 Finish partitioning and write changes to disk
5 Select the debian archive mirror and configure the package manager
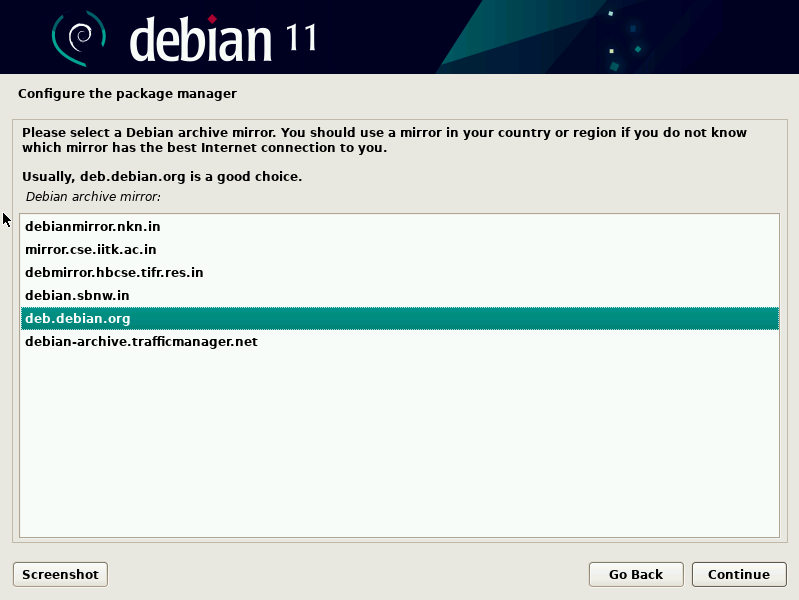
Note: Make sure your machine has a working internet connection.
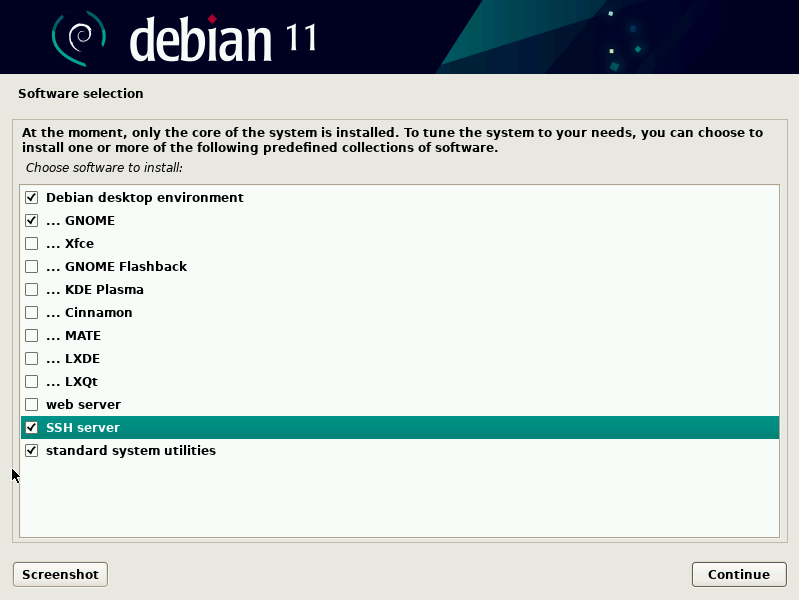
6 Select following Software Packages and click continue
Debian desktop Environment
GNOME
SSH server
Standard system utilities
7 Install Grub bootloader to hard disk. This will completes Debian installation.
Installation Procedure for Ubuntu 20.04.2
Ubuntu download link:
Ubuntu 20.04.2 iso: https://linuxlink.timesys.com/ebf/download/iso/ubuntu-20.04.2.0-desktop-amd64.iso
1 Allocate at least 100GB of space of hard disk.
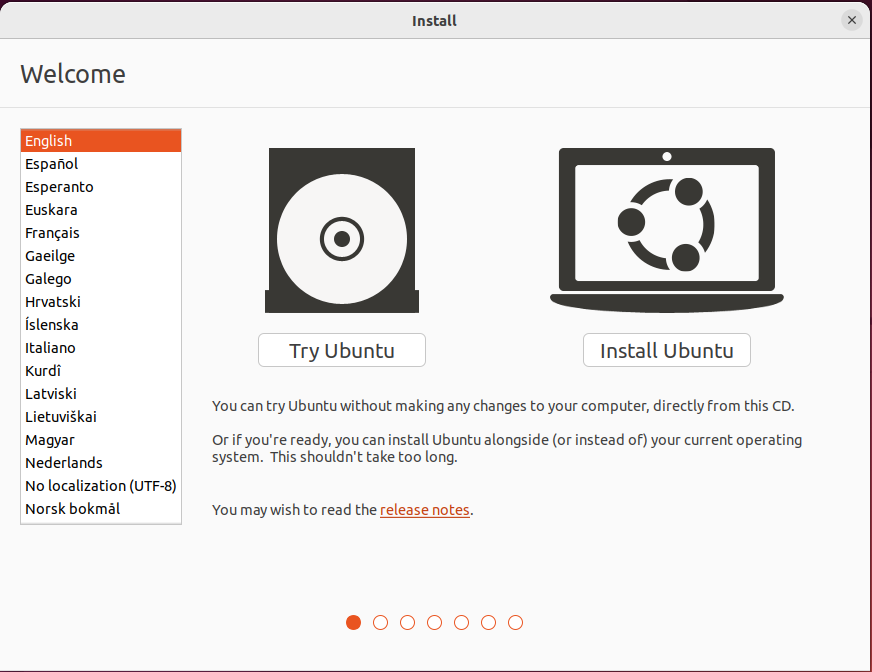
2 Select the Install Ubuntu option from the page.
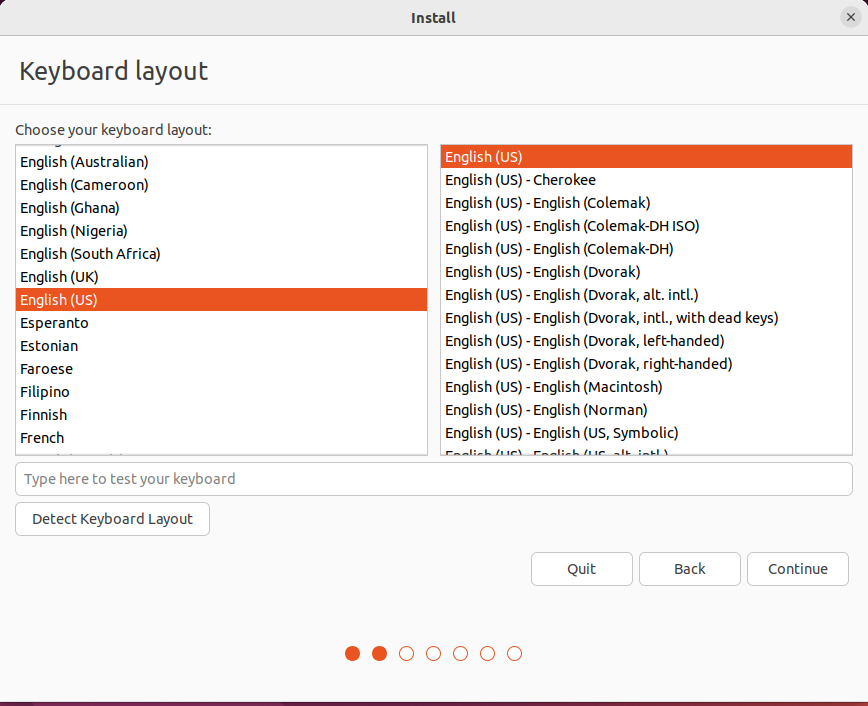
3 Select Keyboard Layout as per your preference and click on the Continue button.
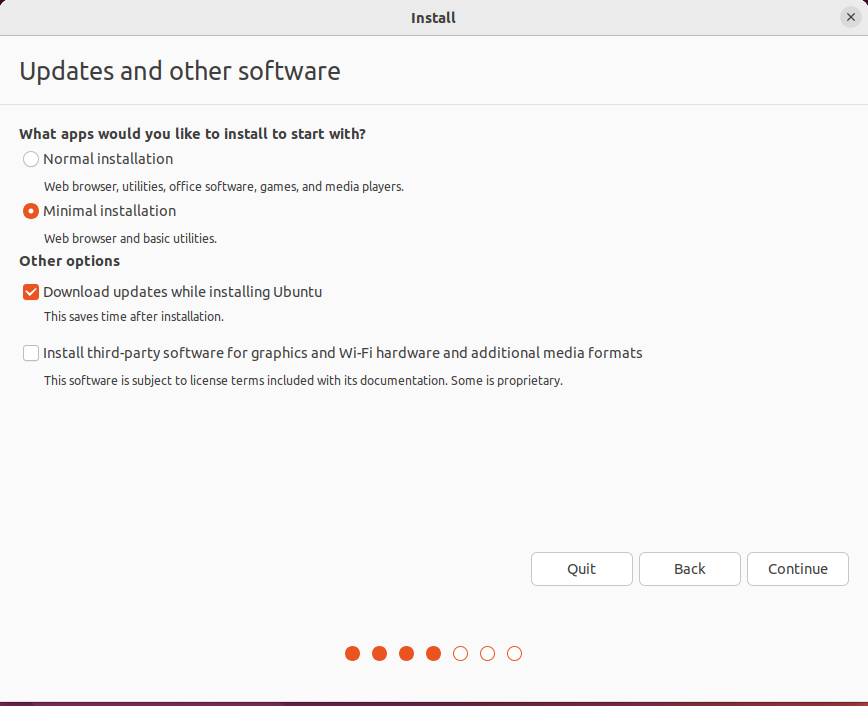
4 Select the Minimal Installation & Download updates while installing Ubuntu options to start the installation of Ubuntu and click on the Continue button.
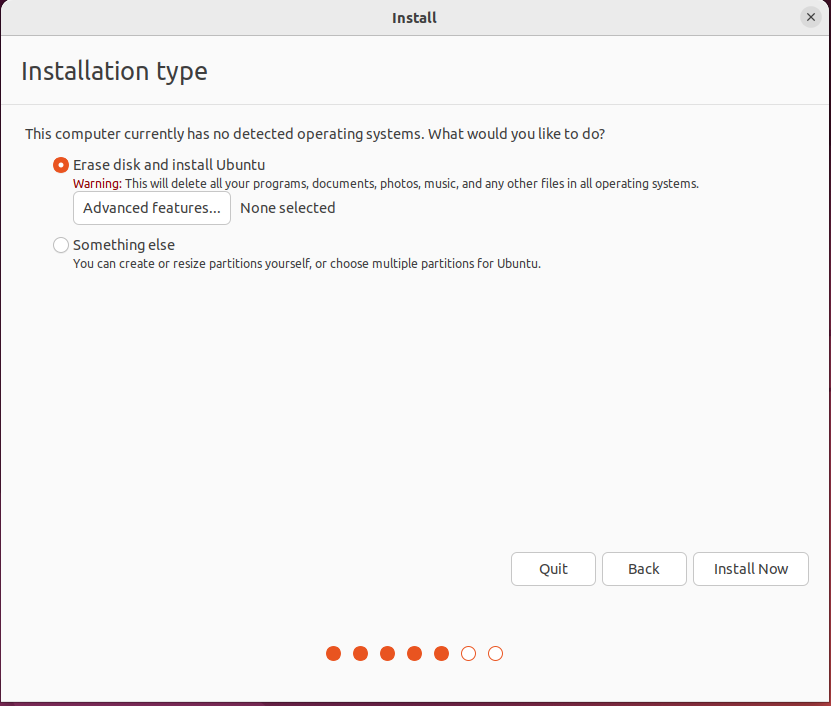
5 On the next page, select the Erase disk and install ubuntu option as the Installation type and click on the Install Now button.
6 A dialog box will appear on the screen asking for writing changes to disk, select Continue button.

7 On the next page, the user will be asked to provide a username and password. Fill in all the required fields and click on the Continue button.

This completes the Ubuntu 20.04 OS installation. After installation, the user will be asked to Restart the computer as per instructions.
Installation Procedure for Ubuntu 22.04.2
Ubuntu download link:
1 Allocate at least 100GB of space of hard disk.
2 Select the Install Ubuntu option from the page.
3 Select Keyboard Layout as per your preference and click on the continue button.
4 Select Minimal Installation & Download updates while installing Ubuntu options to start the installation of Ubuntu and click on the Continue button.
5 On the next page, select the Erase disk and install ubuntu option as the Installation type and click on the Install Now button.
6 A dialog box will appear on the screen asking for writing changes to disk, select Continue button.
7 On the next page, the user will be asked to provide a username and password. Fill in all the required fields and click on the Continue button.
This completes the Ubuntu 22.04 OS installation. After installation, the user will be asked to Restart the computer as per instructions.
EBF Installation Steps
1 Installer is compressed with 7z compression tool. Follow the below steps to install the 7z tool used to extract the installer files on a Linux machine.
sudo apt-get install p7zip-full
2 LinuxLink users can download the latest image from the link mentioned below and extract it to their target machine(Ubuntu/Debian)
To download from LinuxLink, you need to log in first.
https://linuxlink.timesys.com/bfc/
7z x EBF-Installer-<Version>.7z
3 After extracting the downloaded folder, run the below command:
cd EBF-Installer-<Version>
sudo ./EBF-Installer.sh
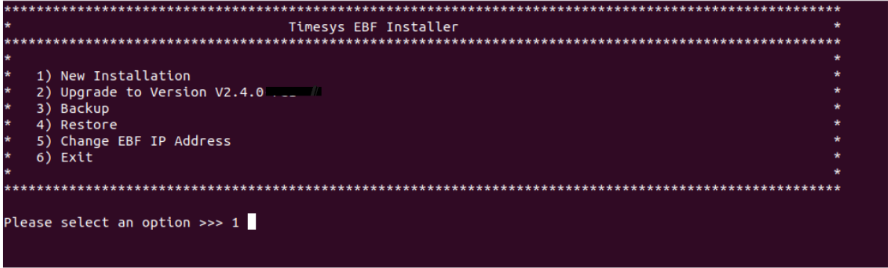
It will ask the user for New Installation or an Upgrade. Choose the New Installation option.
4 Press ENTER to read the EULA.

5 To accept the EULA terms, type yes or hit ENTER.
Do you accept the EULA terms [yes/no] ? [yes] >>>
6 Hit Enter to disable the LAVA option on EBF.

OR

If you want to enable the LAVA option on EBF, enter ‘Y’.
7 Hit Enter to disable the HTTPS support.

OR
If you want to enable HTTPS support, enter ‘Y’.

8 Would you like to specify the local private docker network [Y/N] ? [N] >>>
if you choose yes then you need to set up the network range in the form of 172.16.0.0/16 and it will update the docker network range successfully. Or if you choose nothing to do in or ‘N’. Then it will set the default network range or the last updated network range.

9 Hit ‘Enter’ to generate the default certificate for ‘HTTPS’ support.

OR
Open a new terminal window and run the following commands to generate the certificate:
cd /home/
openssl req -newkey rsa:2048 -nodes -keyout key.pem -x509 \
-days 365 -out certificate.pem
Input all the details as asked.
When asked for input: ‘Common Name (e.g. server FQDN or YOUR name) []:’, enter the IP Address of the current machine (on which EBF is being installed).
cat certificate.pem key.pem > combined.pem
Copy the path of this ‘combined.pem’ file (/home/combined.pem) and paste it into the ongoing installation terminal window.
10.Hit ‘Enter’ to set the default DNS

OR
provide any valid DNS name OR IP address
11 Once the above steps get set up Installation will start.
EBF Upgrade Steps
1 Installer is compressed with 7z compression tool. Follow the below steps to install the 7z tool used to extract the installer files on a Linux machine.
sudo apt-get install p7zip-full
2 LinuxLink users can download the latest image from the link mentioned below and extract it to their target machine(Ubuntu/Debian)
To download from LinuxLink, you need to log in first.
https://linuxlink.timesys.com/bfc/
7z x EBF-Installer-<Version>.7z
3 After extracting the downloaded folder, run the below command:
cd EBF-Installer-<Version>
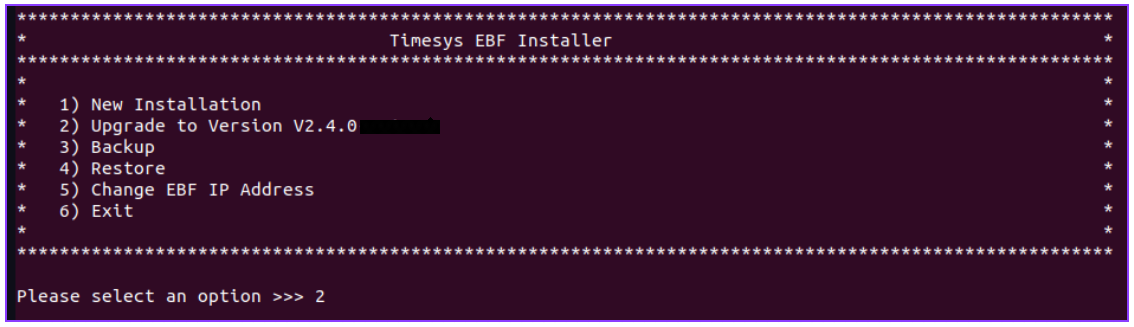
sudo ./EBF-Installer.sh
It will ask the user for New Installation or an Upgrade. Choose the upgrade option.
4 Press ENTER to read the EULA.
5 To accept the EULA terms, type yes or hit ENTER.
Do you accept the EULA terms [yes/no] ? [yes] >>>
Note: Below additional steps would be required on upgrading from an older version of EBF to EBF-2025.07 or higher
i Hit ‘Enter’ to generate the default certificate for ‘HTTPS’ support.
OR
Open a new terminal window and run the following commands to generate the certificate:
cd /home/
openssl req -newkey rsa:2048 -nodes -keyout key.pem -x509 \
-days 365 -out certificate.pem
Input all the details as asked.
When asked for input: ‘Common Name (e.g. server FQDN or YOUR name) []:’, enter the IP Address of the current machine (on which EBF is being installed).
cat certificate.pem key.pem > combined.pem
Copy the path of this ‘combined.pem’ file (/home/combined.pem) and paste it into the ongoing installation terminal window.
ii.Hit ‘Enter’ to set the default DNS
OR
provide any valid DNS name OR IP address
6 Once the above steps are done the upgrade will start with the settings previously configured.
EBF Backup Steps
1 Installer is compressed with 7z compression tool. Follow the below steps to install the 7z tool used to extract the installer files on a Linux machine.
sudo apt-get install p7zip-full
2 LinuxLink users can download the latest image from the link mentioned below and extract it to their target machine(Ubuntu/Debian)
To download from LinuxLink, you need to log in first.
https://linuxlink.timesys.com/bfc/
7z x EBF-Installer-<Version>.7z
3 After extracting the downloaded folder, run the below command:
cd EBF-Installer-<Version>
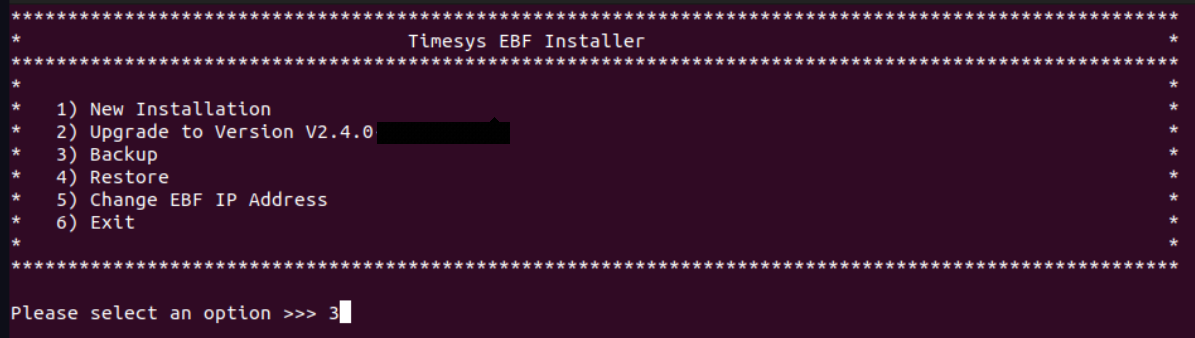
sudo ./EBF-Installer.sh
Select option 3 from the recommended option in order to back up the current EBF server.
4 If you do not want to backup rootfs/kernel images, uploaded during image flashing then type [no] otherwise hit ‘ENTER’.

5 After successful backup the user will be able to see the confirmation message on the screen with the backup name.

Note: The user can restore these backups using restore functionality
EBF Backup Restore Steps
1 Installer is compressed with 7z compression tool. Follow the below steps to install the 7z tool used to extract the installer files on a Linux machine.
sudo apt-get install p7zip-full
2 LinuxLink users can download the latest image from the link mentioned below and extract it to their target machine(Ubuntu/Debian)
To download from LinuxLink, you need to log in first.
https://linuxlink.timesys.com/bfc/
7z x EBF-Installer-<Version>.7z
3 After extracting the downloaded folder, run the below command:
cd EBF-Installer-<Version>
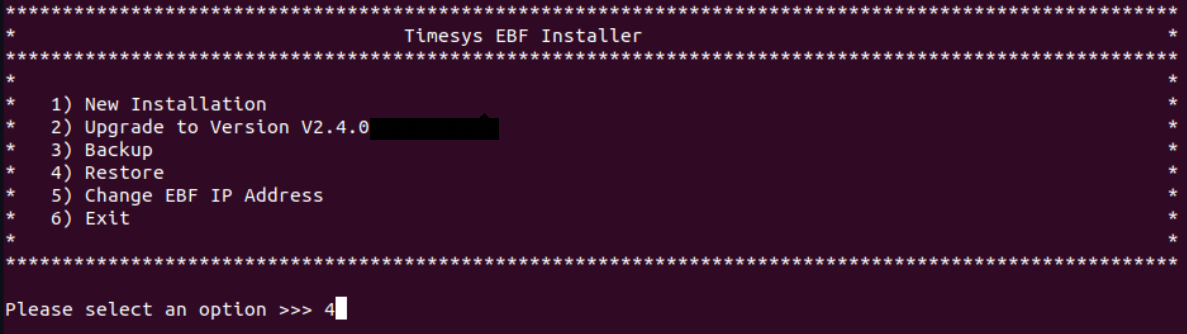
sudo ./EBF-Installer.sh
Select option 4 from the recommended option in order to restore the backup.
4 Select the backup from the backup list in order to restore the backup.

5 if you want to backup the current ebf server then hit “Enter” otherwise type no and hit ‘Enter’.

If you do not want to backup rootfs/kernel images, uploaded during image flashing then type [no] otherwise hit ‘ENTER’.

6 After successful restore the user will able to see the confirmation message on the screen with the backup name.

Change EBF IP address
1 Installer is compressed with 7z compression tool. Follow the below steps to install the 7z tool used to extract the installer files on a Linux machine.
sudo apt-get install p7zip-full
2 LinuxLink users can download the latest image from the link mentioned below and extract it to their target machine(Ubuntu/Debian)
To download from LinuxLink, you need to log in first.
https://linuxlink.timesys.com/bfc/
7z x EBF-Installer-<Version>.7z
3 After extracting the downloaded folder, run the below command:
cd EBF-Installer-<Version>
sudo ./EBF-Installer.sh
4 Select option 5 from the recommended option to change EBF IP.
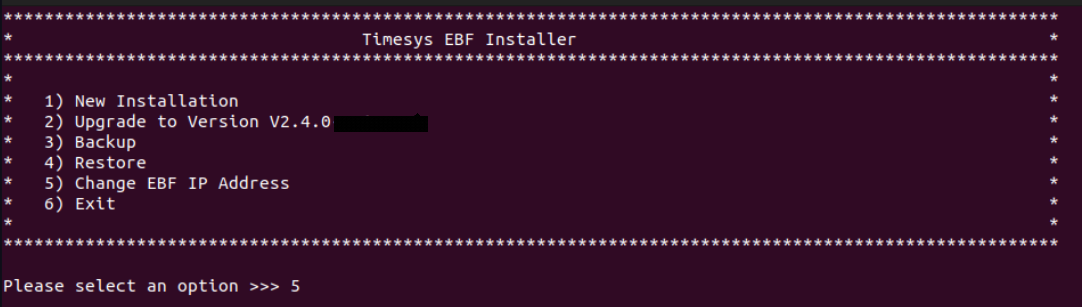
5 After Selection of option no. 5 it will show you EBF current running IP/Domain name on the screen and asks for the new IP/Domain Name.

6 Provide a New IP/Domain name and wait for confirmation.

7 After a successful IP change a confirmation message will appear on the screen with a new IP address.

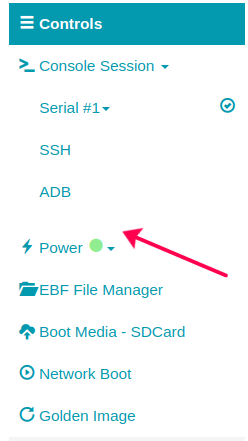
How to Setup EBF
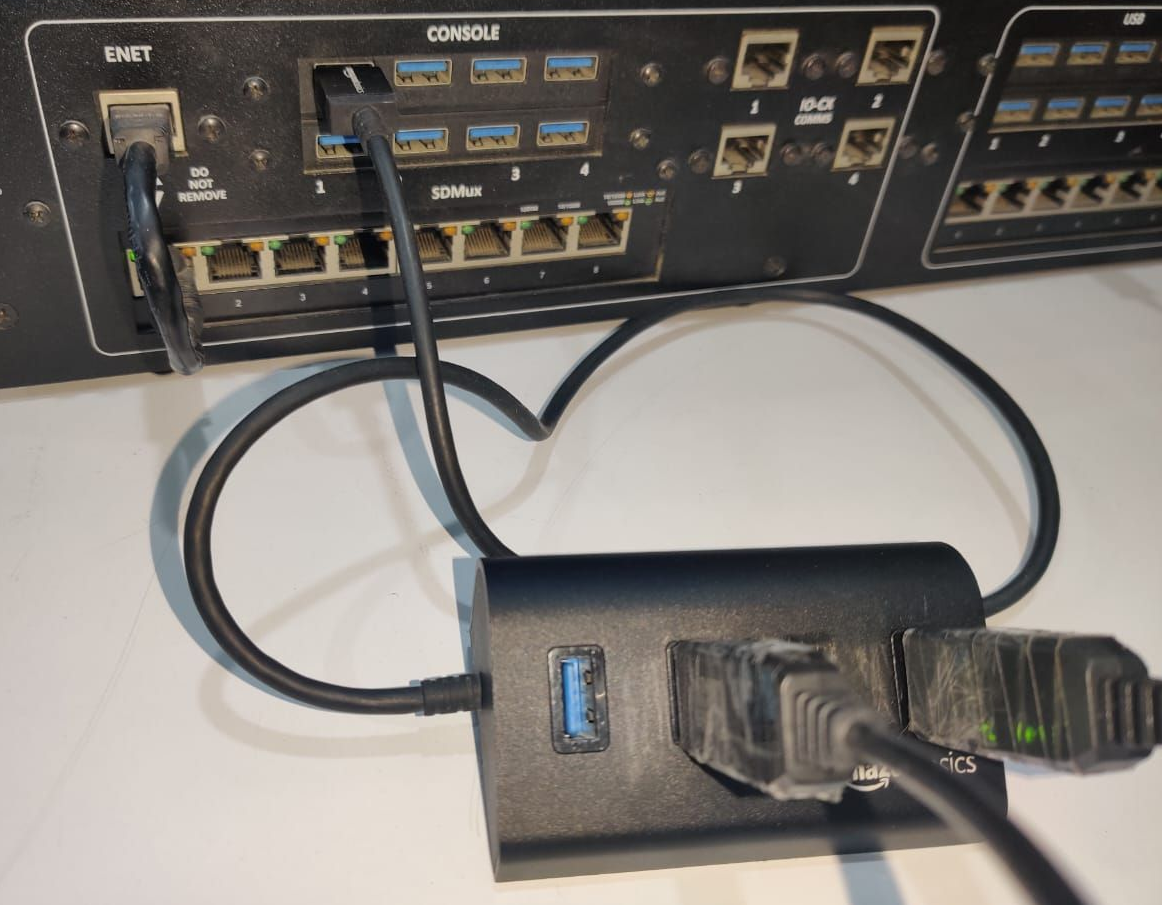
1 Connect device with zombie.
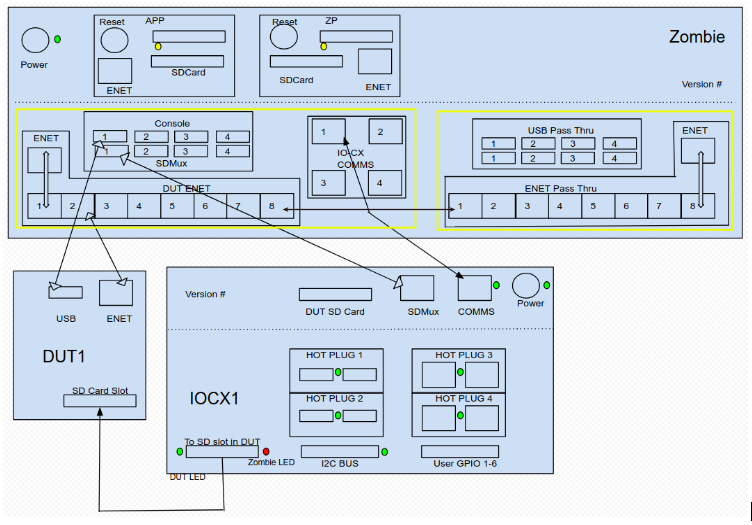
2 The two yellow dots are on the ground in Zombie.
3 The connections shown in upper image are for 1st DUT. Similar will be the connections for rest of the DUTs and IOCXs.
How to Login EBF with SSO
Refer Link
How to Set configurable EBF timeouts
Make changes in the settings.conf file:
1 Go to the directory /data/timesys/ebf/setup . Edit settings.conf and set the below new config variables
CONSOLE_ACCESS_TIMEOUT : “” (By Default it is 5 Sec)
REQ_TIMEOUT : “” (for Zombie workers page - checking zombies are reachable or not)(By Default it is 15 Sec)
2 You can change the timeouts as per your requirement.
How to add new device type
Refer Link
How to add a new device
Following are the steps to add a new device to the EBF server:
1 Login to the EBF homepage/Dashboard through a web browser with credentials.
Username : <username>
Password : <password>
2 This would open up the EBF Dashboard.
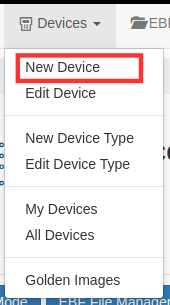
3 There are two ways to add new devices on the web server:
Select the ‘New Device’ option from the ‘Devices’ drop-down list.
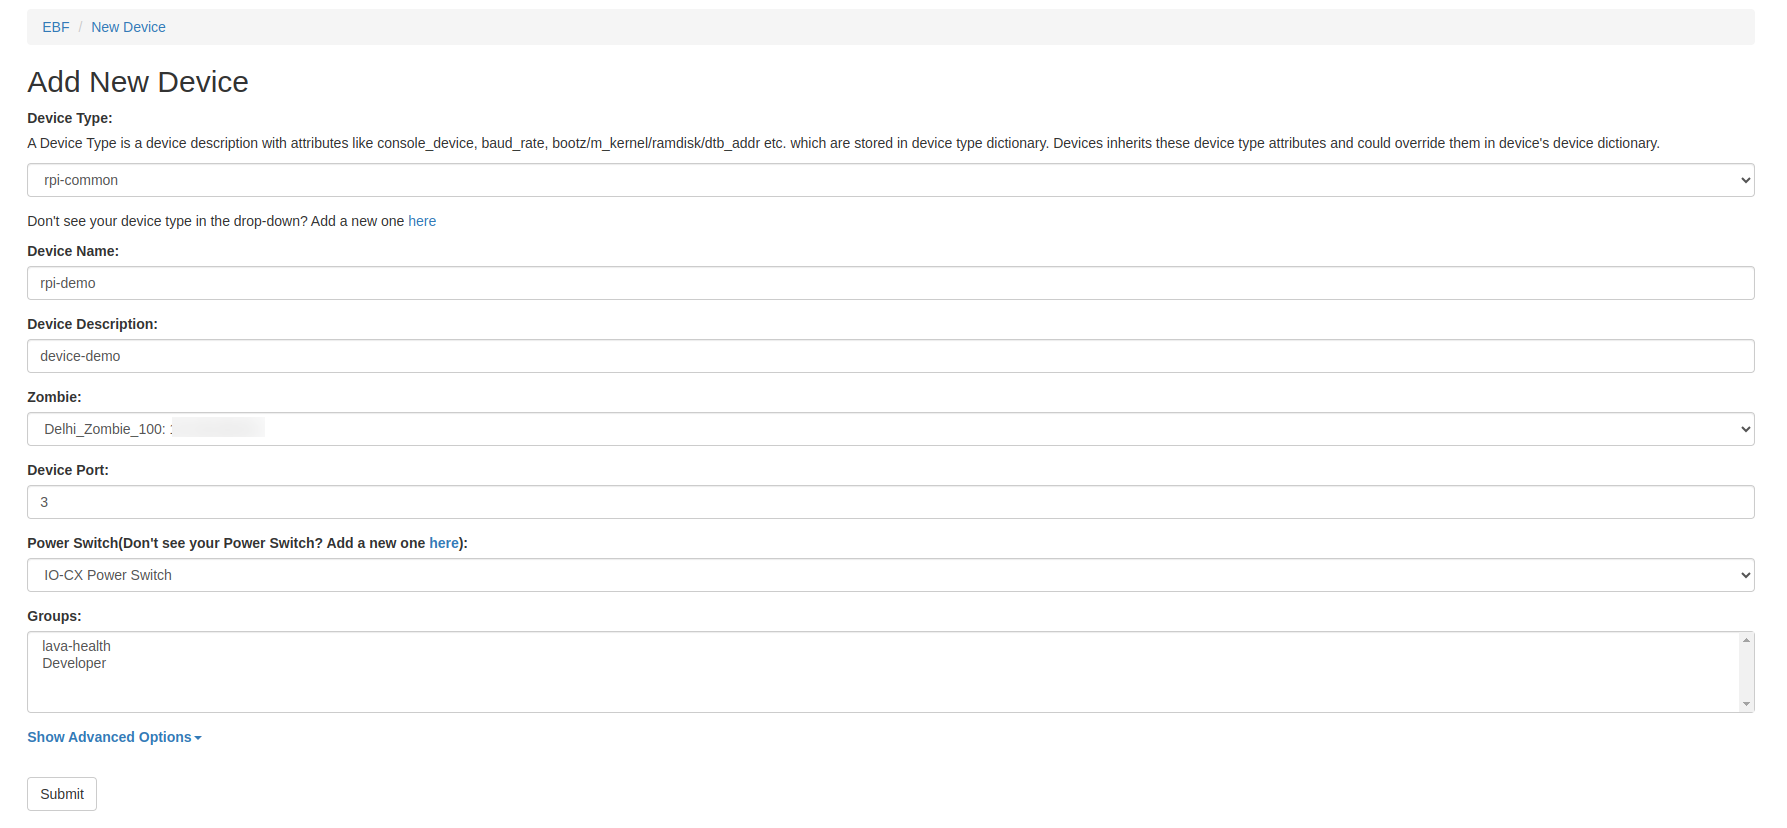
4 ‘Add New Device’ page will appear on the screen.
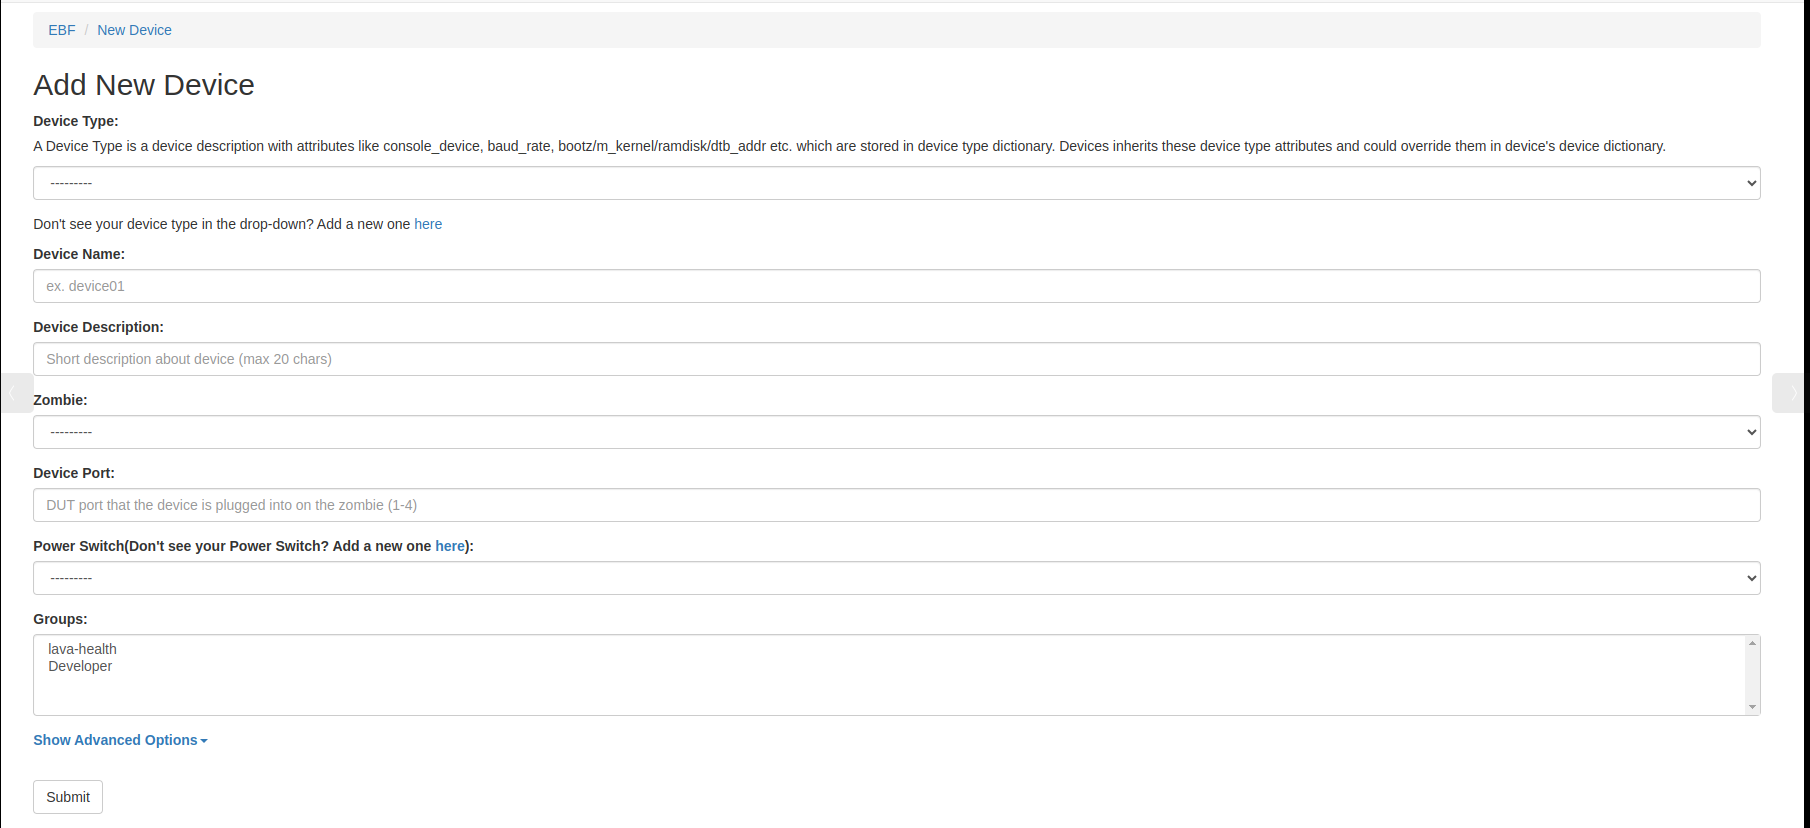
Fill in the necessary fields available on the screen:
You can also restrict the user to release the device by selecting and deselecting the checkbox Allow Device Force Release. if the admin selects it then anyone can release this device forcefully if he deselected it then no one can release this device except the admin.

You can give your own hotplug names. The device could also be assigned a static IP address during Test job execution. To enable this feature check Do you want to assign Device static IP address during test execution? and enter Device’s Network interface as shown in the image below.

Device type: A device type is a generic description of a device and identifies different qualities of that device.
In EBF, a particular DUT is an instance of a device type. For example, if beaglebone-black is a device type, then it can have many device instances like bbb01, bbb02, BBB, etc that share the same device type with the same set of commands. When adding a device, a device type needs to be added corresponding to the device to be added. The device type can be added only by the admin.
Device name: <Device name> .Choose a meaningful unique name
Device Description: Add a Short Description of the device.
Zombie: <Zombie Name:IP Address>
Device Port: DUT port that the device is plugged into on the zombie(1-4)
Power Switch Type: Power Switch type can be IP Controlled Power Switch or IO Controlled Switch.
Power Port: Power port that the device is plugged into on the power strip
Device Version: Add the device version of your device optional field.
Physical Owner: Choose Physical Owner from the drop-down menu optional field.
Number of Serial Consoles: Provide the number of serial consoles that are connected with the zombie set any value 1-8. The default is 1.
Allow Device Force Release. if the admin selects it then anyone can release this device forcefully if he deselected it then no one can release this device excepted admin.
Hotplug Label: You can give the name of hotplugs.
Netboot Type: Select the network boot type (PXE/UEFI) for your device to boot your device through Netboot
Console Sharing: select the option disabled from the Console Sharing drop-down menu to disable the console sharing for the device.
OR
select the option enabled from the Console Sharing drop-down menu to enable the console sharing for the device.
Tags: Provide a tag name for this device. This tag helps EBF identify a particular device if there are multiple devices of the same type.
Groups Admin can assign a group to a device. So that the device is visible to all users in that group.
IOCX MUX Mode: If IOCX hardware is connected to this Device, you could configure its MUX module to either SDMux or USBMux mode for writing to the Device’s SDCard or USB storage respectively using this setting.
Click on the Submit button after filling in all the fields.
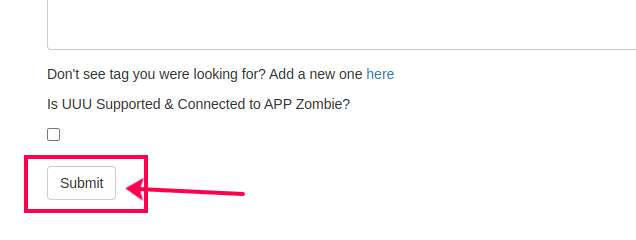
5 The new device will be added to the EBF server after clicking on the ‘Submit’ button.
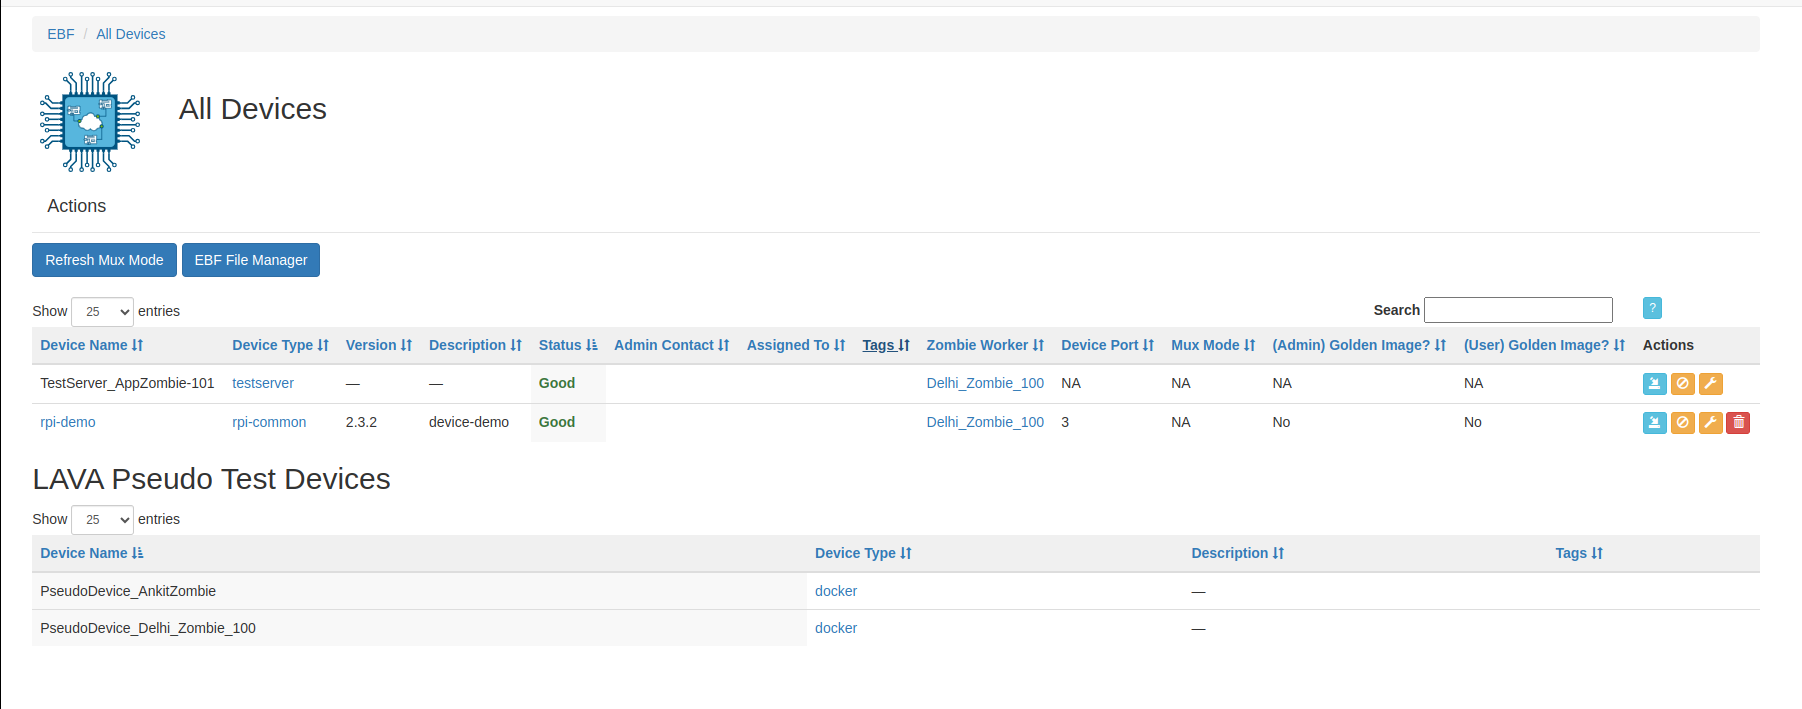
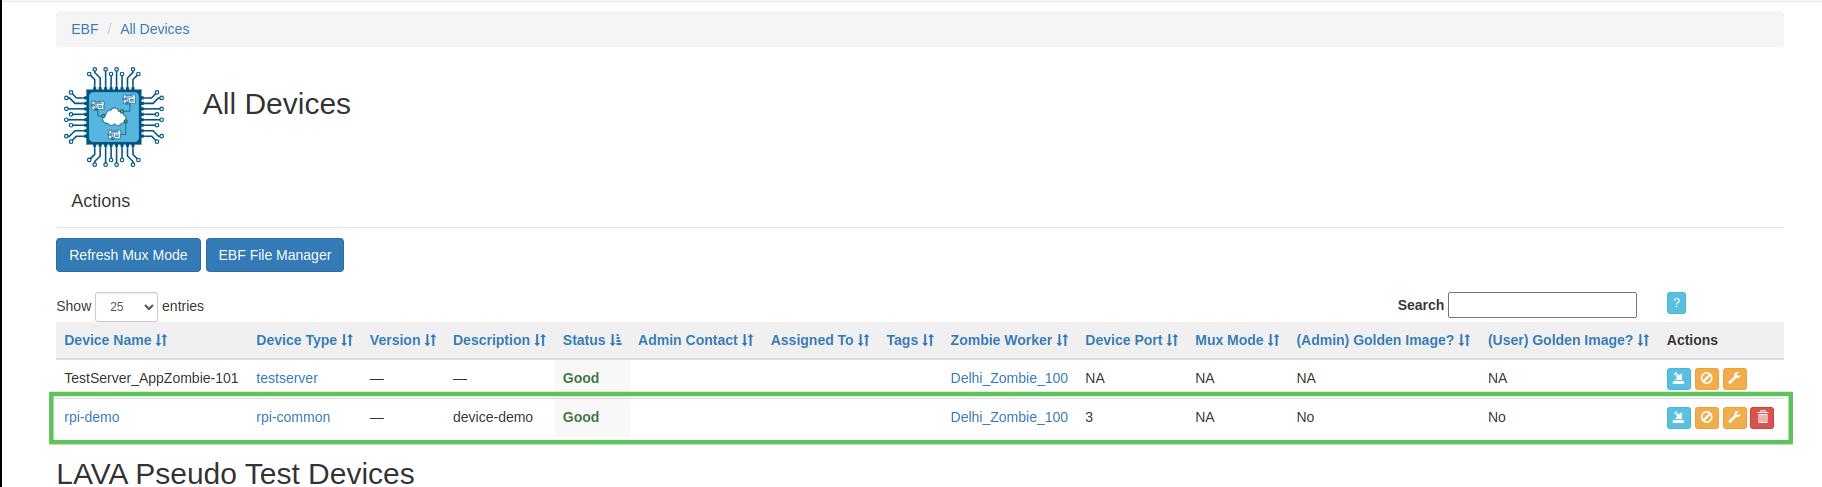
6 User can view new devices added by selecting: Devices -> All Devices option on EBF Dashboard.
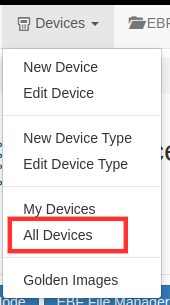
7 The new device added is listed on the ‘All Devices’ page.
How to edit details of an available device
Following are the steps to edit the details of the added Device on the EBF server:
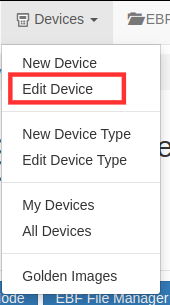
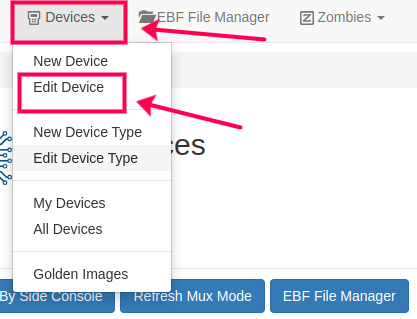
1 Select the ‘Edit Device’ option from the ‘Devices’ drop-down list on the EBF dashboard to edit Device details.
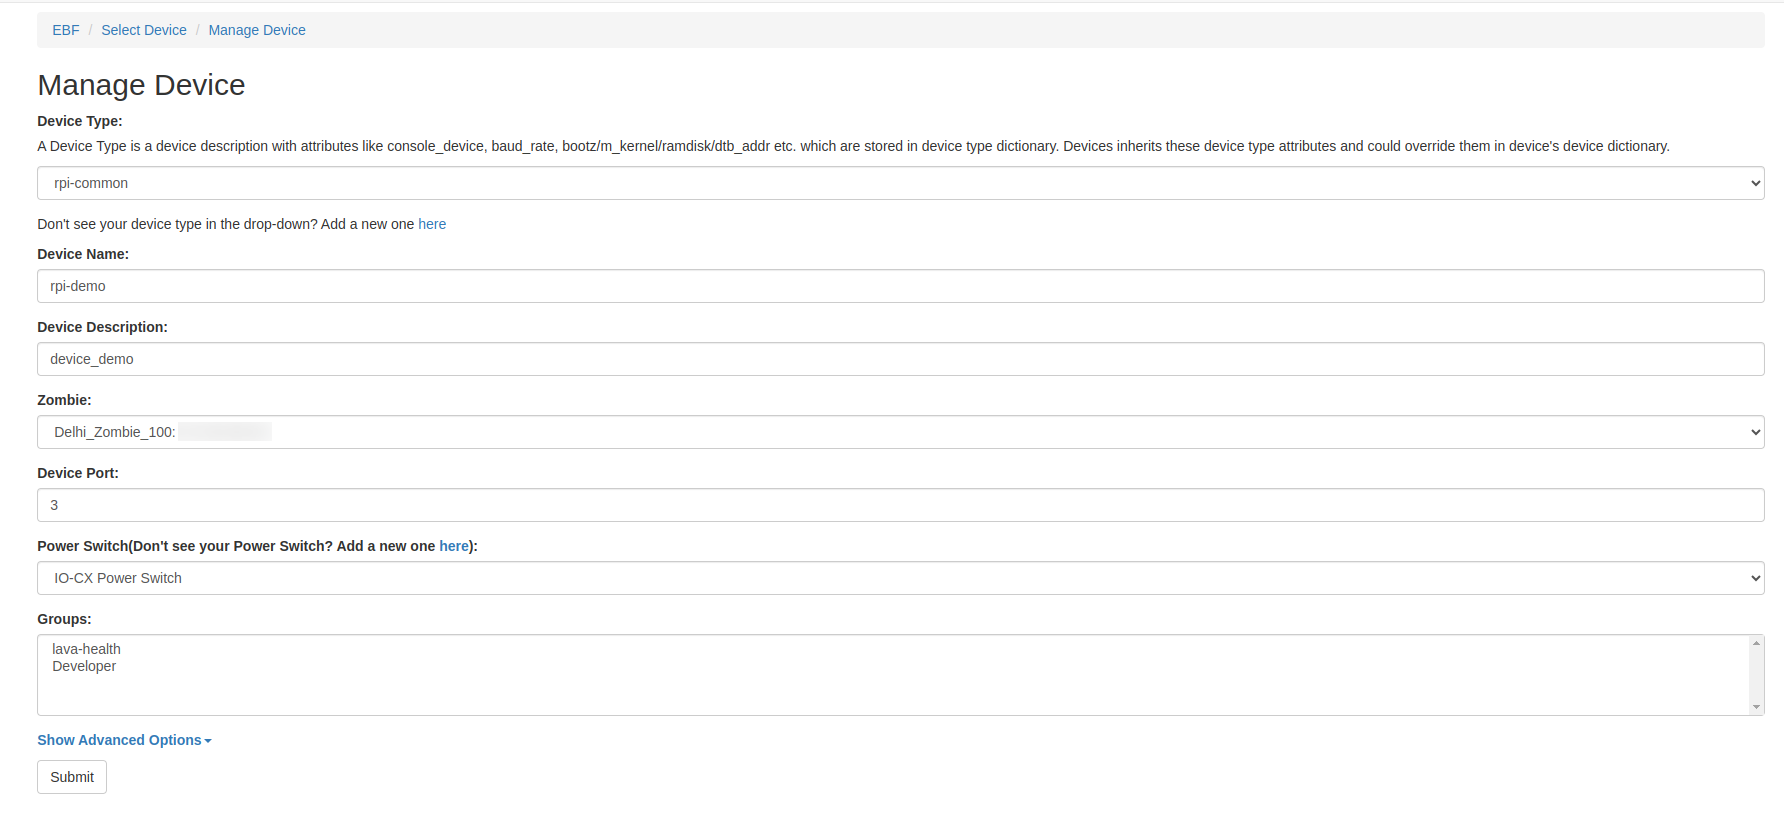
2 Select Device from the drop-down list on the ‘Select Device’ page to edit Device details.

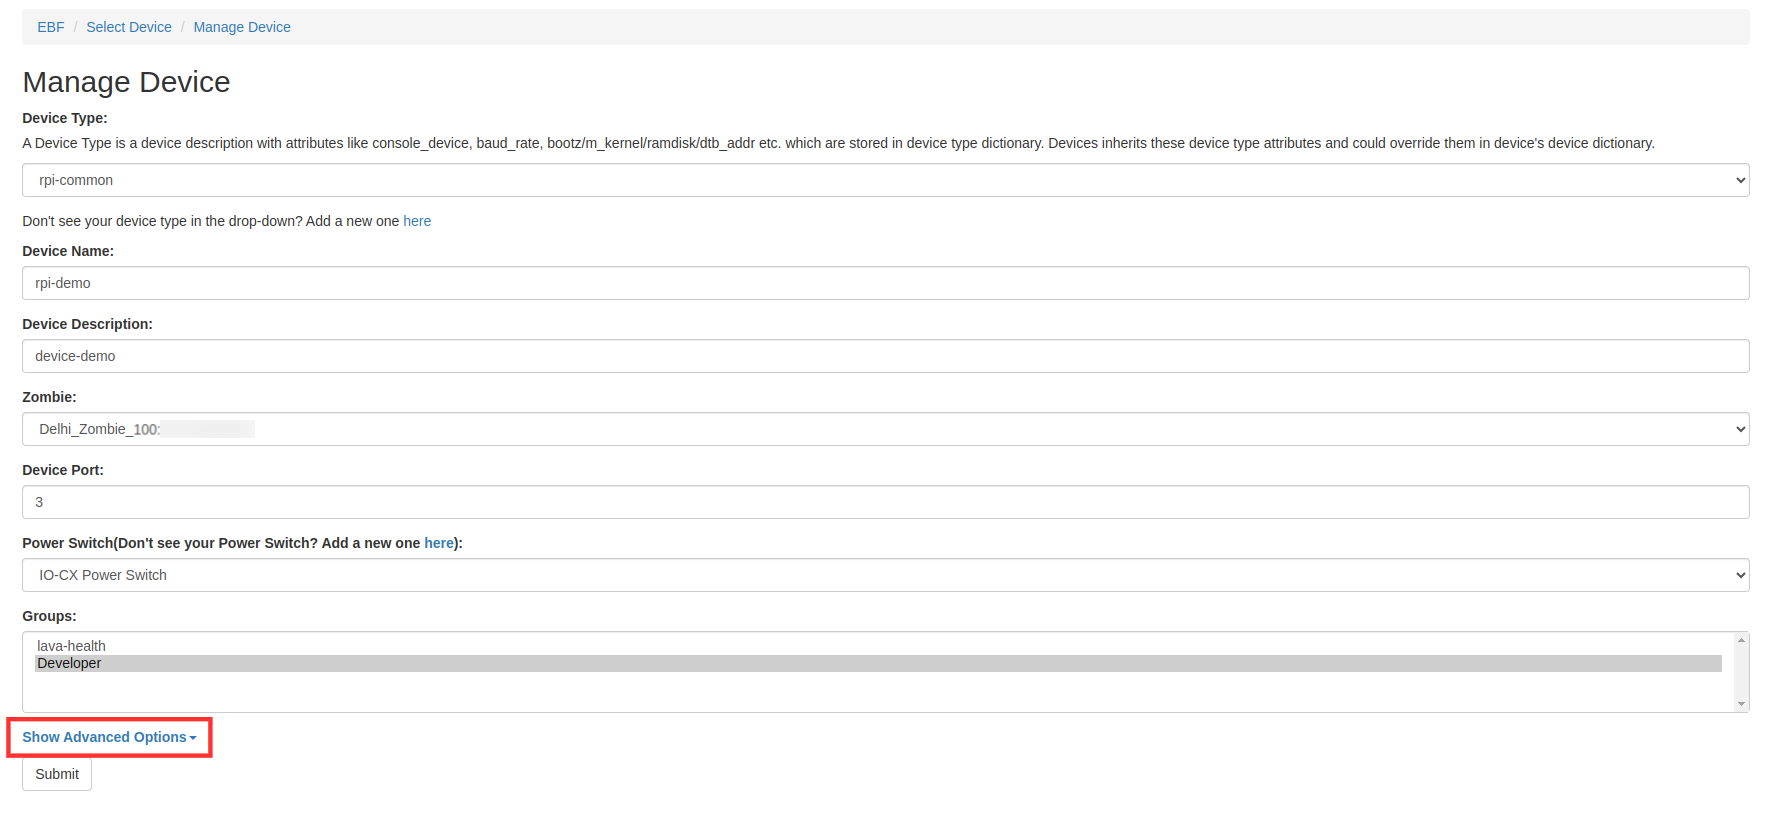
3 ‘Manage Device ’ page will appear on the screen. Edit device details.
4 Click on the ‘Submit’ button and a confirmation message ‘Updated Device‘ will appear on the screen.

How to Delete an Available Device
Following are the steps to edit the details of the added Device on the EBF server:
1 Select the ‘All Devices’ option from the ‘Devices’ drop-down list on the EBF dashboard to delete the device.
2 Select the Device, you want to delete.
3 Click on the ‘Delete icon’ of the corresponding device, you want to delete.
4 A confirmation pop-up will appear on the screen. Click on the ‘OK’ button to delete the device.

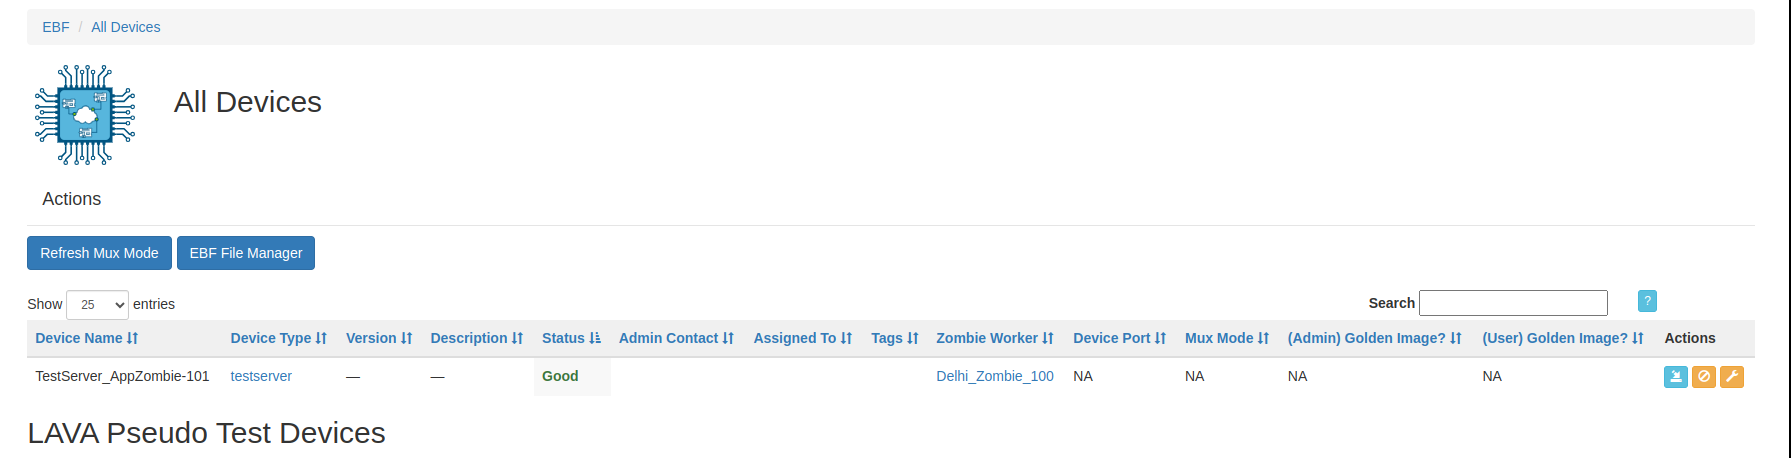
5 After deleting the device successfully, the device will no longer appear on the screen.
How to edit Device Dictionary
The device dictionary is created with every new device added. The user can view the device dictionary under the Advanced options available on the Edit Device page.
The following are the steps to view or edit the Device dictionary:
1 Go to Devices -> Edit Device
2 Select the device from the drop-down list.

3 Manage device page will appear on the screen.
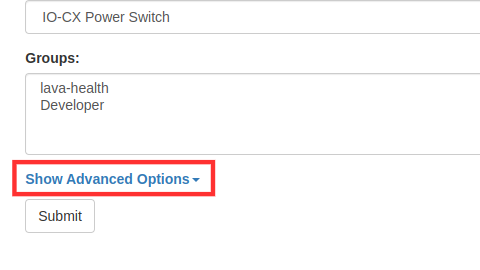
4 Click on the Advanced options tag.
5 Select click here to view the Device dictionary.
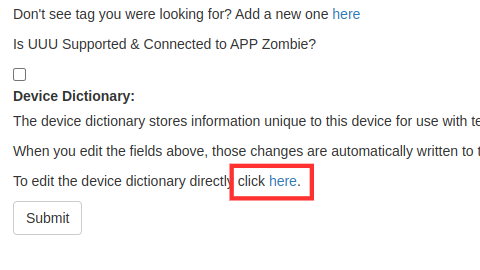
6 The Device dictionary will appear on the screen.
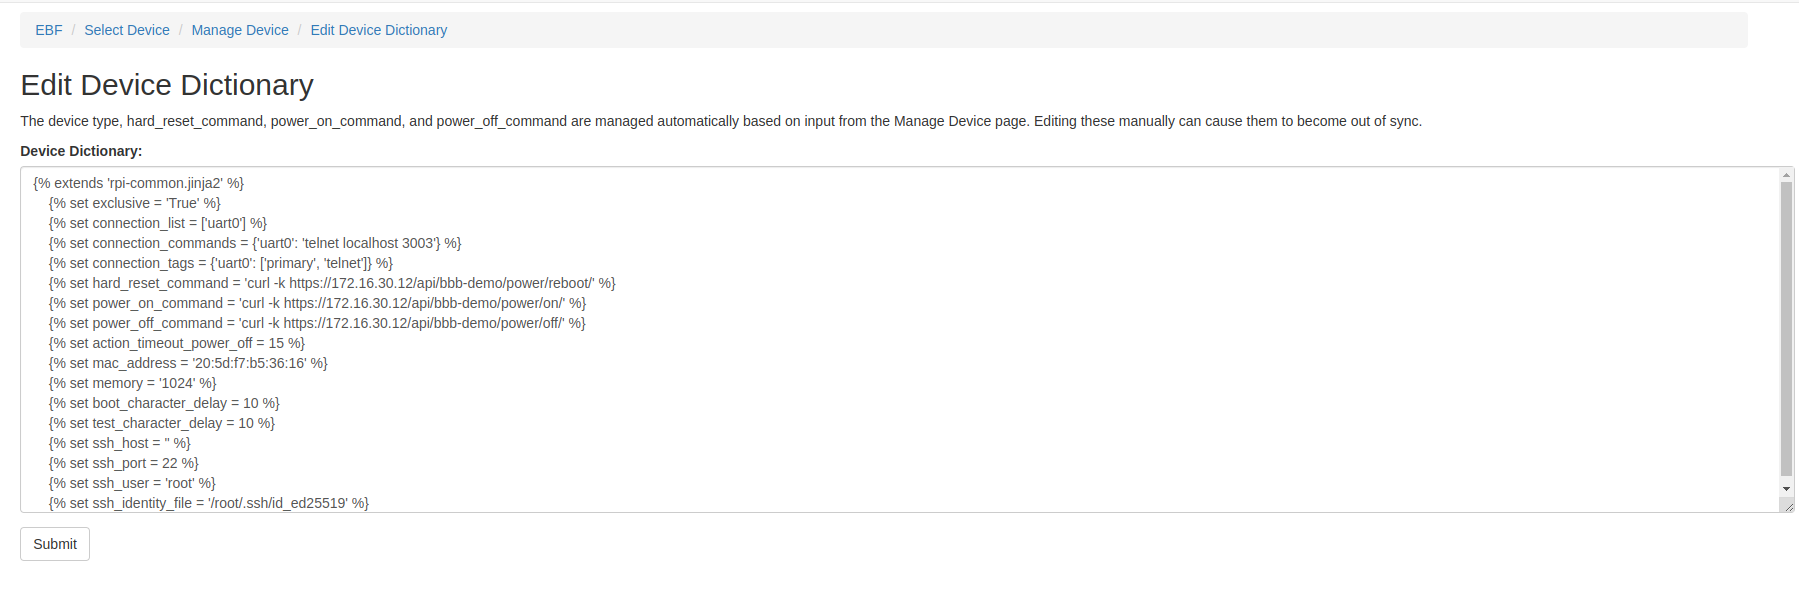
7 The user can view and edit the Device dictionary of the device.The following are the fields in the device dictionary which are by default created while adding a new device.
{% extends 'beaglebone-black.jinja2' %}
{% set exclusive = 'True' %}
{% set hard_reset_command = 'curl  http://192.168.12.81/api/bbb09/power/reboot/' %}
{% set power_on_command = 'curl  http://192.168.12.81/api/bbb09/power/on/' %}
{% set power_off_command = 'curl  http://192.168.12.81/api/bbb09/power/off/' %}
{% set action_timeout_power_off = 15 %}
Must parameters in Device Dictionary are:
{% set connection_command = 'telnet localhost 3006' %}
{% set mac_address = '50:54:30:14:34:52' %}
{% set memory = '1024' %}
Specifications:
{%{background:yellow} set connection_command='telnet localhost <PORT>' %}
{%{background:yellow} set mac_address = ‘<Provide unique Mac Address>’%}
{%{background:yellow} Set memory =’<set memory> ’%}
Other parameters for reference:
{% set bootloader_prompt = '=>' %}
{% set interrupt_prompt = 'Press SPACE to abort autoboot in 2 seconds' %}
{% set interrupt_char = ' ' %}
{% set console_device = 'ttyS0' %}
{% set boot_message = 'Starting kernel' %}
{% set shutdown_message = 'Restarting system' %}
Specifications:
Bootloader_prompt: It is set by default in the Device type of the device but if the prompt varies then user can set the bootloader prompt in device dictionary.
{% set bootloader_prompt = '=>'%}
Interrupt_prompt: If the device has interrupt prompt, then user can set interrupt prompt in device dictionary if required.
{% set interrupt_prompt = 'Press SPACE to abort autoboot in 2 seconds'%}
Interrupt_char: If the device requires to stop at the bootloader prompt then set interrupt char in the device dictionary.
{% set interrupt_char = ' '%}
Console_device: It is set by default in the Device Type of the device but if the prompt varies then the user can set console_device in the device dictionary.
{% set console_device = 'ttyS0'%}
Boot_message: This confirms that the booting process has passed the boot prompt and the board is available to take the next command from the framework. Following is one of the scenarios where it can be useful:
If the device requires a boot message at the time of login then the user can set boot_message in the device dictionary.
{% set boot_message = 'Starting kernel'%}
Shutdown_message: When the board reboots, log messages are generated. This variable contains a unique sub-string from the logs which confirms that system has rebooted.
{% set shutdown_message = 'Restarting system'%}
Device booting precedence
The boot parameters are selected for booting the device as per the order described below:
Device Dictionary
Device Type
base-uboot.jinja2
base.jinja2
Device Dictionary: The boot parameters provided in the device dictionary for booting the device are of the highest precedence. For example, if the bootloader prompt is defined in the Device dictionary, then the device tries to boot from the defined value of the bootloader prompt in the device dictionary.
{% set bootloader_prompt = '=>' %}
Device Type: If the bootloader prompt parameter provided in the device dictionary doesn’t boot the device or if the parameter is not defined in the device dictionary of the device then the value for the bootloader prompt mentioned in the device type of the device boots the device.
{% set bootloader_prompt = bootloader_prompt|default('U-Boot') %}
base-uboot.jinja2: If the device doesn’t boot from the defined value of bootloader prompt in device dictionary and device type then the device takes the value of bootloader prompt from base-uboot.jinja2 file and tries to boot the device.
bootloader_prompt: {{ bootloader_prompt|default('=>') }}
base.jinja2: The boot parameters defined in base.jinja2 are of the lowest precedence. If the device is not booted from the above three values, then device tries to boot from the value of the bootloader prompt provided in base.jinja2 file.
{% set base_menu_bootloader_prompt = 'Start:' -%}
How to View Device Dictionary
Following are the steps to view the device dictionary of a device.
1 Login to the EBF homepage/Dashboard through a web browser with credentials.
Username: <Username>
Password: <Password>
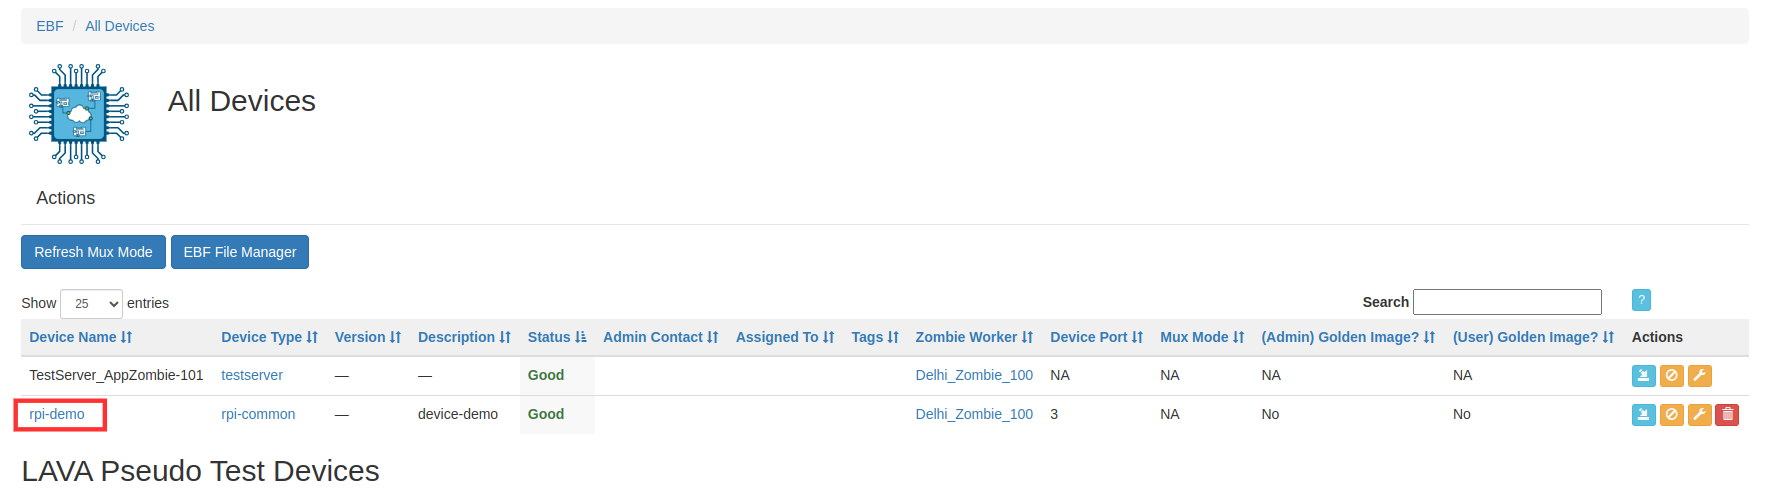
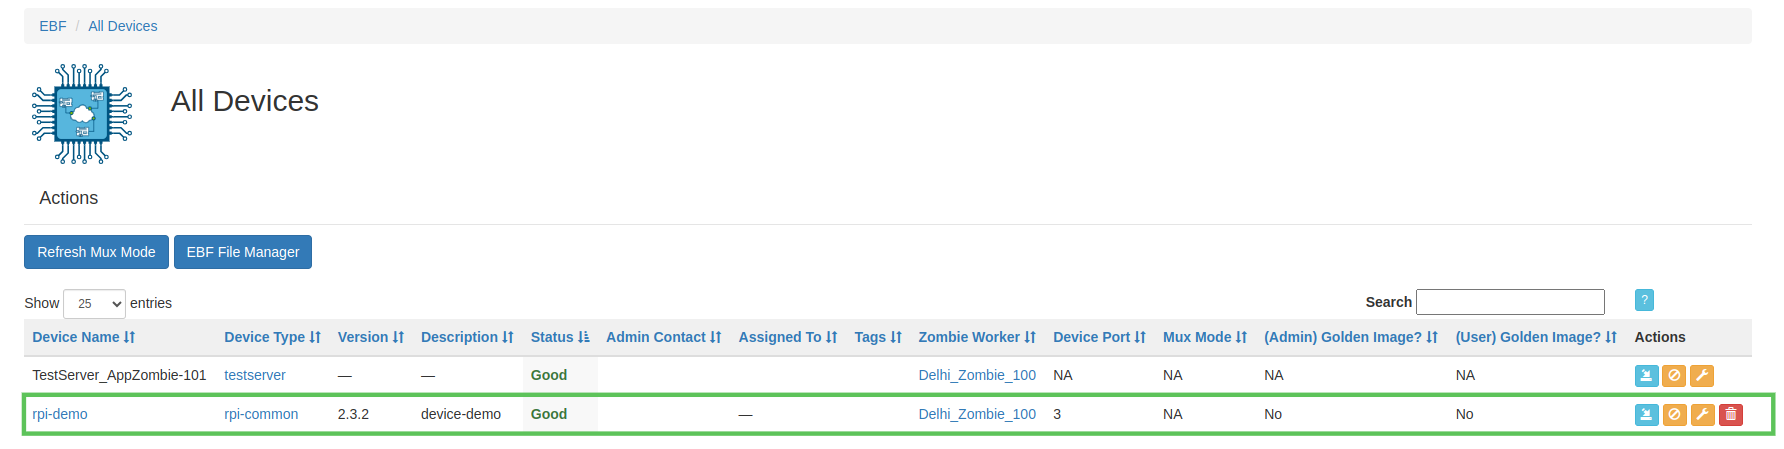
2 Go to Devices -> All Devices.
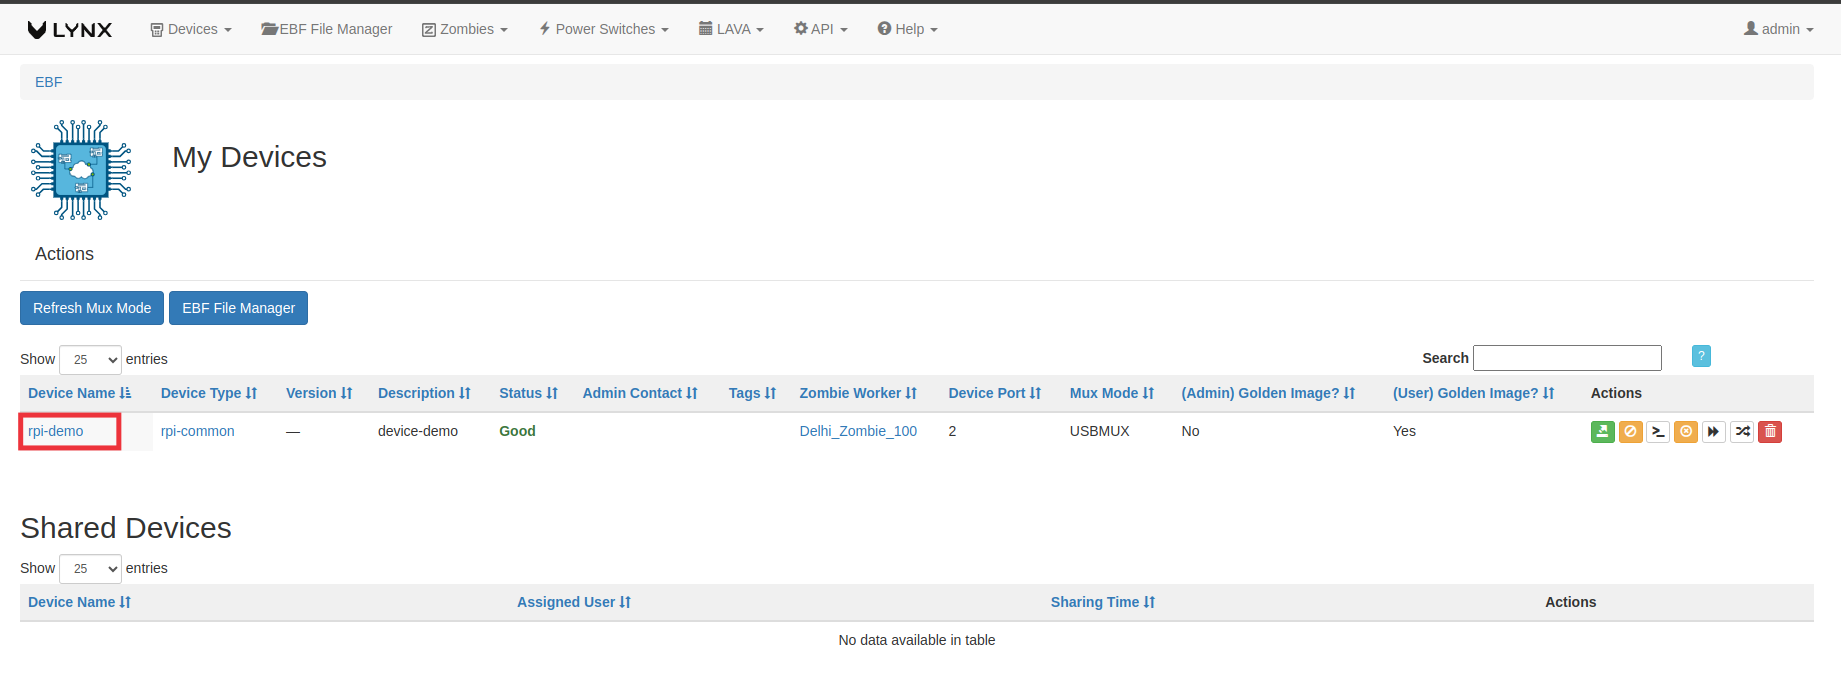
3 All Devices page will appear on the screen. Select the device name(here rpi-demo is taken as reference) to view the device dictionary.
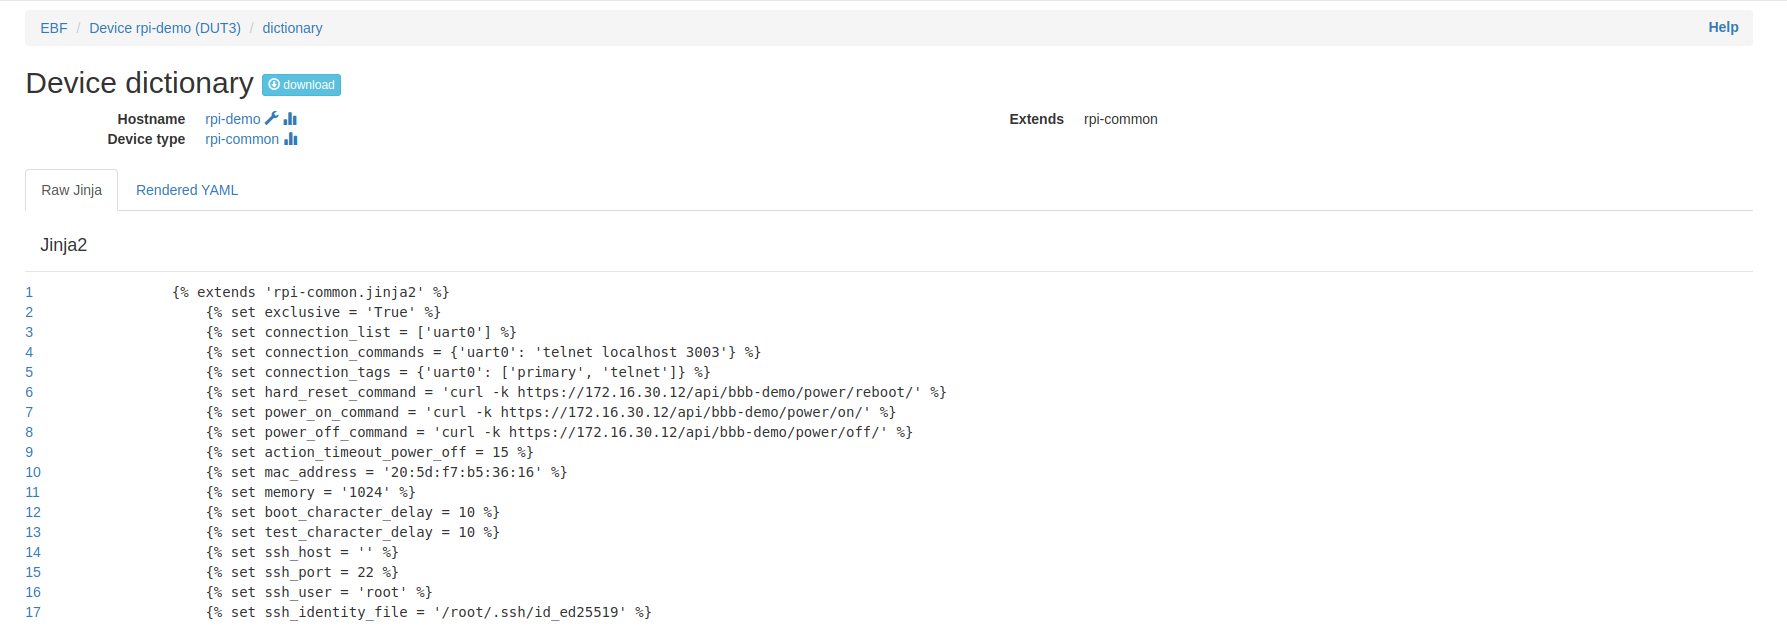
4 On the next page, select the Device Dictionary tag to view the Device dictionary of the selected device.

5 Device Dictionary of the selected device will be displayed on the screen.
How to Enable/Disable Console Sharing
How to Enable Console Sharing
Following are the steps to Enable console Sharing
1 Login to the EBF homepage/Dashboard through a web browser with credentials.
Username: <Username>
Password: <Password>
2 Select the ‘Edit Device’ option from the ‘Devices’ drop-down list on the EBF dashboard to edit Device details.
3 Select Device from the drop-down list on the ‘Select Device’ page to edit Device details.
4 ‘Manage Device ’ page will appear on the screen. Edit device details.
5 Click on the ‘Show Advanced Options’
6 Now select Enabled from console sharing drop-down menu to enable the console sharing for the device and save the setting.
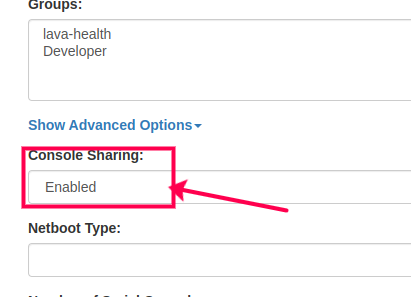
OR
7 Or you can also enable console sharing by clicking on console sharing action button present next to the launch console button

8 On All devices page console sharing button is visible.

OR
On the device console page console-sharing option is visible

How to Disable Console Sharing
Following are the steps to Enable console Sharing
1 Login to the EBF homepage/Dashboard through a web browser with credentials.
Username: <Username>
Password: <Password>
2 Select the ‘Edit Device’ option from the ‘Devices’ drop-down list on the EBF dashboard to edit Device details.
3 Select Device from the drop-down list on the ‘Select Device’ page to edit Device details.
4 ‘Manage Device ’ page will appear on the screen. Edit device details.
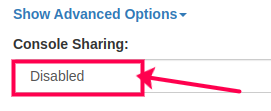
5 Click on the ‘Show Advanced Options’
6 Now select Disabled from console sharing drop-down menu to disable the console sharing for the device and save the setting.
7 Or you can also disable console sharing by clicking on console sharing action button present next to the console sharing button

8 On All devices page console sharing button is not visible.

OR
On the device console page console-sharing option is not visible
How to Setup x86 Netboot Support
Following are the steps to setup x86 Netboot support
1 Login to the EBF homepage/Dashboard through a web browser with credentials.
Username: <Username>
Password: <Password>
2 Select the ‘Edit Device’ option from the ‘Devices’ drop-down list on the EBF dashboard to edit Device details.
3 Select Device from the drop-down list on the ‘Select Device’ page to edit Device details.
4 ‘Manage Device ’ page will appear on the screen. Edit device details.
5 Click on the ‘Show Advanced Options’
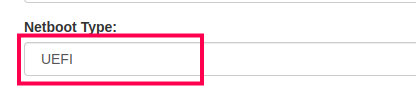
6 Select the type of netboot PXEUEFI from the option Netboot Type
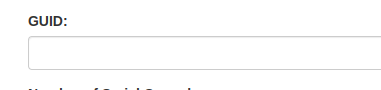
7 After selecting Netboot Type, Give GUID of the device (GUID Visible only If Netboot Type is Selected).
8 After filling in all the details click on submit button to save the configuration
How to Edit Netboot Type and GUID
Following are the steps to setup x86 Netboot support
1 Login to the EBF homepage/Dashboard through a web browser with credentials.
Username: <Username>
Password: <Password>
2 Select the ‘Edit Device’ option from the ‘Devices’ drop-down list on the EBF dashboard to edit Device details.
3 Select Device from the drop-down list on the ‘Select Device’ page to edit Device details.
4 ‘Manage Device ’ page will appear on the screen. Edit device details.
5 Click on the ‘Show Advanced Options’
6 Edit the type of netboot PXEUEFI from the option Netboot Type
7 After editing Netboot Type, edit GUID of the device.
8 Click on submit button to save the configuration
Manage Power Switch
Add a New Power Switch
1 Login to the EBF homepage/Dashboard through a web browser with credentials.
Username : <username>
Password : <password>
2 After login, click on ‘New Power Switch’ option under ‘Power Switch’.
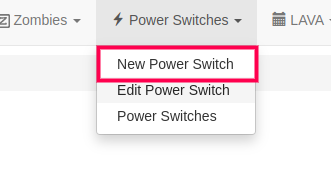
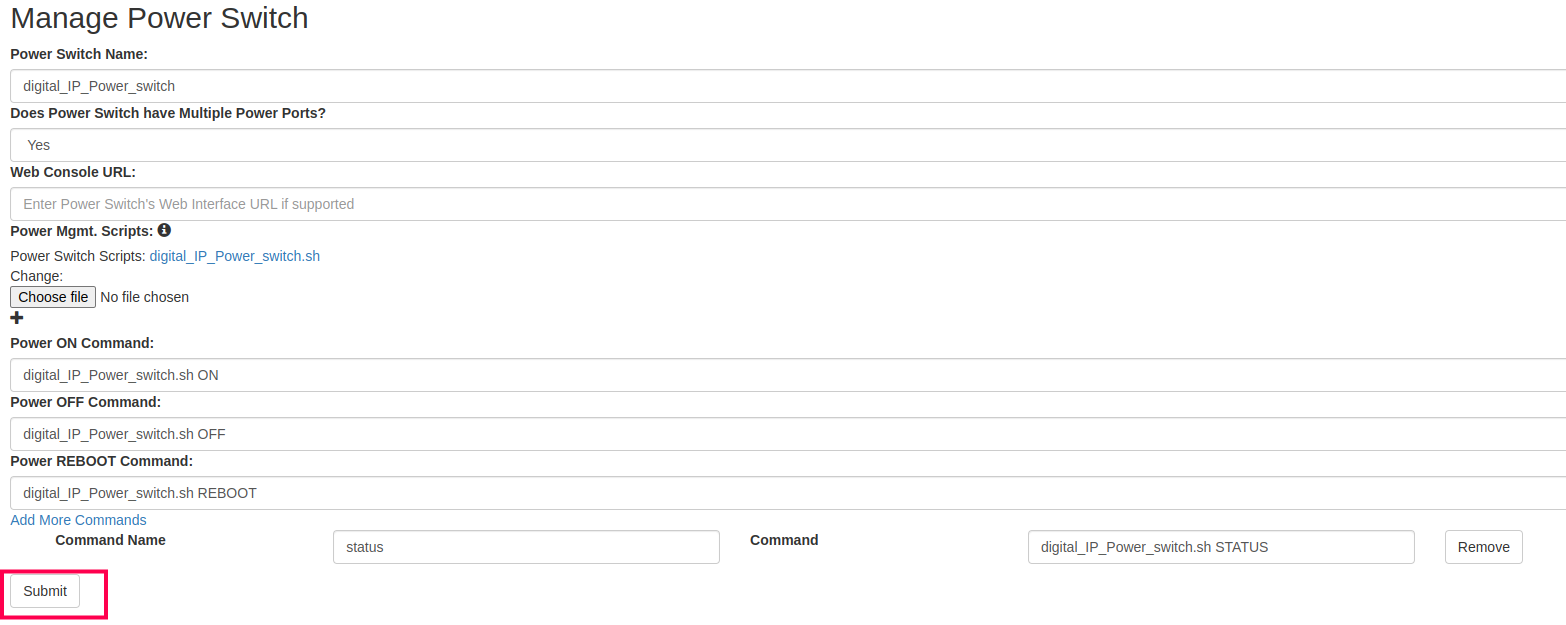
3 ‘Add Power Switch’ screen will open. Input all the required details and click on the ‘Submit button. Users may also add some custom commands by clicking on ‘Add More Commands’ link present at the bottom.

Edit Power Switch
1 Login to the EBF homepage/Dashboard through a web browser with credentials.
Username : <username>
Password : <password>
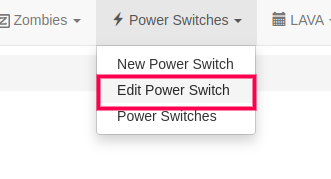
2 After login, click on ‘Edit Power Switch’ option under ‘Power Switch’.
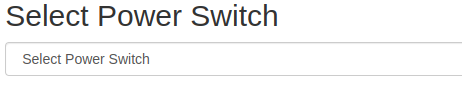
3 Select the Power Switch that you want to edit from the dropdown.
4 Screen to edit Power Switch Details will be shown on the screen. Make the required changes and then click on ‘Submit’ button. A confirmation message will be shown on the screen.
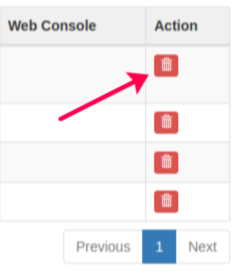
Power Switches List
1 Login to the EBF homepage/Dashboard through a web browser with credentials.
Username : <username>
Password : <password>
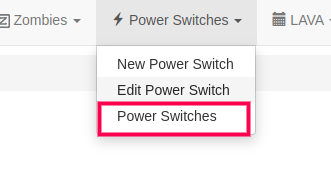
2 After login, click on ‘Power Switches’ option under ‘Power Switch’ dropdown.
3 List of all the entered Power Switches will be shown on the screen.
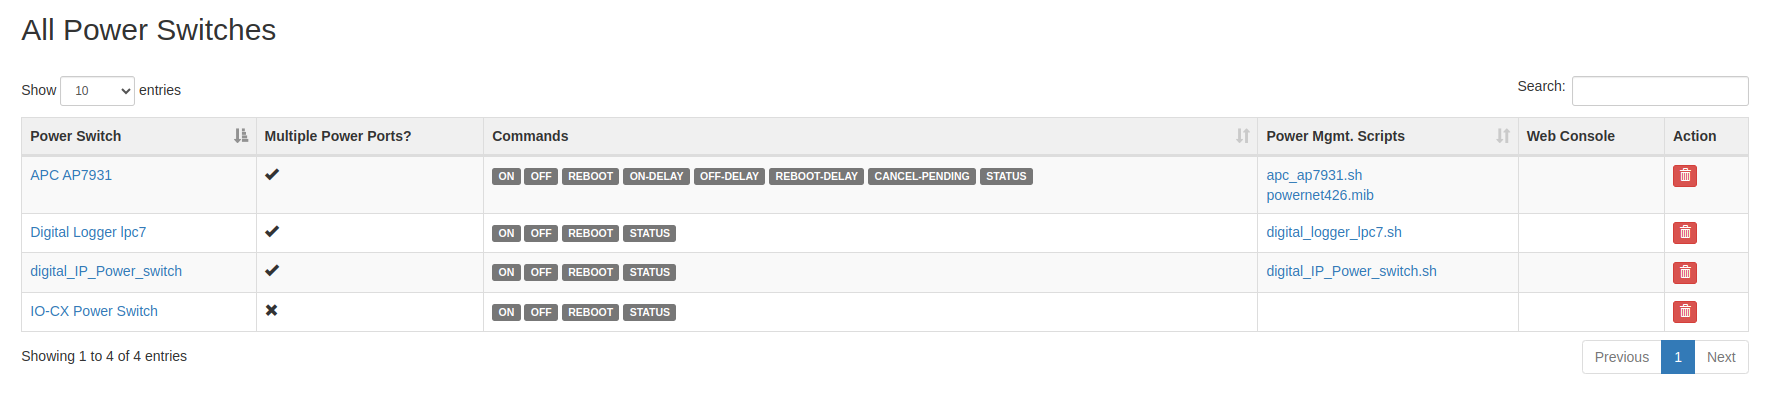
4 User may delete a power switch by clicking on ‘Delete’ action as shown in image below.
How to add a Pseudo(Docker) Device
Follow this to add a Pseudo(Docker) Device using Zombie
Follow this add a Pseudo(Docker) Device using New Device
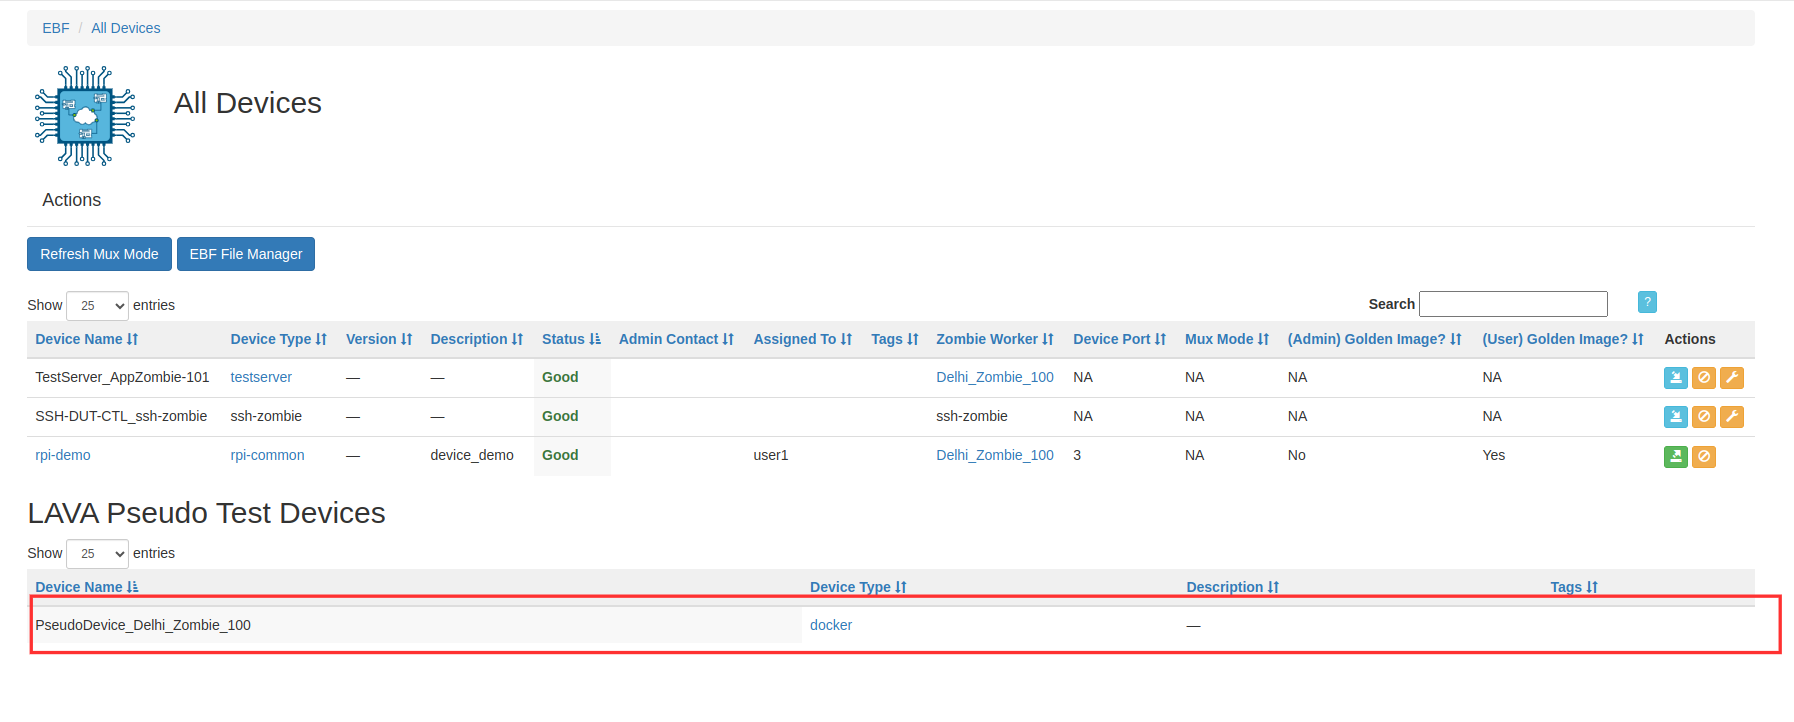
Add a Pseudo(Docker) Device using New Zombie
Whenever you add a new zombie on the EBF server, a pseudo device will automatically be added to the EBF.
1 How to Add a New Zombie on the EBF Server. Follow this section
2 Select the ‘All Device’ option from the ‘Devices’ drop-down list to view the automatically added Pseudo Device on the EBF server.
Add a Pseudo(Docker) Device using New Device
Following are the steps to add more pseudo-device to the EBF:
1 Login to the EBF homepage/Dashboard through a web browser with credentials.
Username : <username>
Password : <password>
2 This would open up EBF Dashboard.
3 Select the ‘New Device’ option from the ‘Devices’ drop-down list.
4 ‘Add New Device’ page will appear on the screen.
5 Fill in the necessary fields available on the screen.
Device Name: <Device name> .Choose a meaningful unique name
Device Type: Choose “docker” device type.
Group: Admin can assign a group to a device. So that the device is visible to all users in that group.
Tags: Provide a tag name for this device. This tag helps EBF identify a particular device if there are multiple devices of the same type.
Device Description: Add a Short Description of the device.
Zombie: <Zombie Name:IP Address>
6 A Newly added Pseudo/Docker Device will appear after submitting the data.
How to Configure E-mail for Test Job
1 Login to the EBF homepage/Dashboard through a web browser with credentials.
Username : <username>
Password : <password>
2 This would open up EBF Dashboard.
3 Click on username (“admin”) from the page.
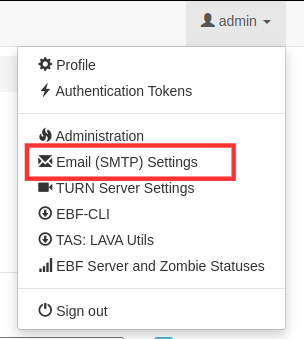
4 A Drop-down menu will be appear on the screen click on “Email (SMTP) Settings”
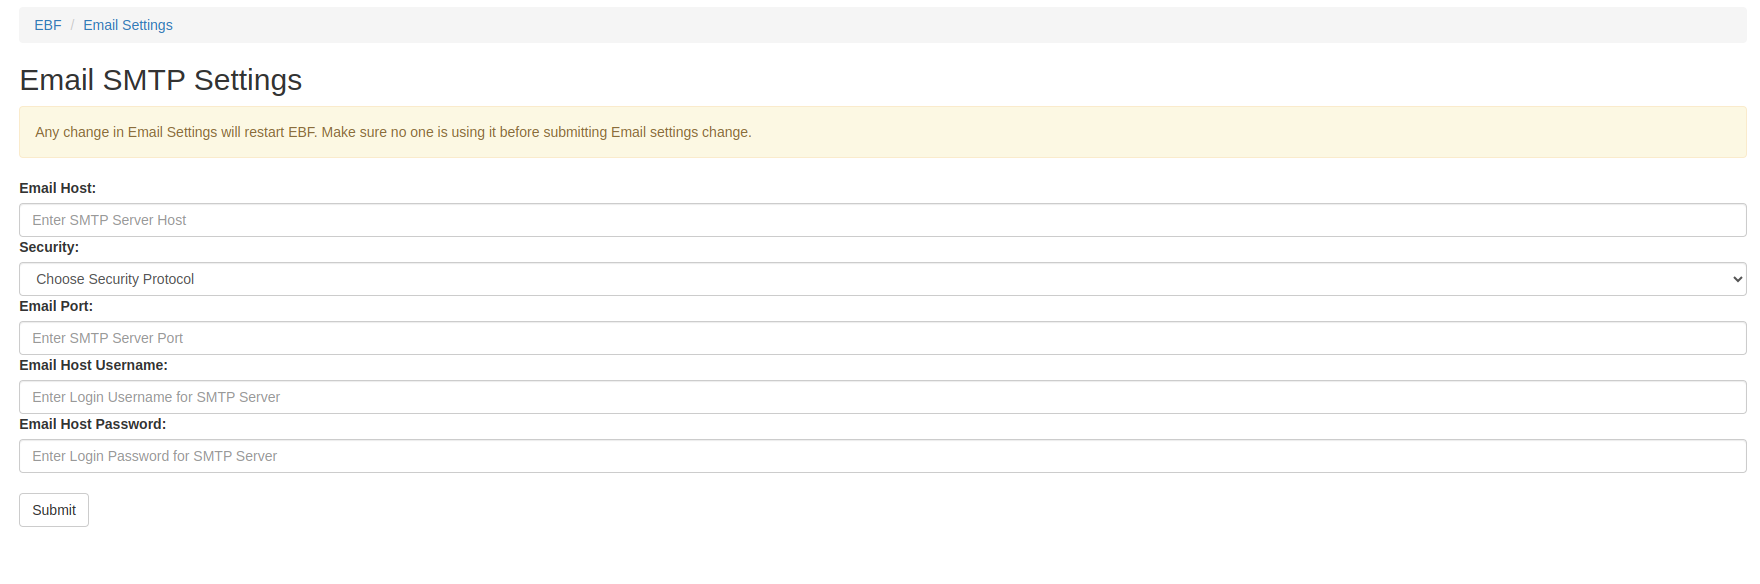
5 Fill the required field to setup email settings and then click on submit button.
6 After providing the above details reboot the machine
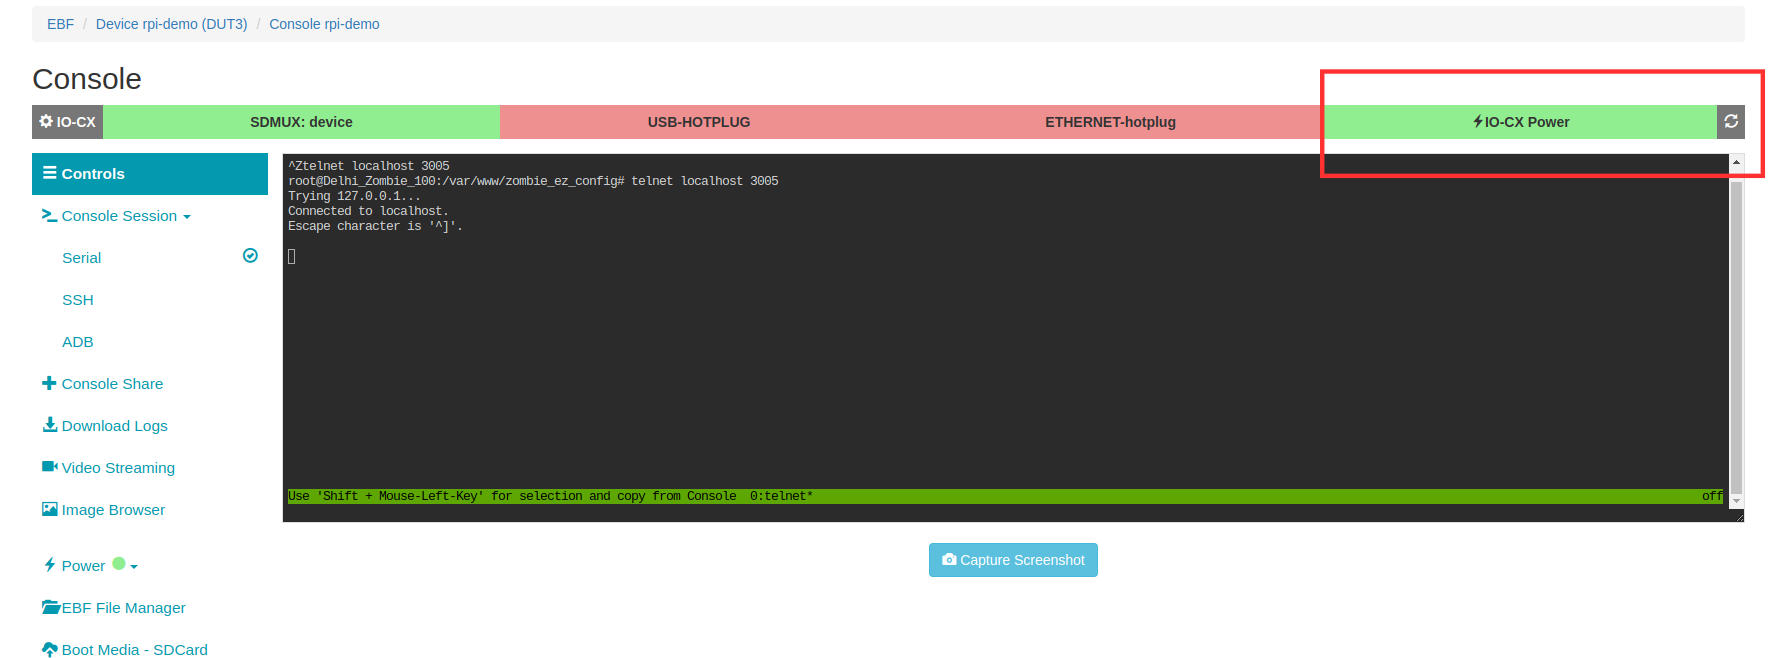
How to Update IOCX Hotplug Names
Following are the steps to update IOCX hotplug names from EBF Dashboard:
1 Login to the EBF homepage/Dashboard through a web browser with credentials.
Username : <username>
Password : <password>
2 This would open up EBF Dashboard.

3 Select ‘Edit Device’ option from the Devices Drop down.
4 Select the device of which you want to update the IOCX hotplug names.

5 Manage Device Dashboard would openup.
6 Under Show Advanced Options: Fill the name of the hotplug you want to give. You can give all the 4 hotplug names or you can left as blank.
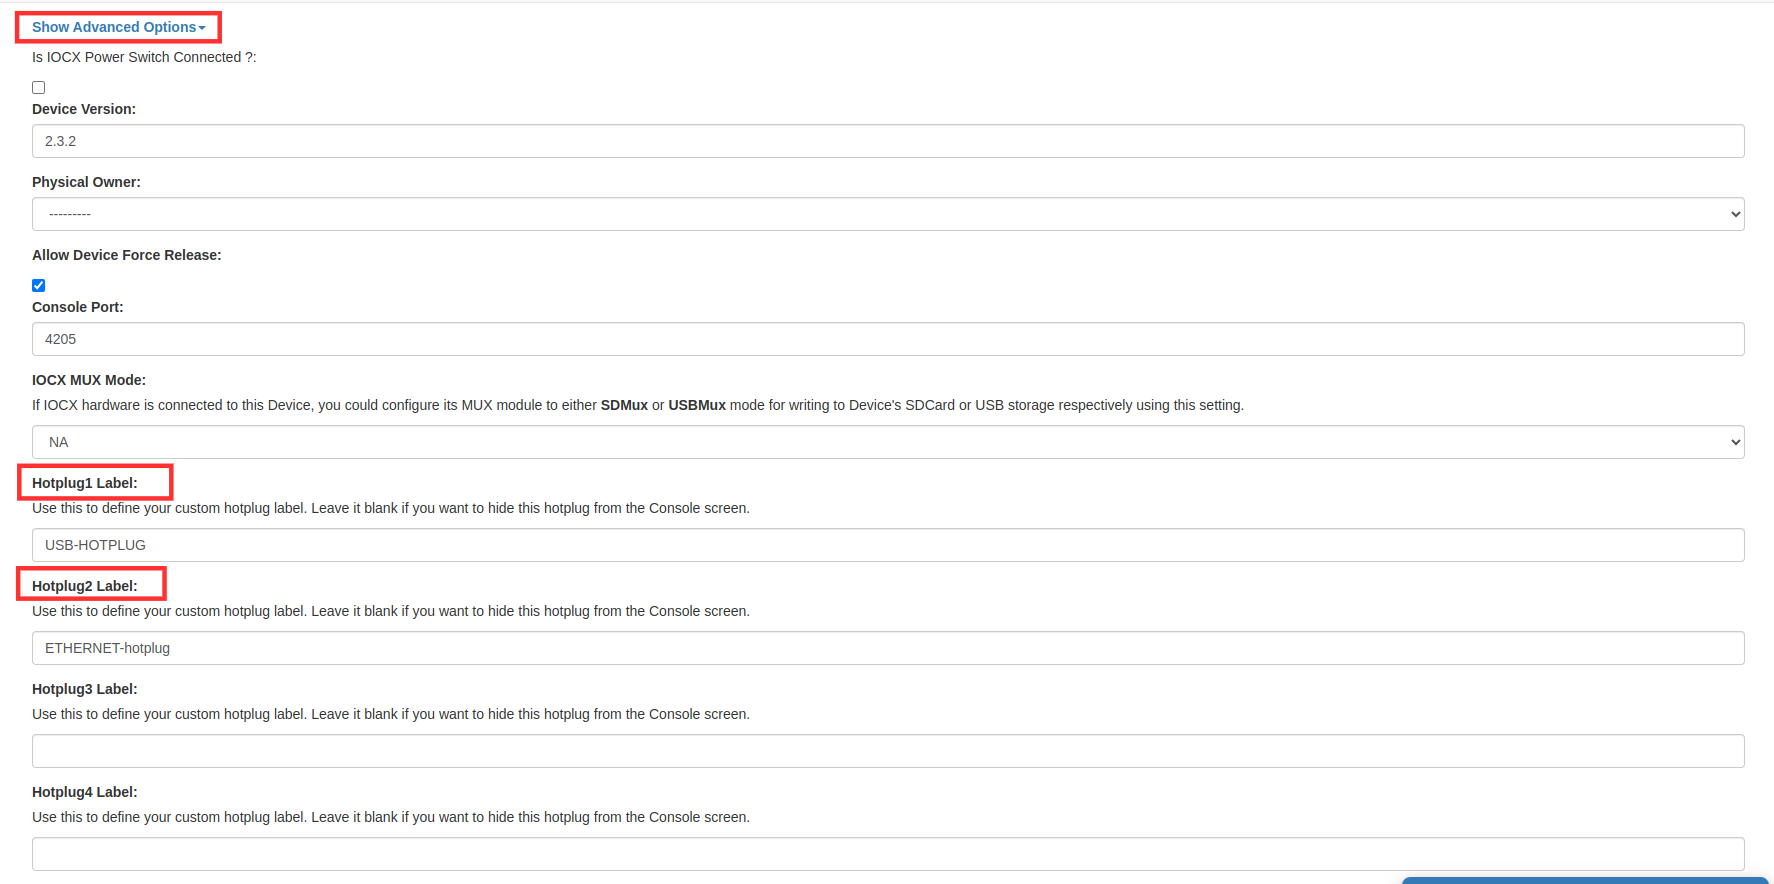
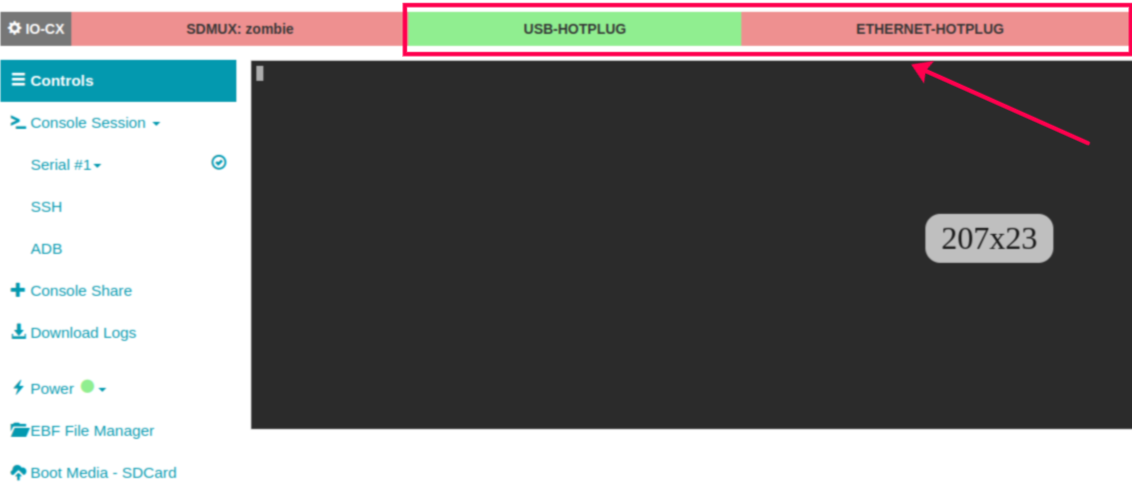
For e.g.In this case I filled only 2 hotplugs Label: Hotplug Label 1(USB-HOTPLUG) and Hotplug Label 2(ETHERNET-hotplug)and keep the other two hotplug(Hotplug Label 3 and Hotplug Label 4)blank.
7 After that, Click on the submit button.
8 Following message will appear on the screen, on successful updation.

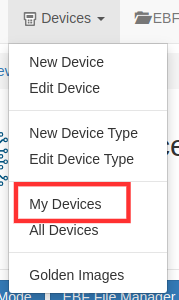
9 You can check on the console screen to see the Updated hotplug names. Click on my devices from the Devices drop down option.
10 Click on the device console option to launch the console.

11 Hotplug names are visible on the console screen.
OR
12 Click on the device name on My Devices page.
13 Click on the Launch Console button to launch the console.
14 Hotplug names are visible on the console screen.
How to ADD a IOCX Power switch
Following are the steps to ADD IOCX Power Switch on EBF.
First, Add the Power Switch on the EBF Server.
To see, How to Add Power Switch, Please Refer Link Link
1 After adding the power switch on the EBF-Server, Connect the IOCX main power to the Power switch configured.
2 Go to ->Devices->Edit Devices
3 Select Device

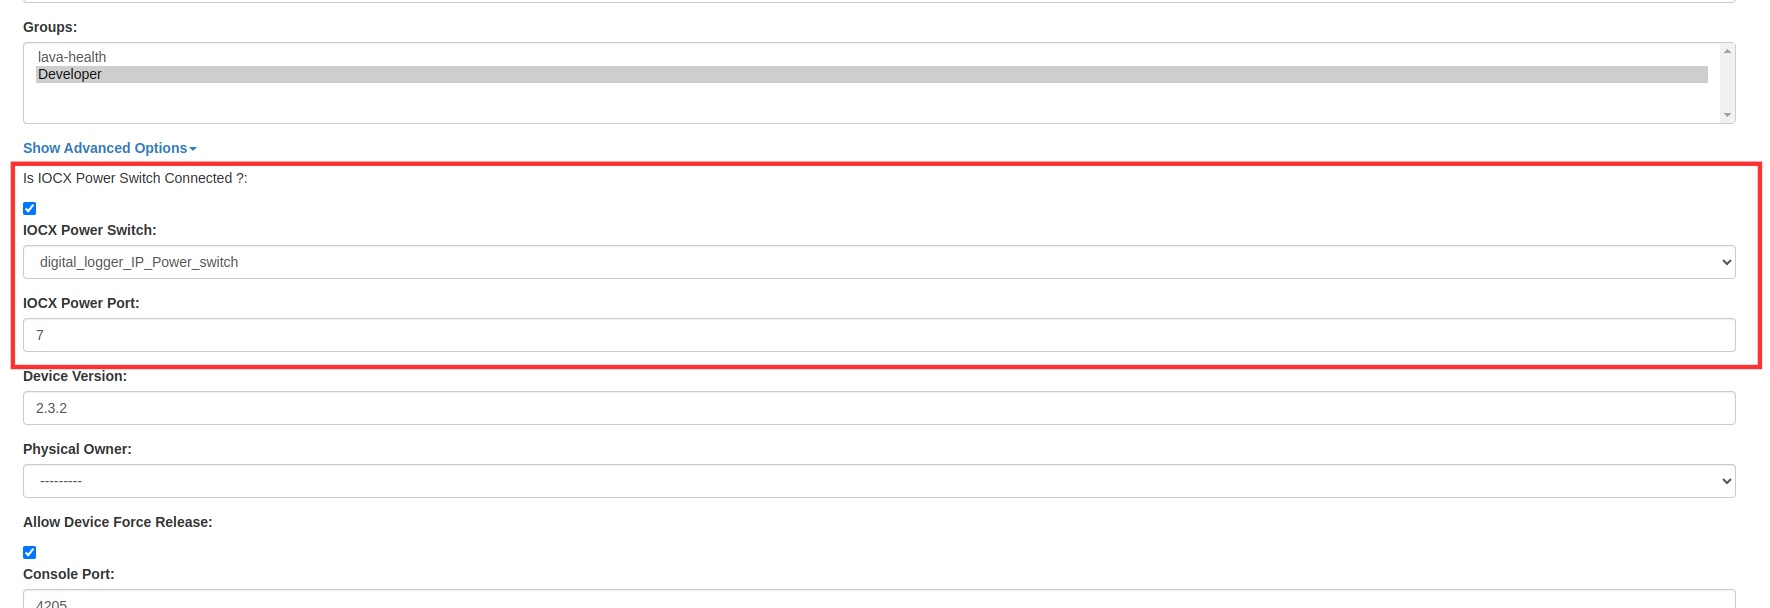
4 On Manage Device Page->Show Advanced Options
5 Check the checkbox, IOCX Power Switch Connected
6 Select the IOCX Power Switch
7 Enter the IOCX power port no
8 After that, Click on the Submit button.
9 A confirmation message will appear on the screen, indicating that the device has been edited successfully.
10 Go to ->Devices->My Devices
11 Click on the Launch Console from My Devices page.
12 IOCX Power Switch is visible on the console page.
How to Add Users
Following are the steps to add users:
1 Login to the EBF homepage/Dashboard through a web browser with credentials.

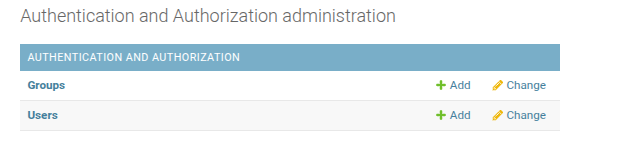
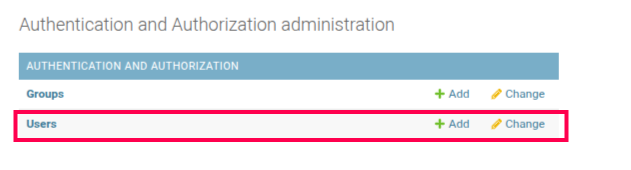
2 Select the Administration option from the admin drop-down list.

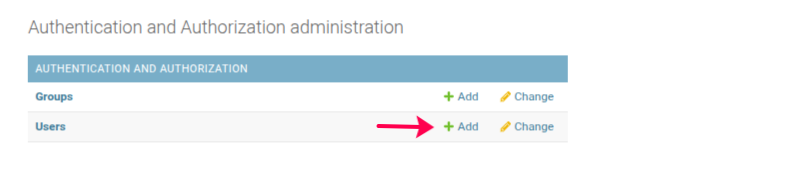
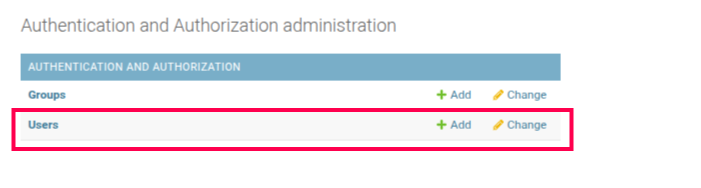
3 Users option is available under the Authentication and Authorization section on the Administration page.
4 Select the +Add option for adding a new user.
5 Add user page will appear on the screen.
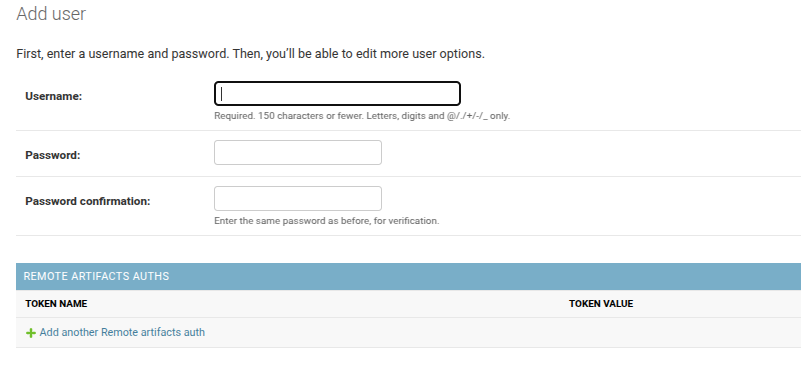
6 Enter the username and password details of a new user.
Username:<Username Required>
Password:<password for new user>
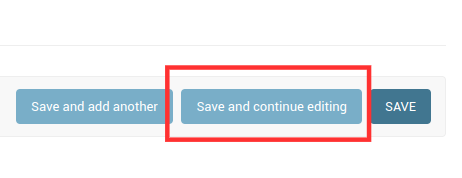
7 After filling in all the details, click on the Save and continue editing button.
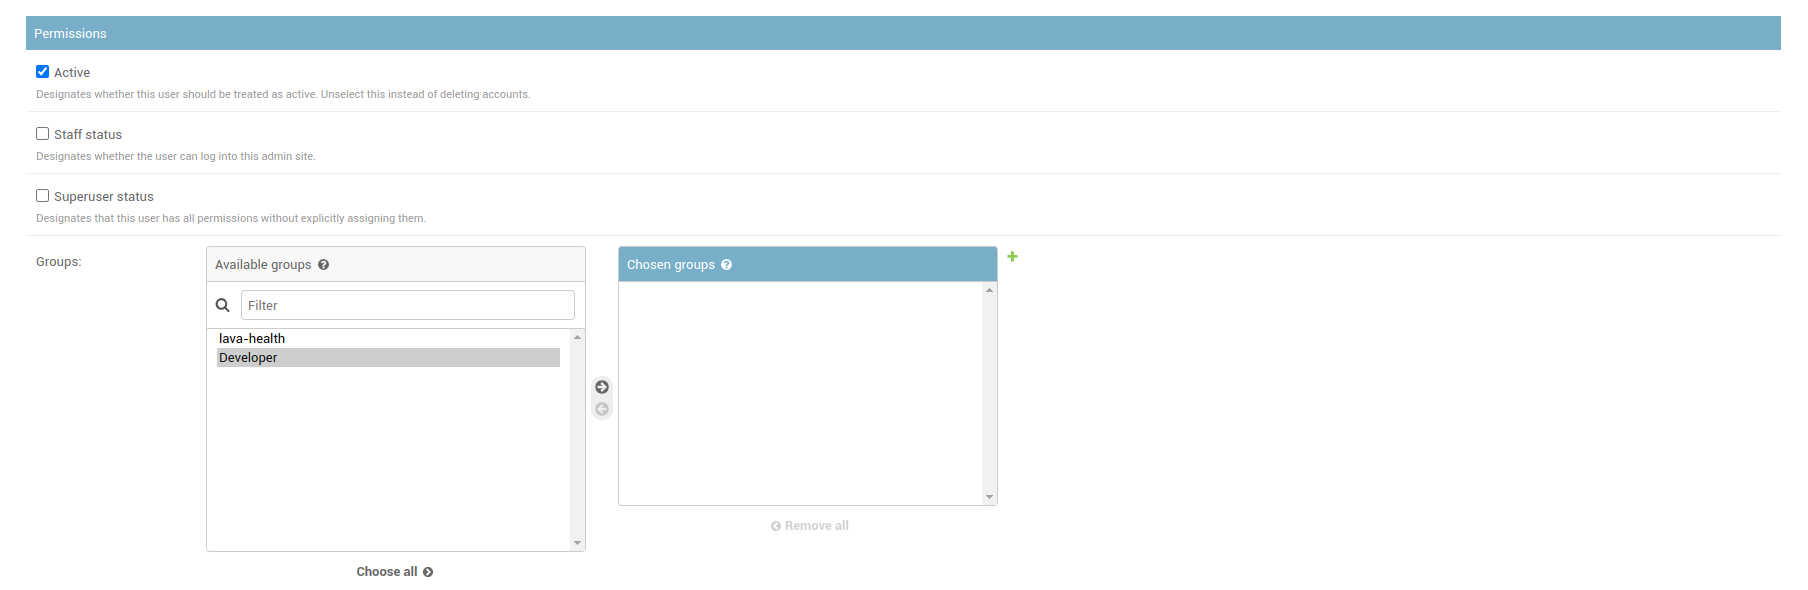
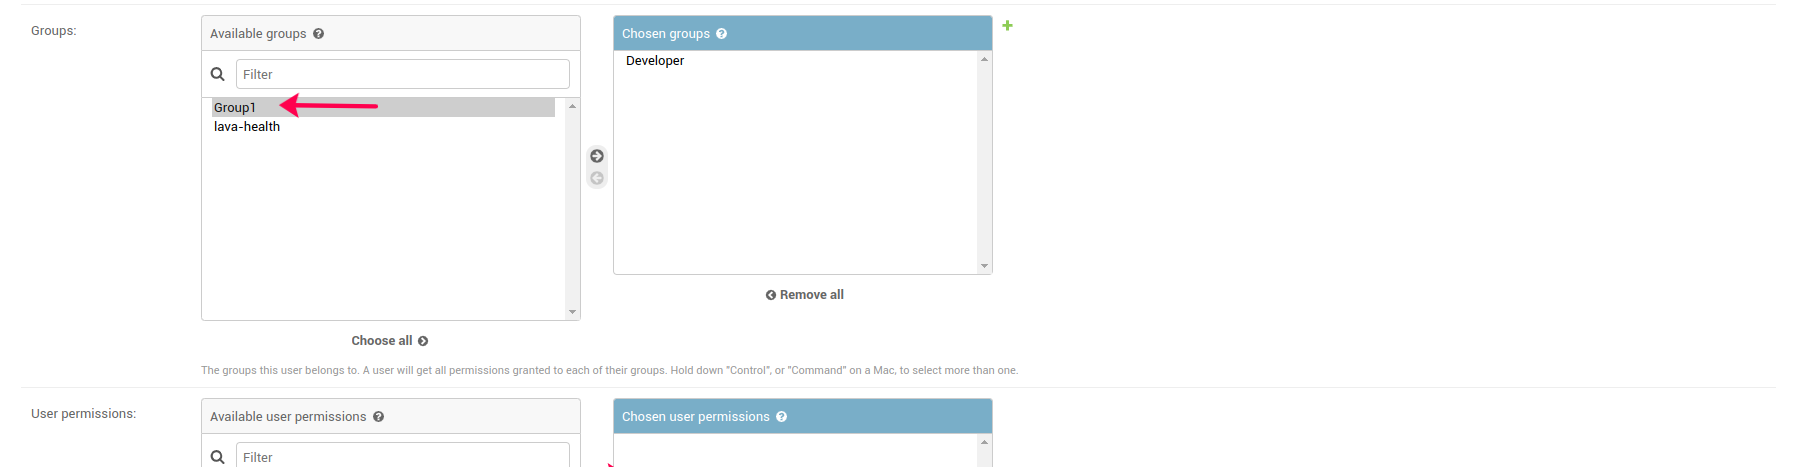
8 Assign a group to the user from the list of the groups
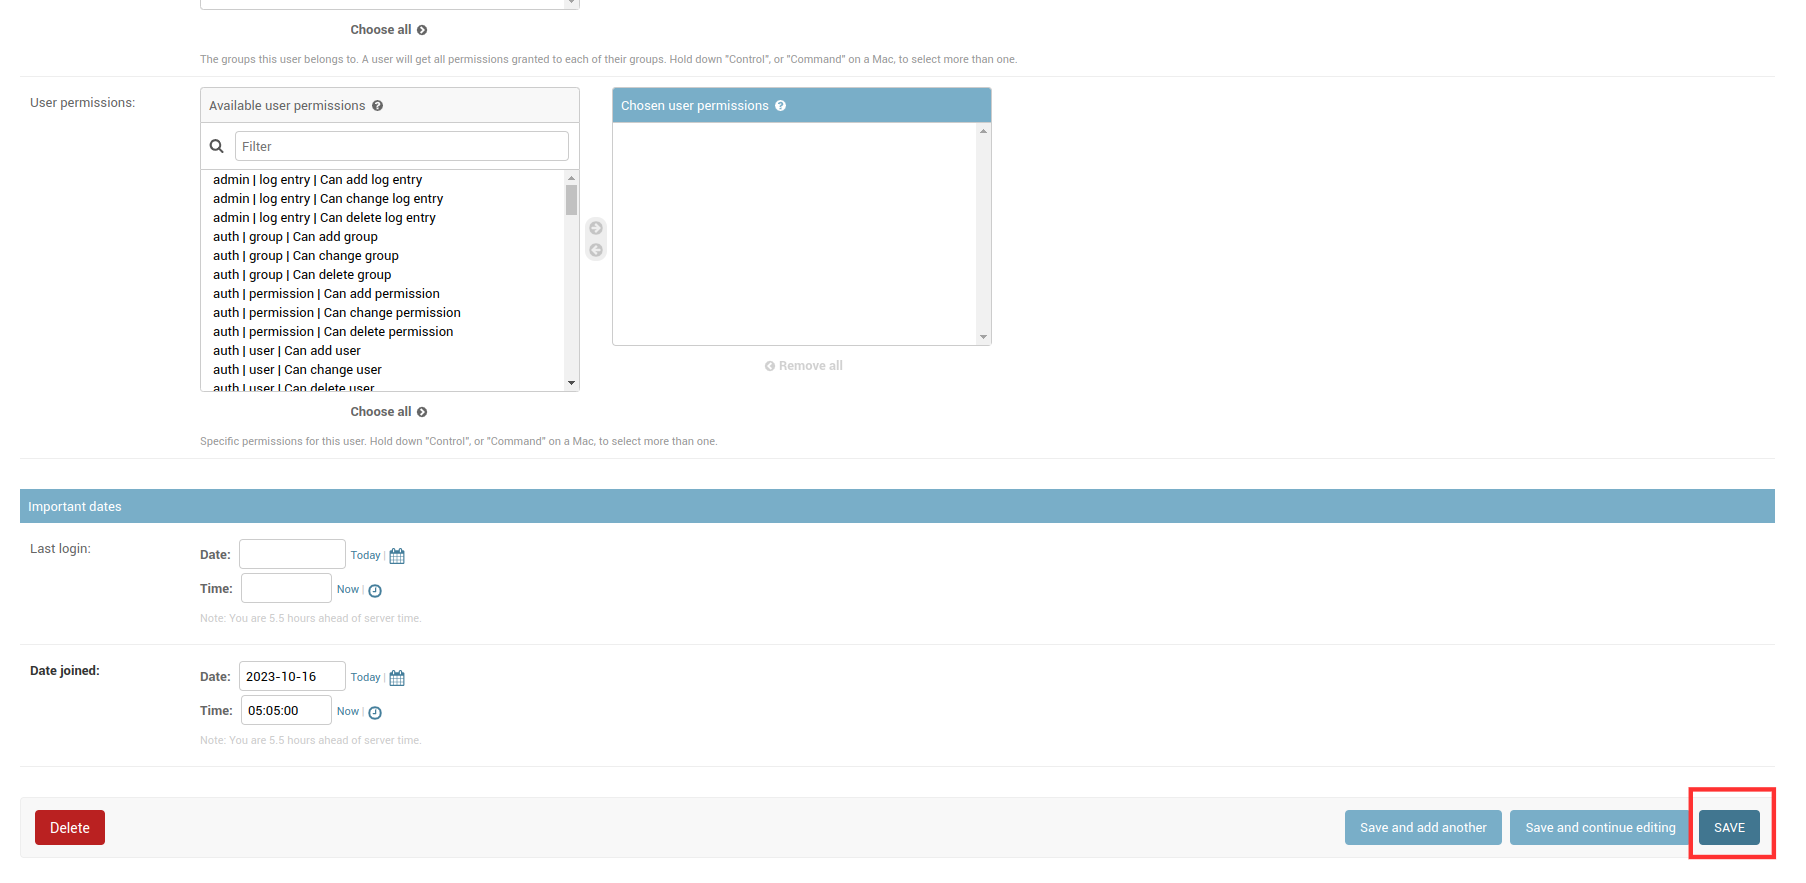
9 After entering all the details, click on the Save button.
10 The newly added user will be shown on the screen.

User Permissions
The following are the permissions w.r.t different user types:
Permissions |
Anonymous(Non-logged users) |
Developer |
Admin |
|---|---|---|---|
View Home screen |
✓ |
✓ |
✓ |
View Zombies |
✓ |
✓ |
|
View DUTs |
✓ |
✓ |
|
View Test Jobs (TAS only) |
✓ |
✓ |
|
View Test Job Results & Job definition YAML (TAS only) |
✓ |
✓ |
|
View Test Job execution Logs (TAS only) |
✓ |
✓ |
|
View Charts & Graphical Reports (TAS only) |
✓ |
✓ |
|
Launch DUT Console of allocated DUT |
✓ |
✓ |
|
Power control (On/Off/Reboot) of allocated DUT |
✓ |
✓ |
|
Upload SD card image on allocated DUT |
✓ |
✓ |
|
Allocate free DUT |
✓ |
✓ |
|
Release allocated DUT |
✓ |
✓ |
|
View all own allocated DUTs |
✓ |
✓ |
|
View all DUTs and current allocations |
✓ |
✓ |
|
Submit & Re-submit Test Job (TAS only) |
✓ |
✓ |
|
Download Test Results (TAS only) |
✓ |
✓ |
|
Add/Edit/Delete Charts (TAS only) |
✓ |
✓ |
|
Forced Release of allocated DUTs |
✓ |
✓ |
|
Add DUT |
✓ |
✓ |
|
View/Add/Edit/Delete Authorization tokens |
✓ |
✓ |
|
Add Zombie |
✓ |
||
Add Users |
✓ |
||
Access to Admin interface |
✓ |
||
Edit Zombie Description on Home screen |
✓ |
||
Edit/Delete chart(s) created by any user |
✓ |
||
There are three types of users concerning their roles and permission. The admin has the access to add all types of users according to their respective permissions.

1 Anonymous user is a non-logged user.
2 Admin User
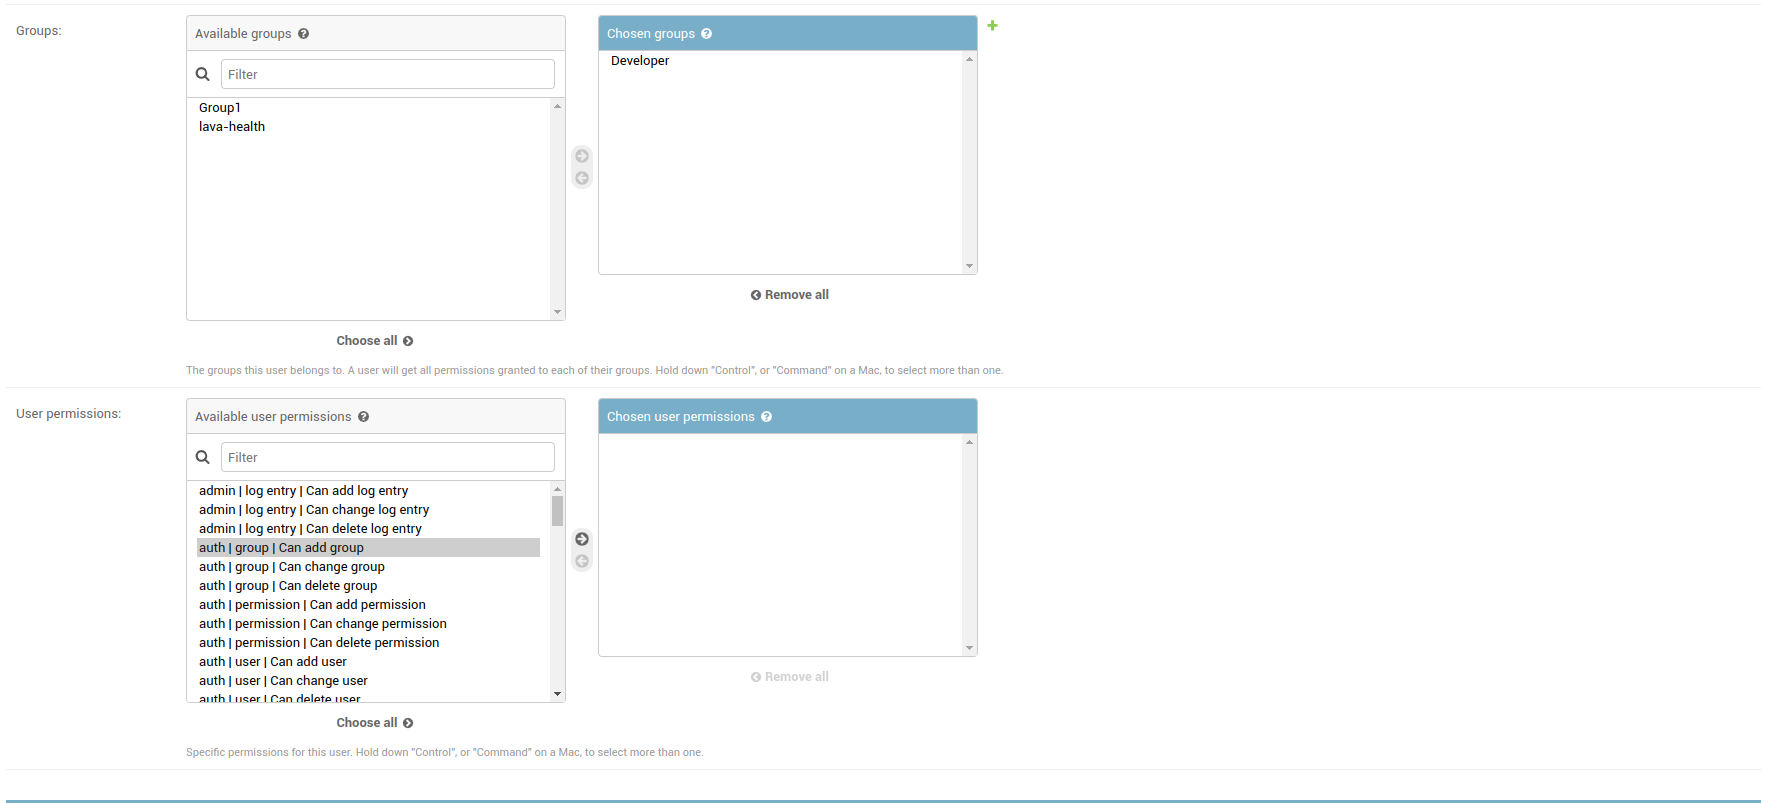
For admin user, select the following options:
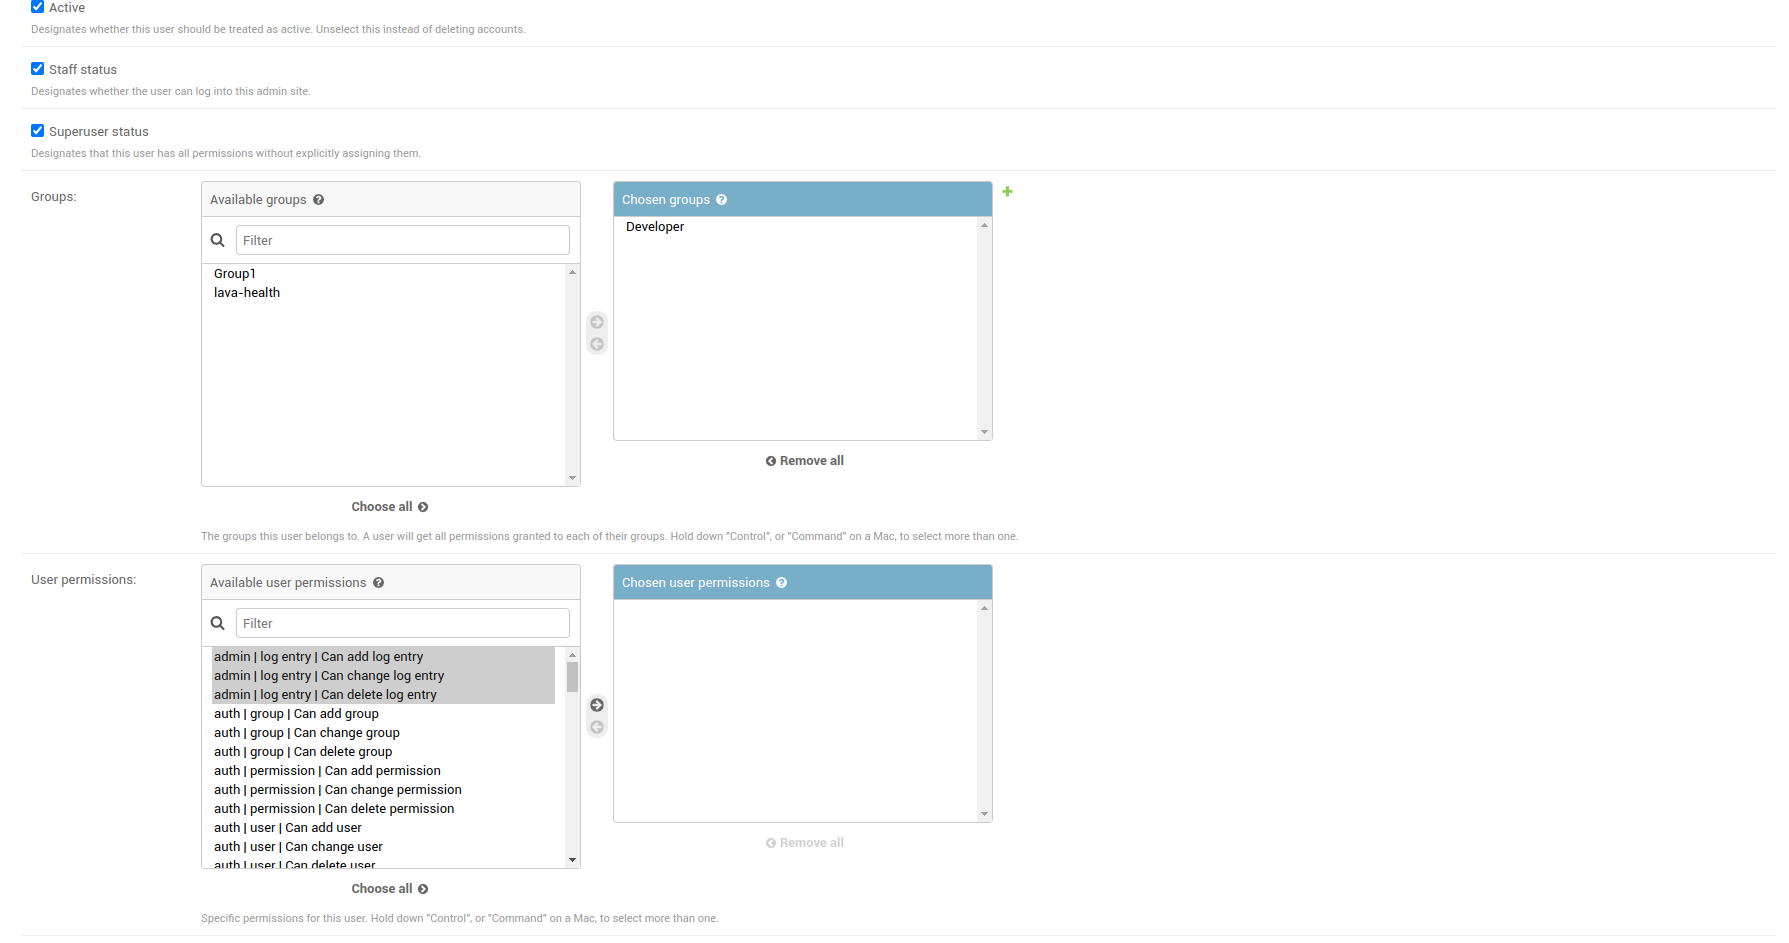
3 Developer
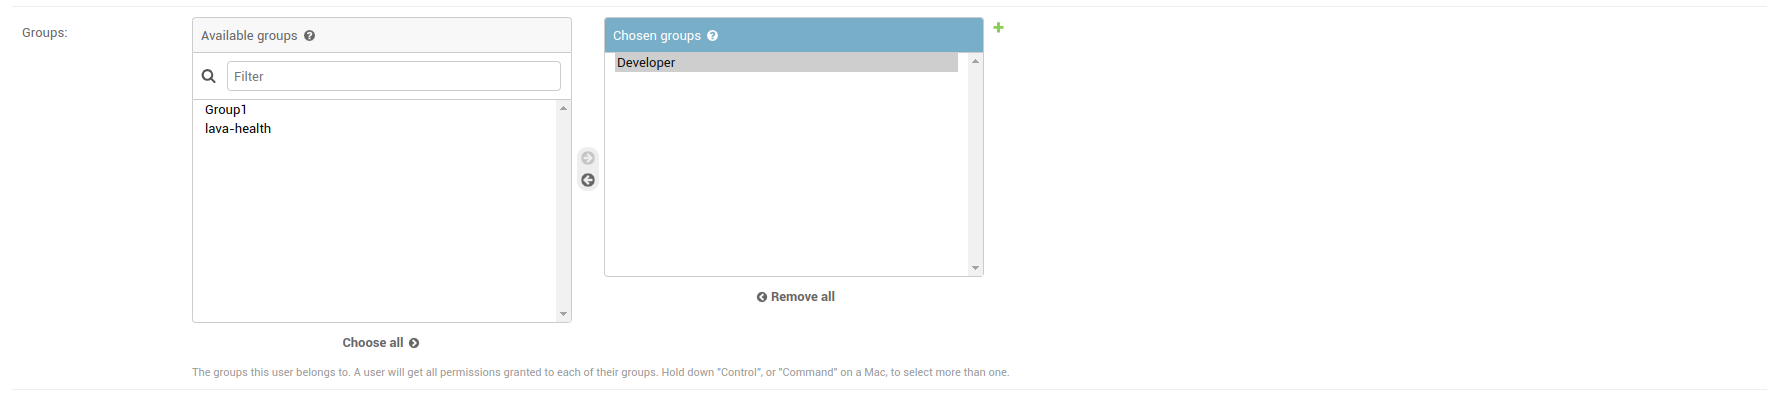
To selecting a user as a Developer, go to the Group section select the ‘Developer’ option from the available users and move to chosen groups.
After selecting the user as per the permission, select the Save button available at the bottom of the page.

The new user is added and the new user can sign in to the EBF server with their respective credentials.
Change user’s permissions
Following are the steps to change user privileges assigned to any user:
1 Login to the EBF homepage/Dashboard through a web browser with credentials.
2 Select the Administration option from the admin drop-down list.
3 Users option is available under the Authentication and Authorization section on the Administration page.
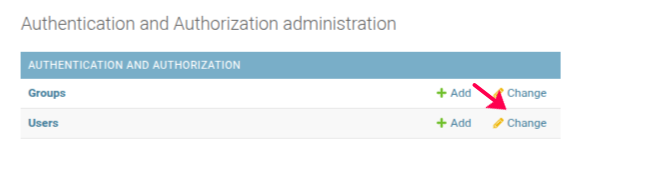
4 Select the Change option for editing details of an available user.
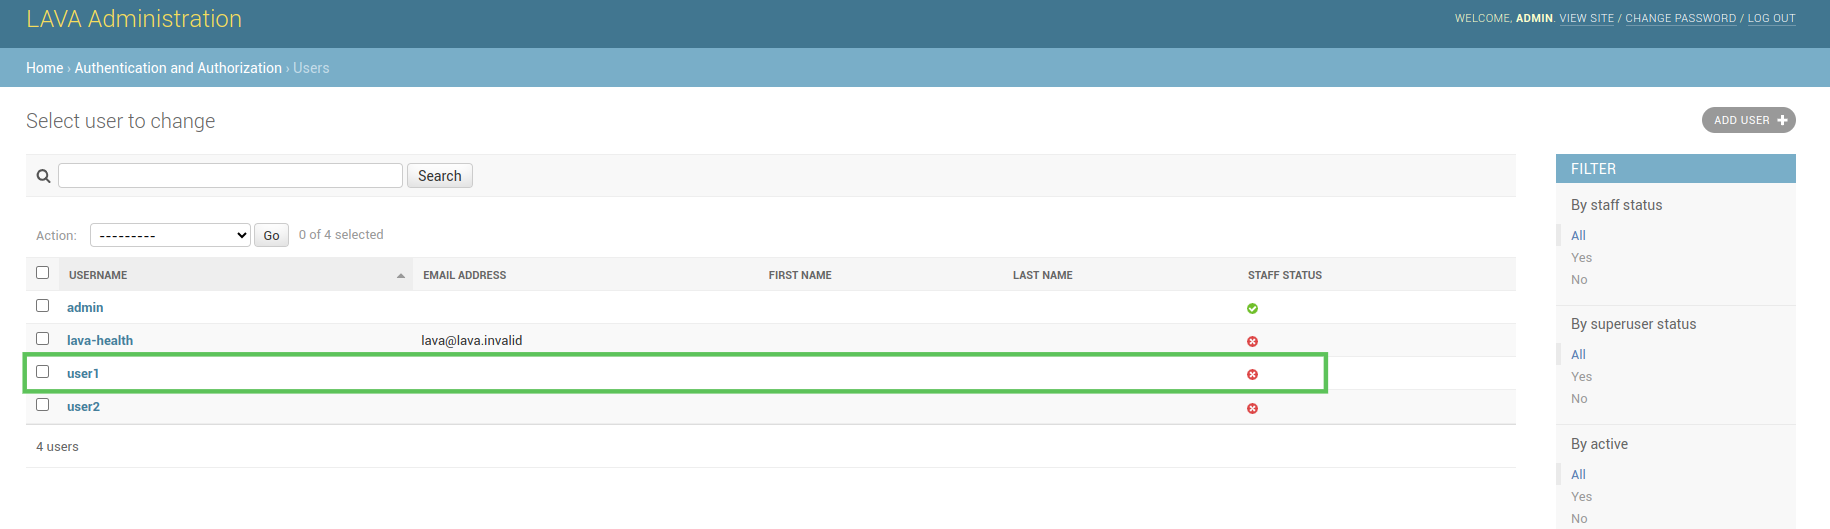
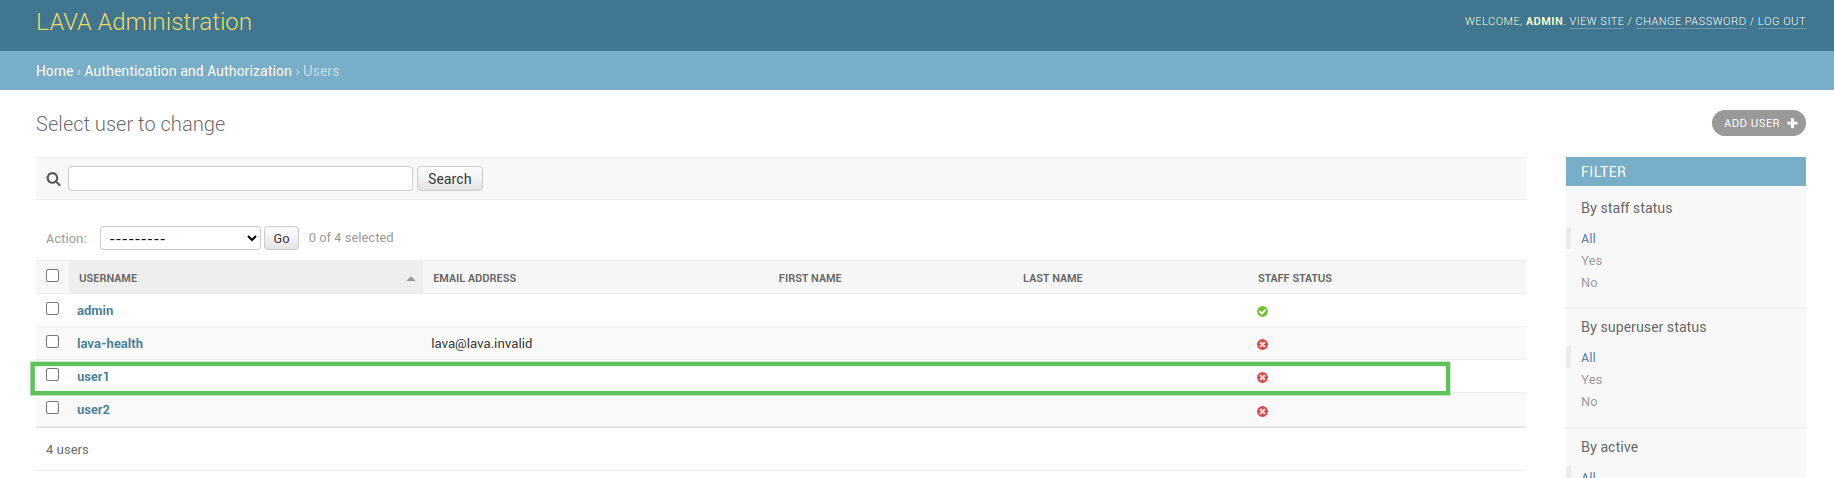
5 List of available users will be shown on the screen. Click on the name of the user whose details are to be edited.
6 Change privileges of the user from the given Permissions section.
7 Then click on the Save button to save the changes.
How to Delete a user
Following are the steps to delete an available user:
1 Login to the EBF homepage/Dashboard through a web browser with credentials.
2 Select the Administration option from the admin drop-down list.
3 Users option is available under the Authentication and Authorization section on the Administration page.
4 Select the Change option for editing details of an available user.
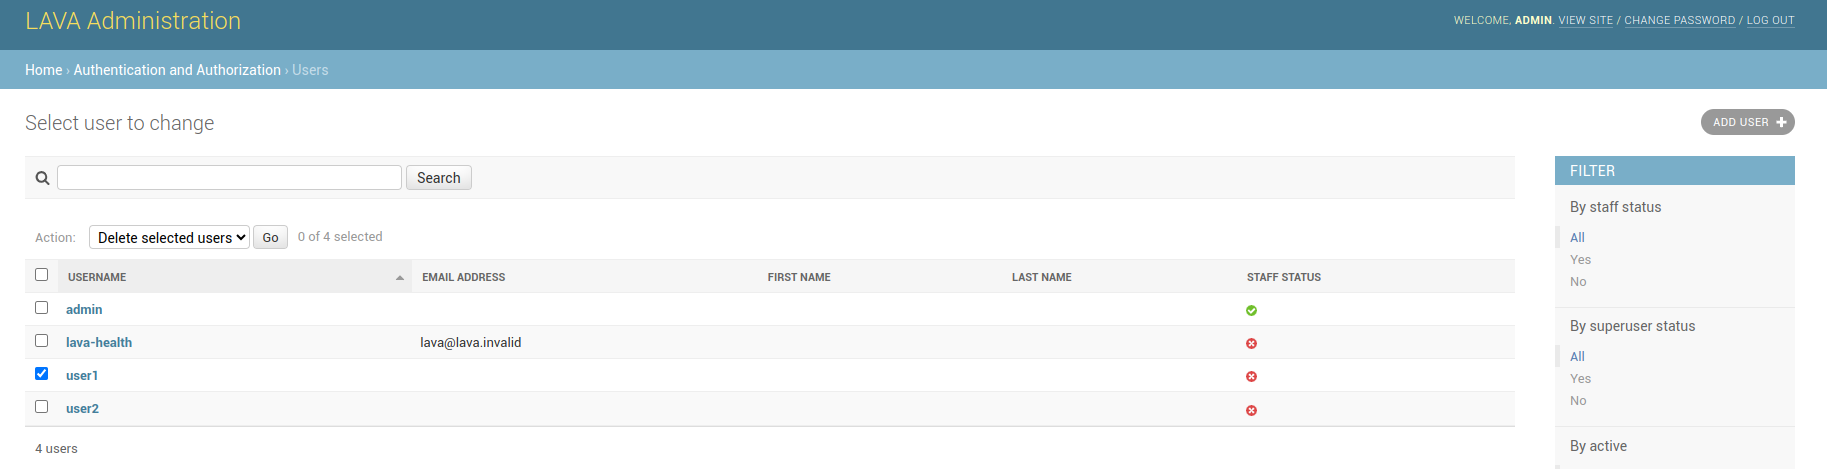
5 List of available users will be shown on the screen. Select the user whom you want to delete.
6 Select Delete selected Users option from the Actions options.
7 Confirm the delete.
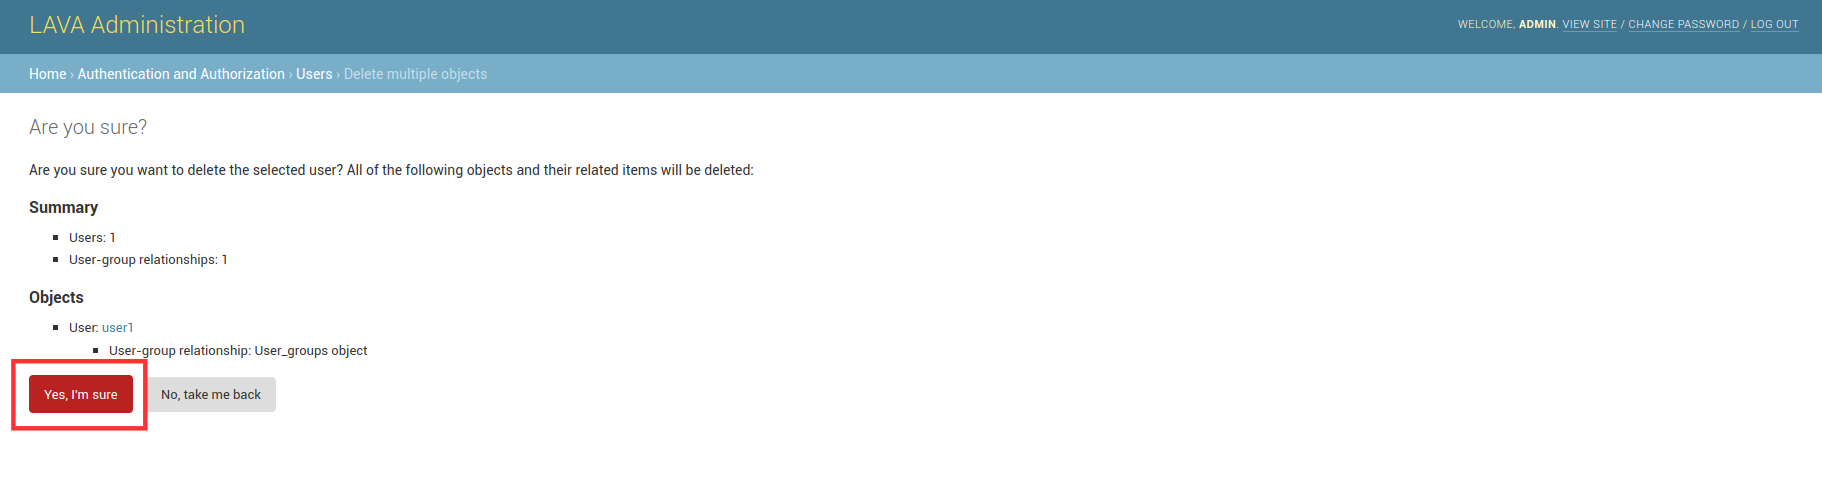
8 Selected users will be deleted.
How to Add Groups
Following are the steps to add groups:
1 Login to the EBF homepage/Dashboard through a web browser with credentials.
2 Select the Administration option from the admin drop-down list.
3 Groups option is available under the Authentication and Authorization section on the Administration page.
4 Select the +Add option for adding a new group.

5 Add group page will appear on the screen.
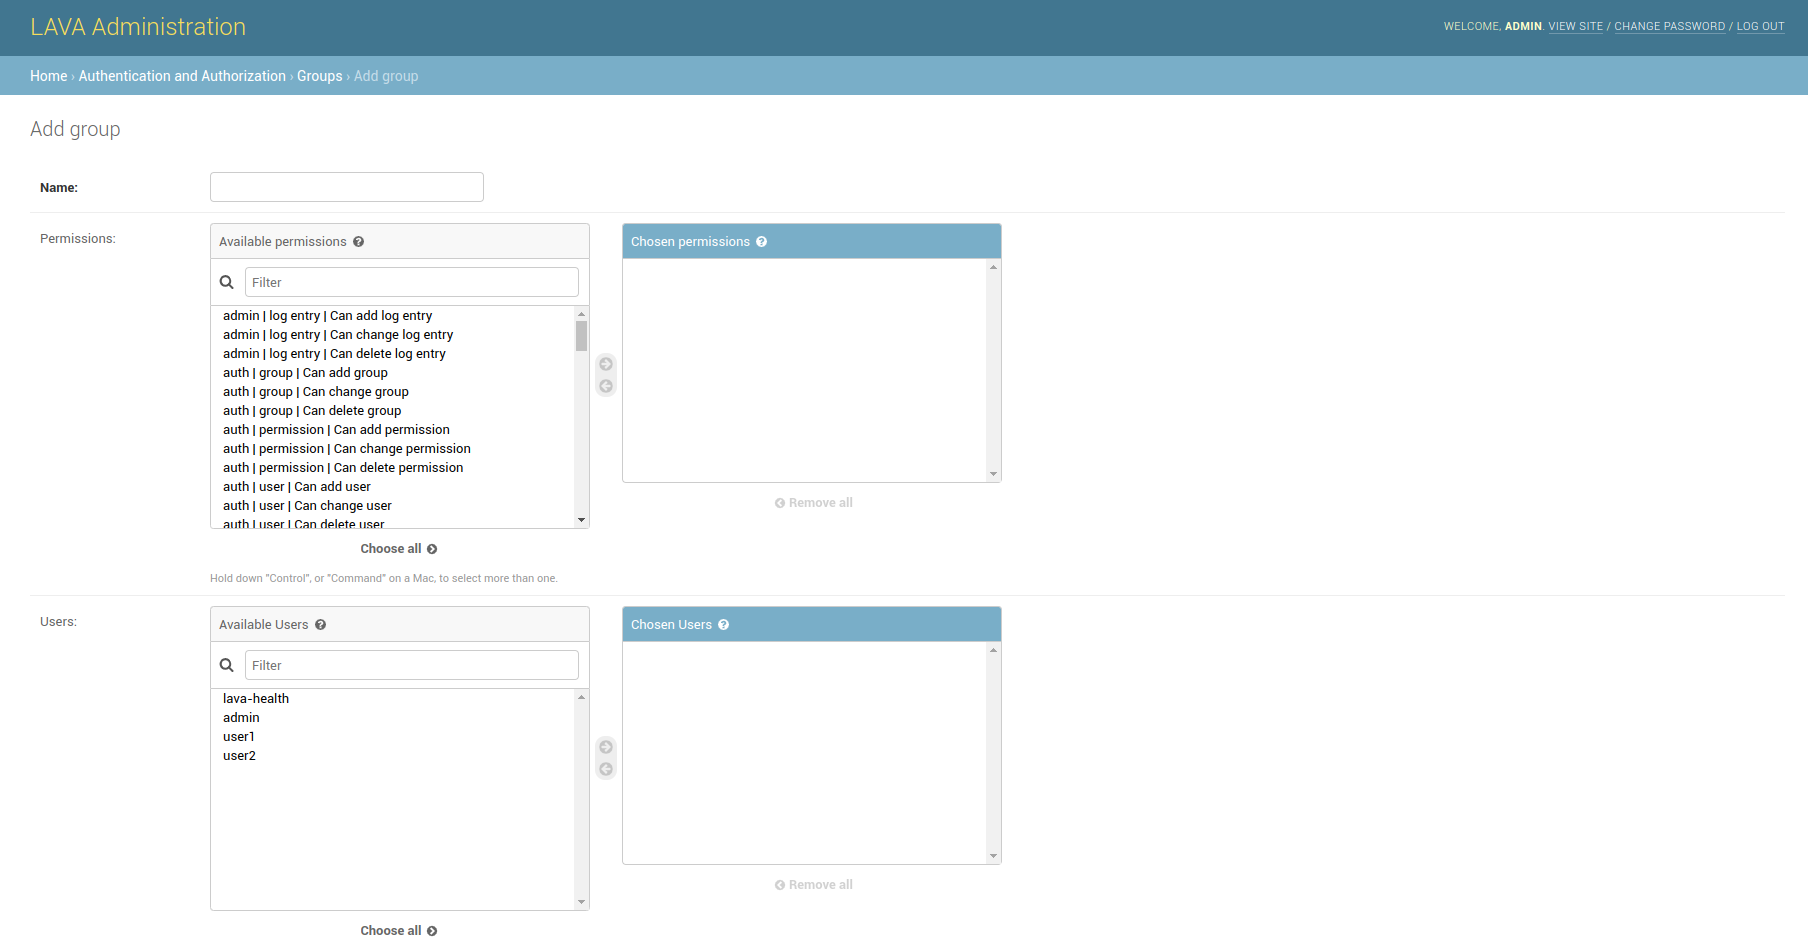
6 Provide the name of the group in the name field.

7 Select a user from the list and assign him/her to the group.
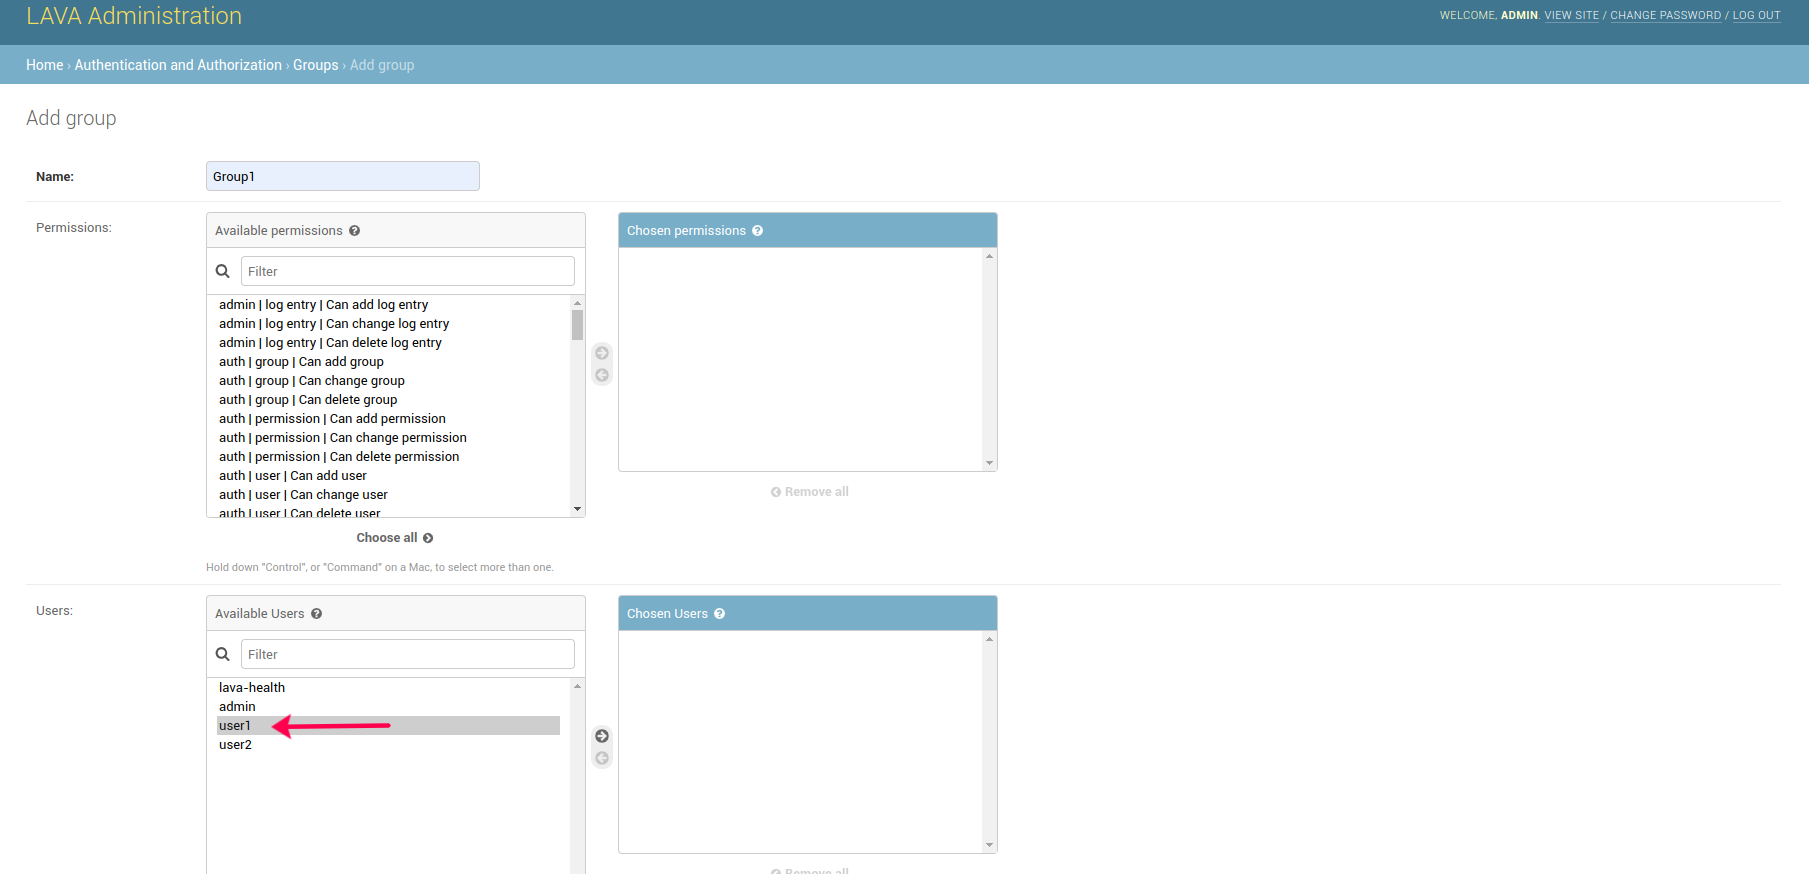
8 Finally Click on the Save button to create a group.
How to assign/change User Group(s)
1 Login to the EBF homepage/Dashboard through a web browser with credentials.
2 Select the ‘Administration’ option from the ‘admin’ drop-down list.
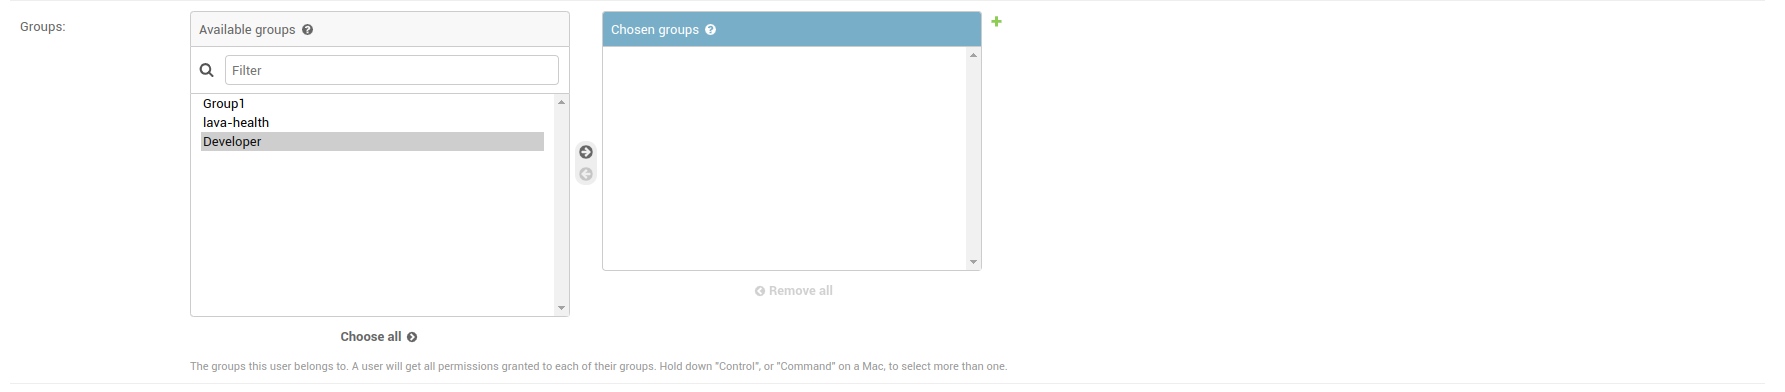
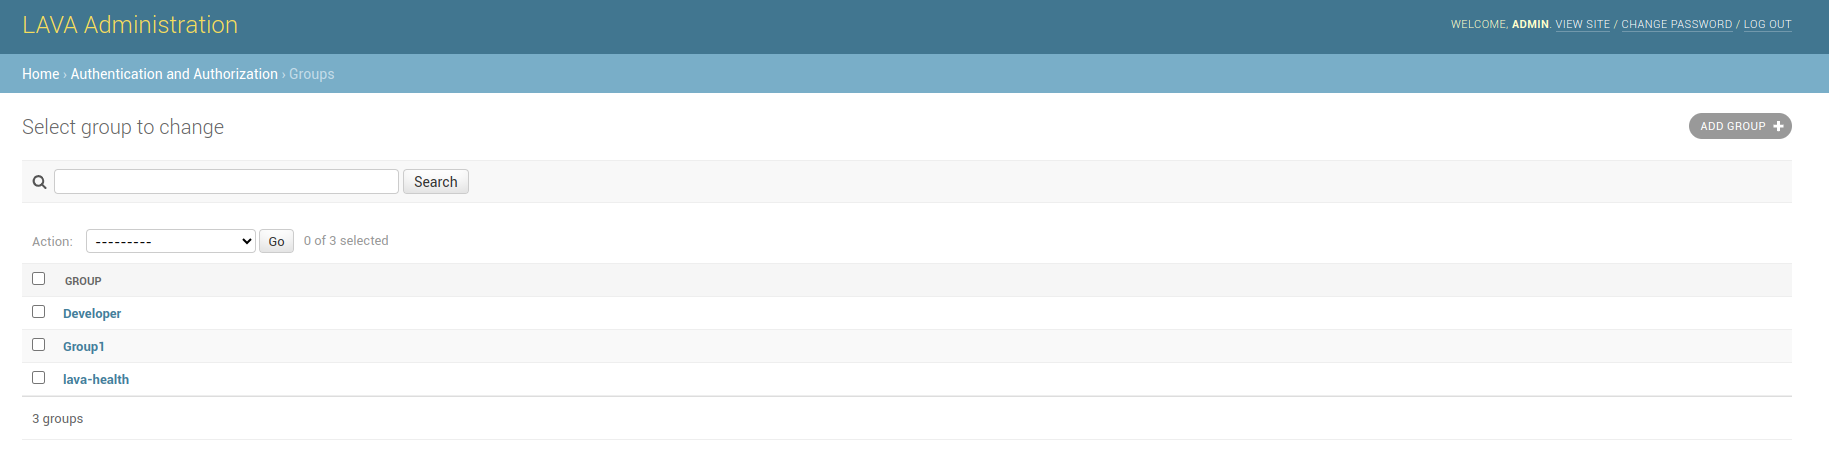
3 Assign group to the user in 2 ways:
Select Option Groups under AUTHENTICATION AND AUTHORIZATION

Select the Group which you want to assign it to the user. In this case, I have selected group as Group1
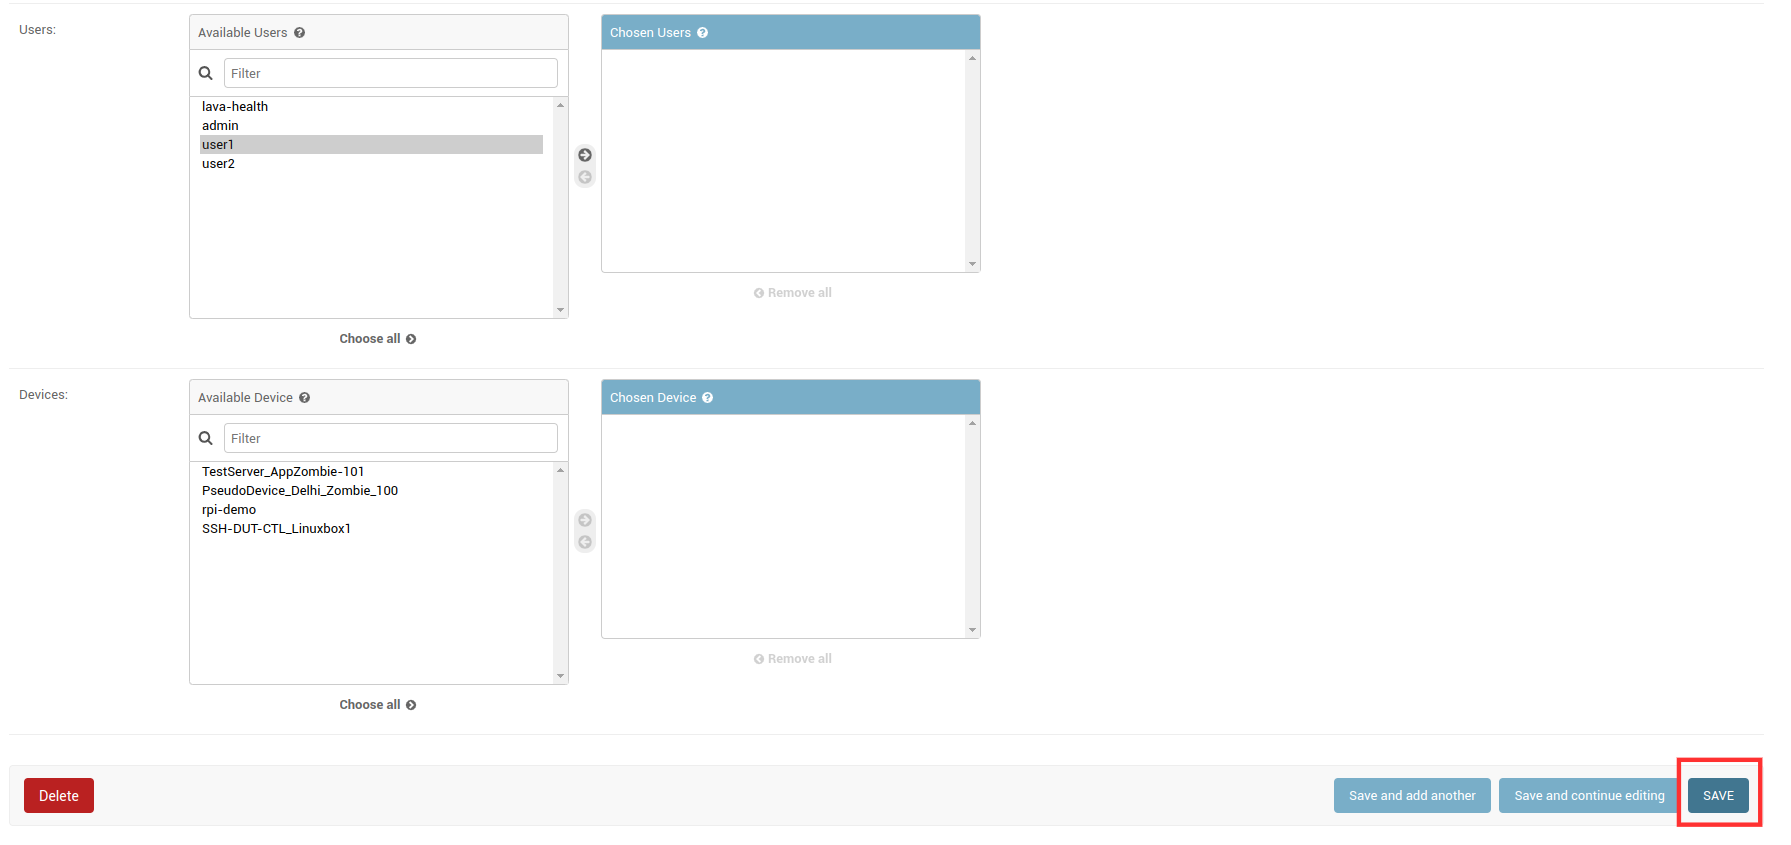
Select the user to which you want to assign the group.
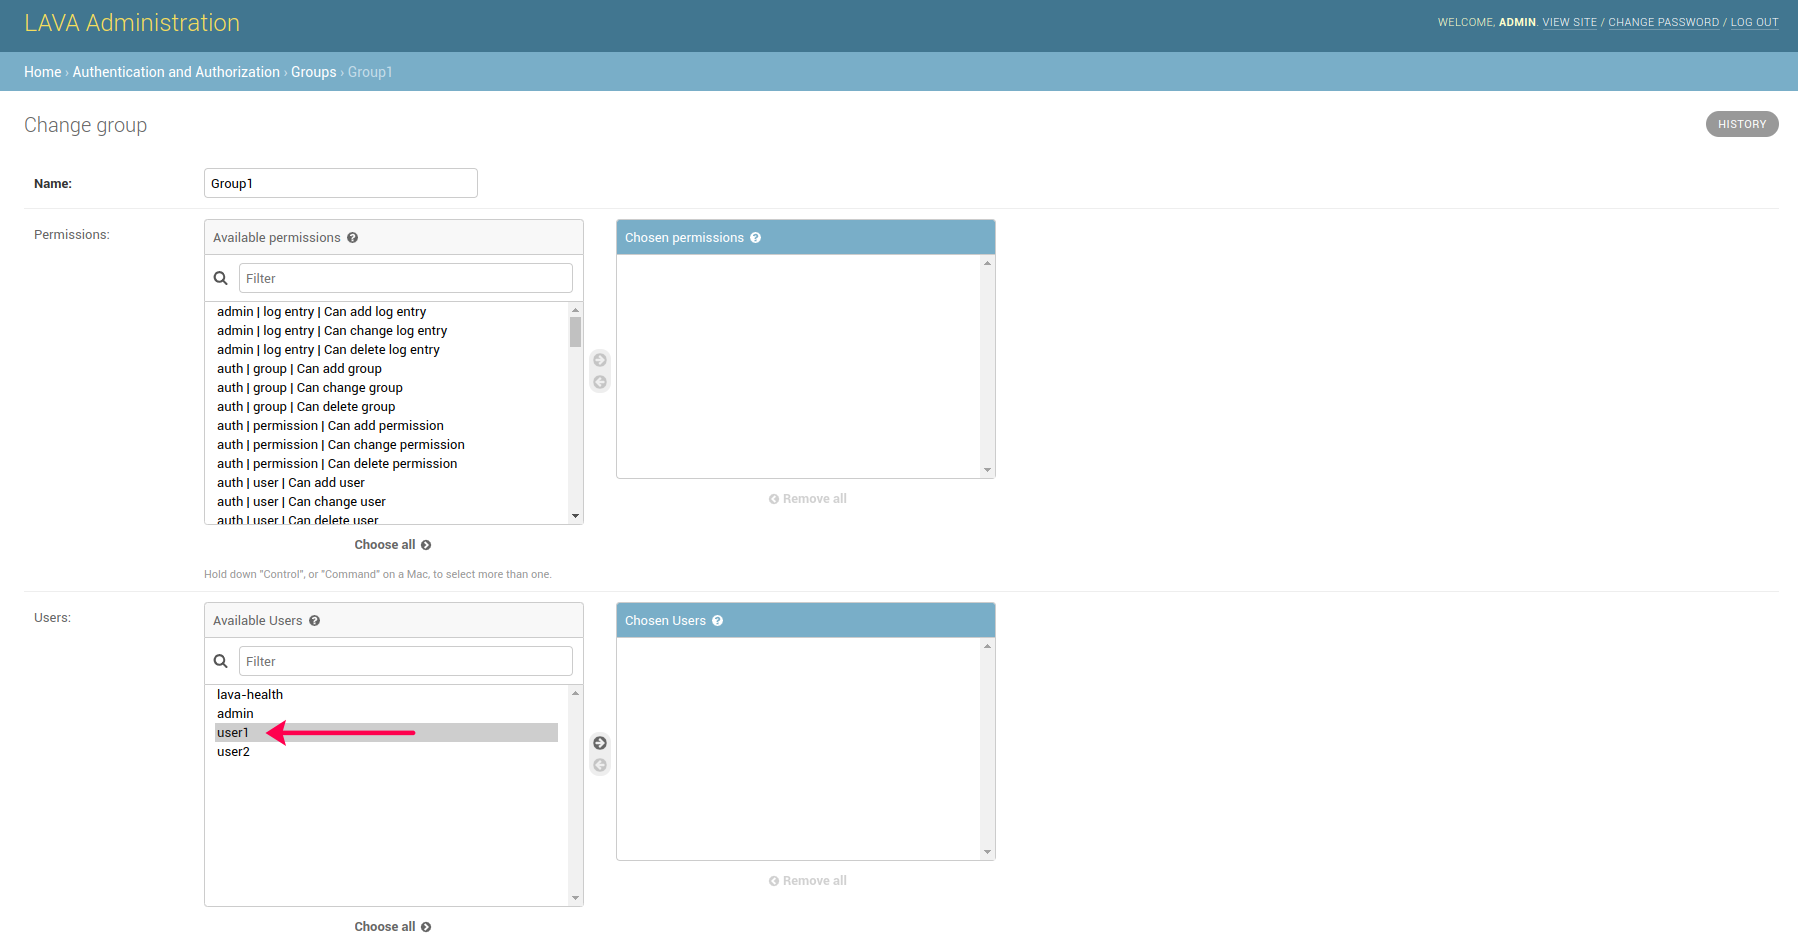
After selecting the user,click on the Save button.
4 Select Option Users under AUTHENTICATION AND AUTHORIZATION
Select the User to whom you want to assign the Group. In this case, I have selected User as User1.
Select the group to which you want to assign the user.
After selecting the user,click on the Save button.
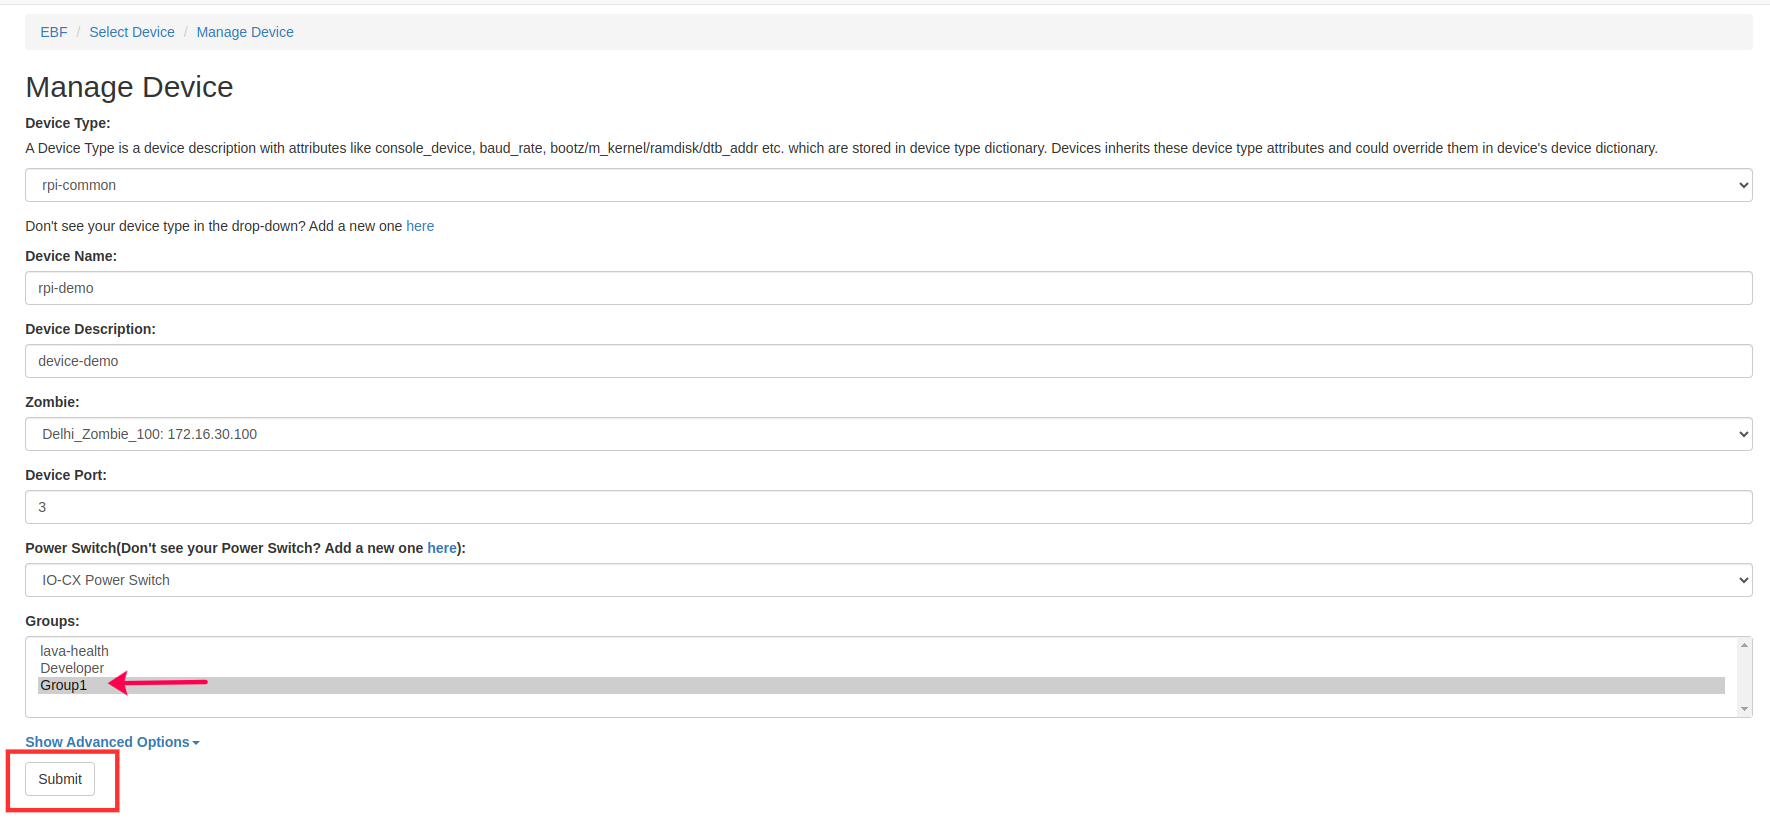
How to assign/change Device Group(s)
1 Login to the EBF homepage/Dashboard through a web browser with credentials.
2 Go to Devices option and select edit Devices option
3 Select the device of which you want to assign/change the group

4 Select the Group you want to assign to the device. In this case, I have selected Group as Group1.
5 After selecting the group, click on the submit button.
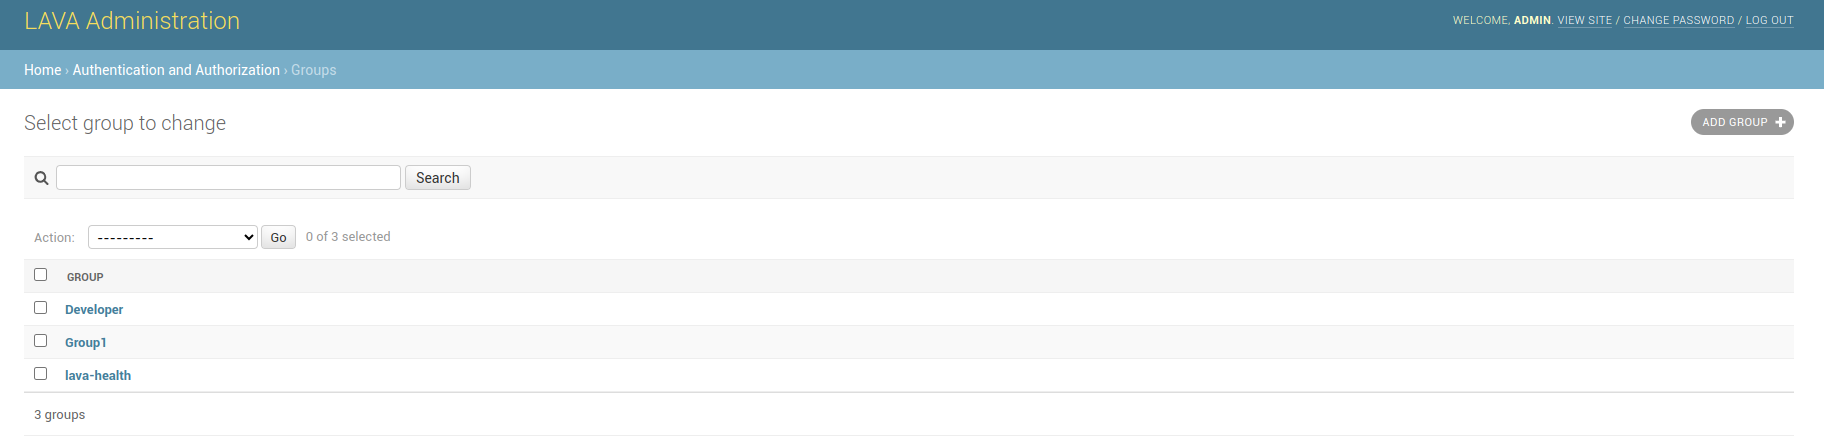
How to assign/change Device Group(s) for SSH-Device
1 Login to the EBF homepage/Dashboard through a web browser with credentials.
2 Select the Administration option from the admin drop-down list.
Select Option Groups under AUTHENTICATION AND AUTHORIZATION

Select the Group which you want to assign it to the user. In this case, I have selected group as Group1
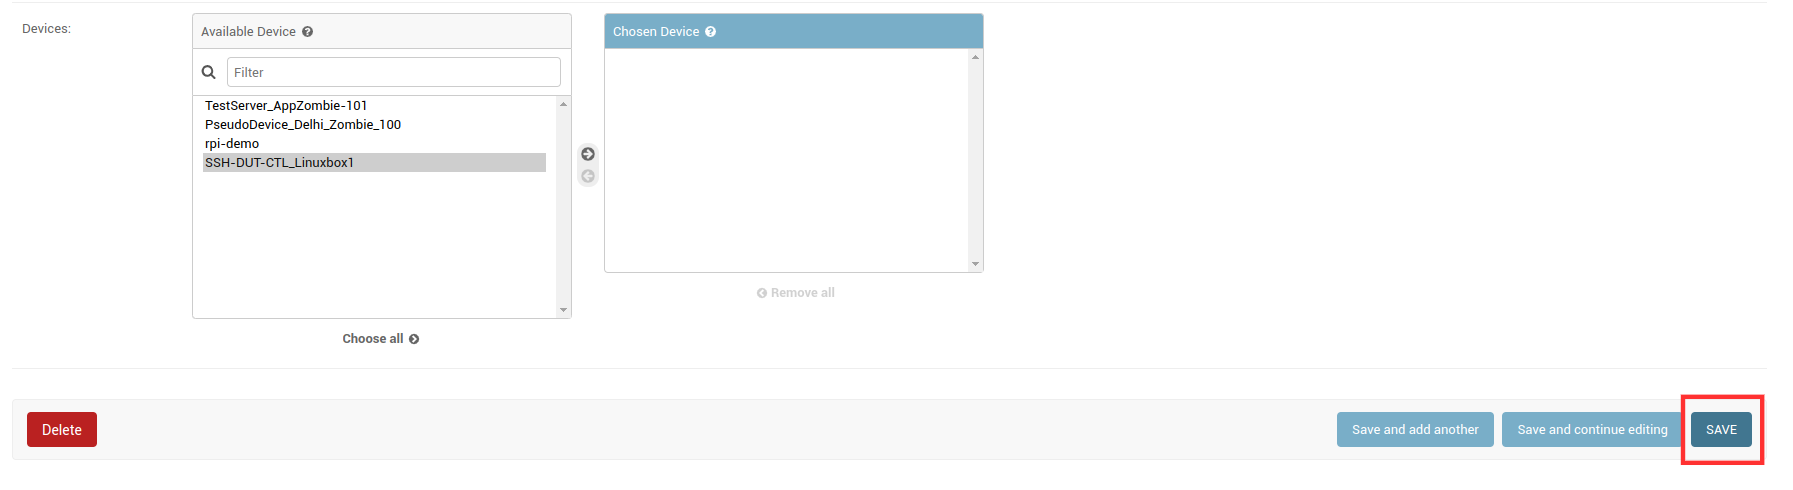
3 Select the SSH Device to which you want to assign the Group. In this case, I have selected SSH-DUT-CTL_Linuxbox1
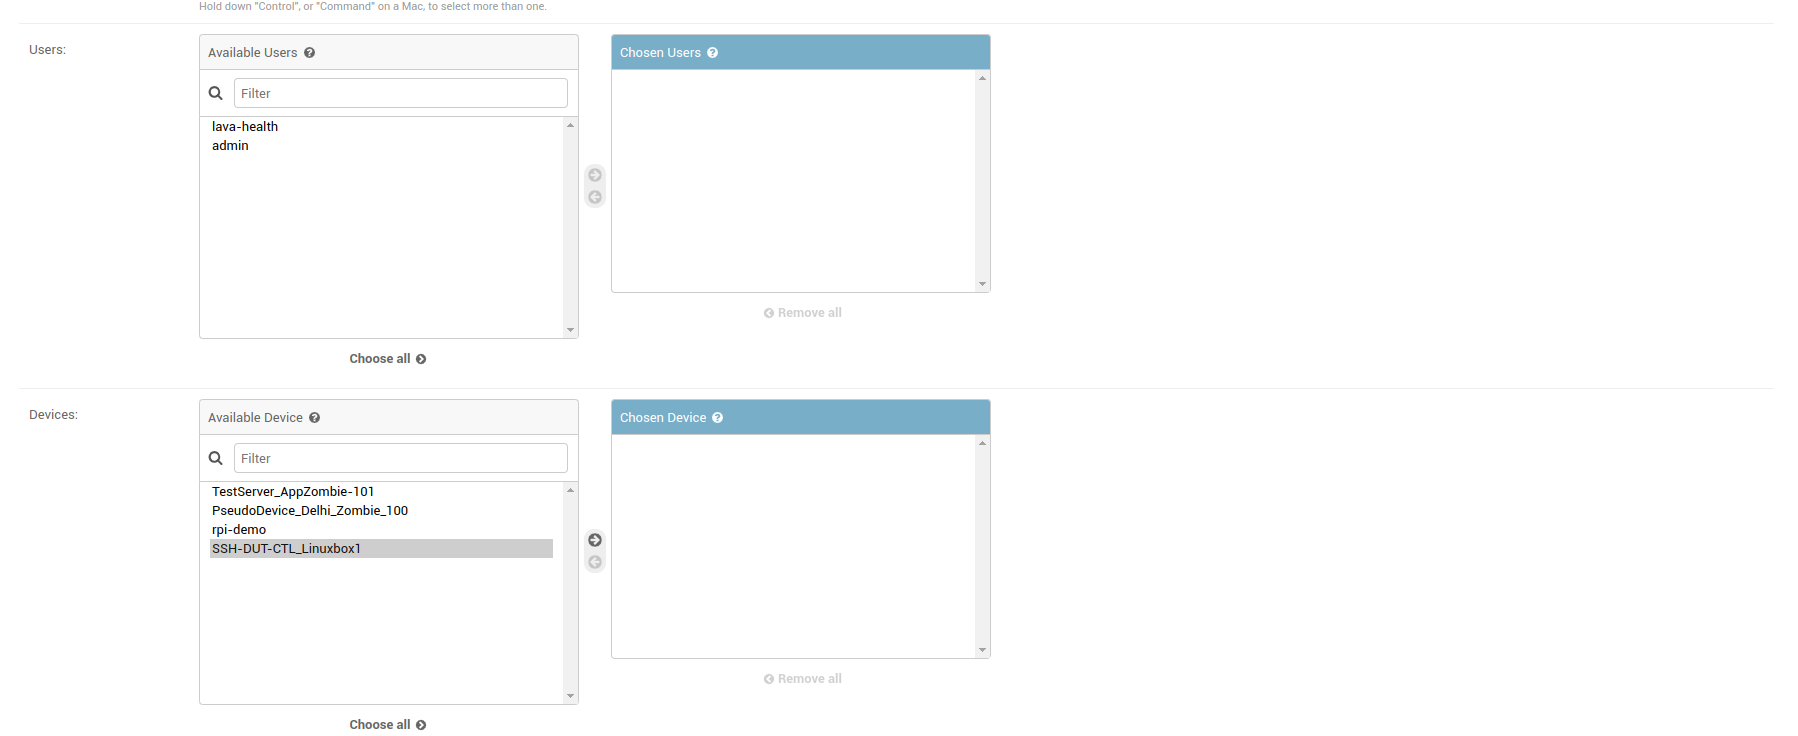
4 After selecting the device, Click on the Save button
How to add Golden Images(Admin Controlled)
Many a time EBF Users may leave the board in a state where it is no longer in usable state for a new user who assigns the board. In order to avoid it, EBF software should bring the board back to a pristine state before a new user can access it.
The following are the steps to add Golden Images to the EBF Server:
1 Login to the EBF homepage/Dashboard through a web browser with credentials.
Username : <username>
Password : <password>
2 This would open up the EBF Dashboard.
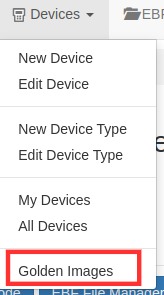
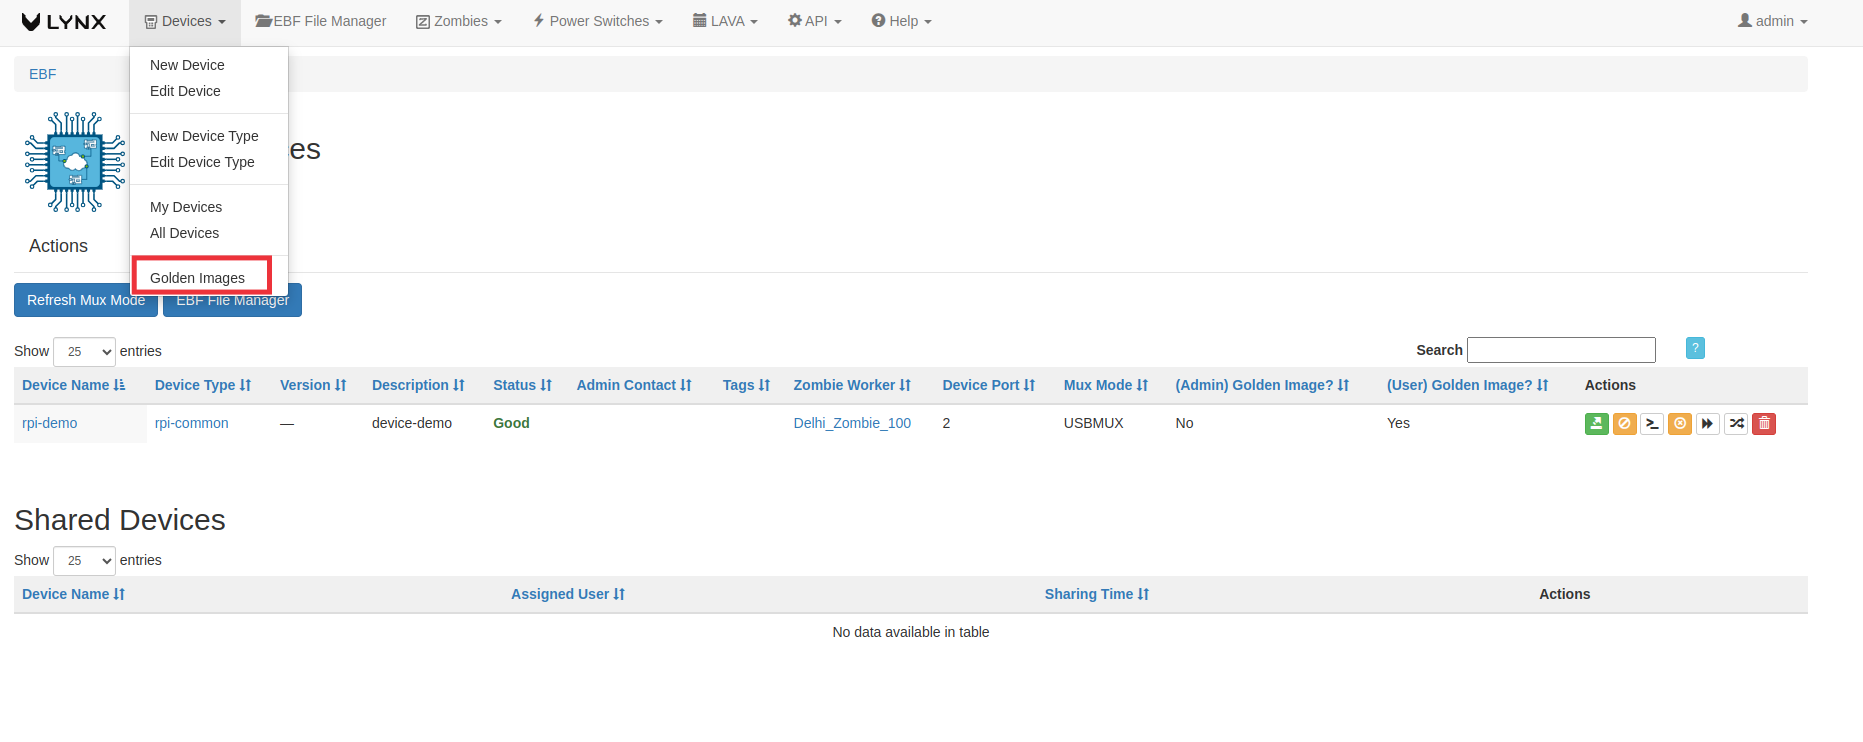
3 Go to Devices -> Golden Images Select the Golden Image option from the menu.
4 After selecting the golden images option, the golden image dashboard will appear on the screen. Click on the click here option.

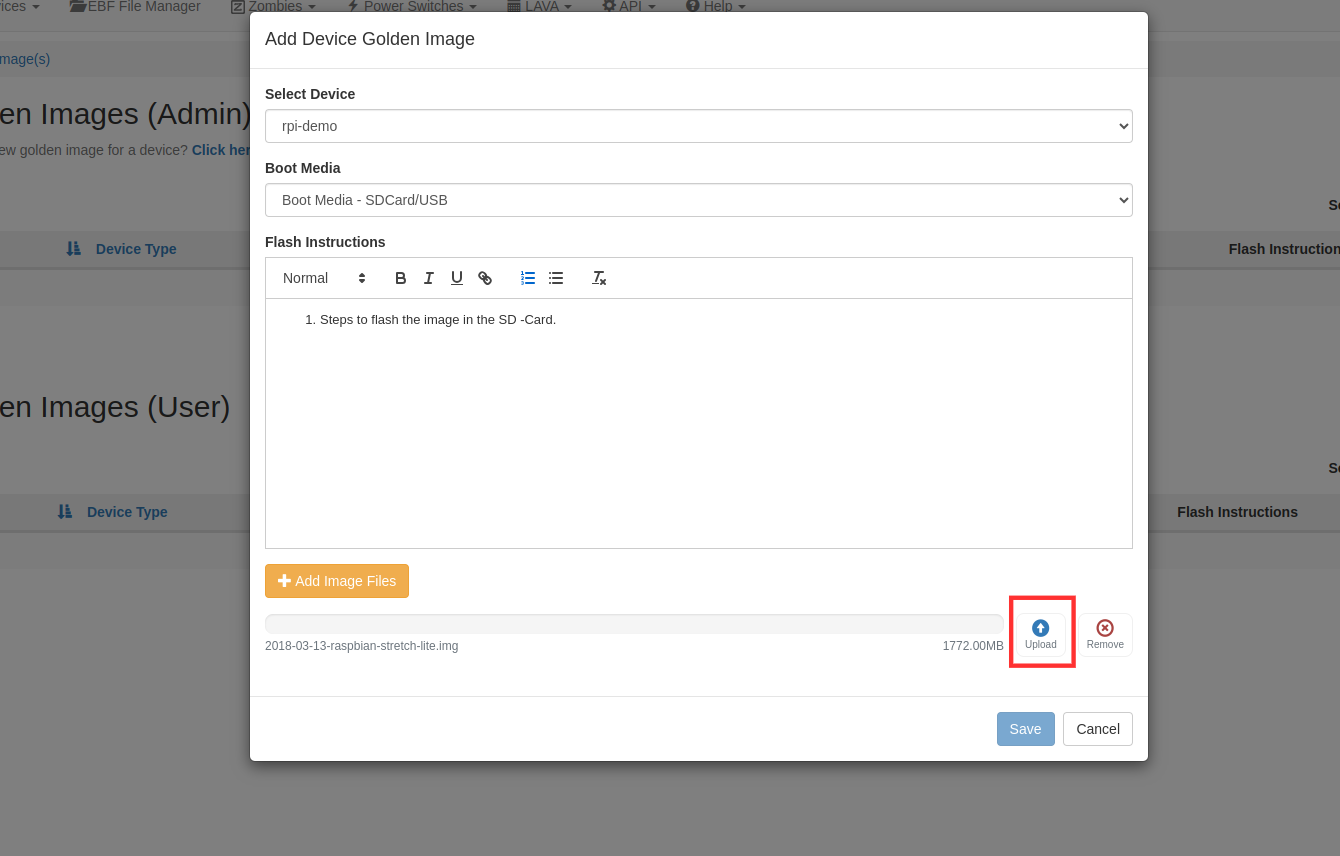
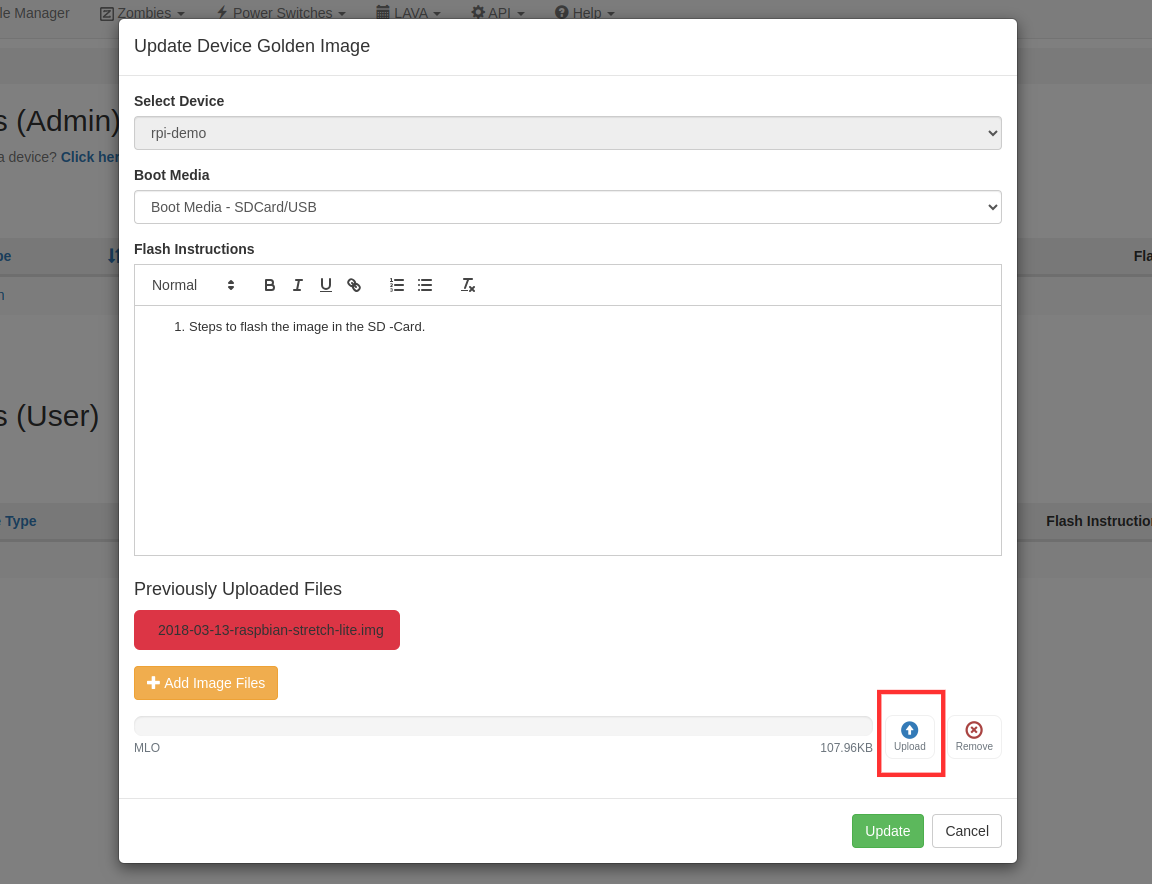
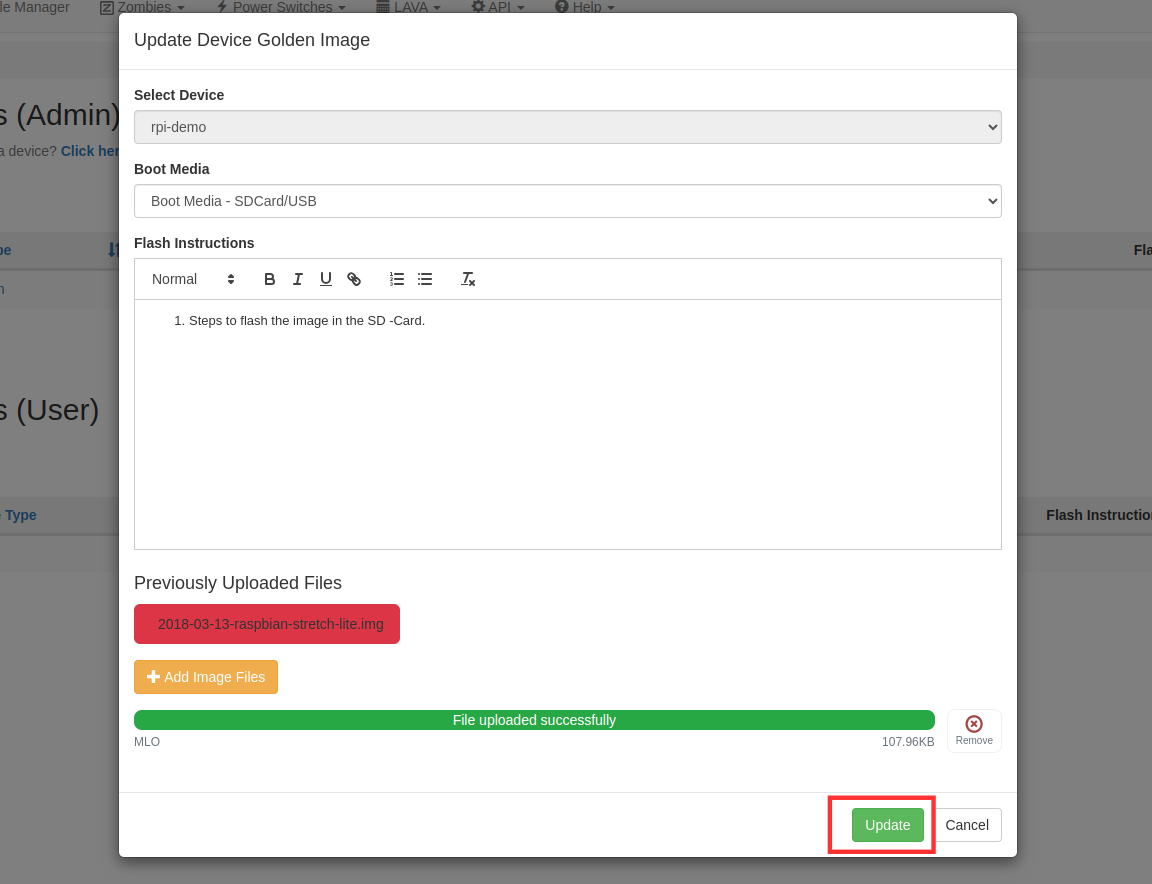
The Add Device Golden Image pop-up will appear on the screen.
From the Select device drop-down and choose the device on which you want to add the golden image.
Select the boot media, SD-Card/USB Boot, or Network Boot.
Add the flash instructions, which is optional.
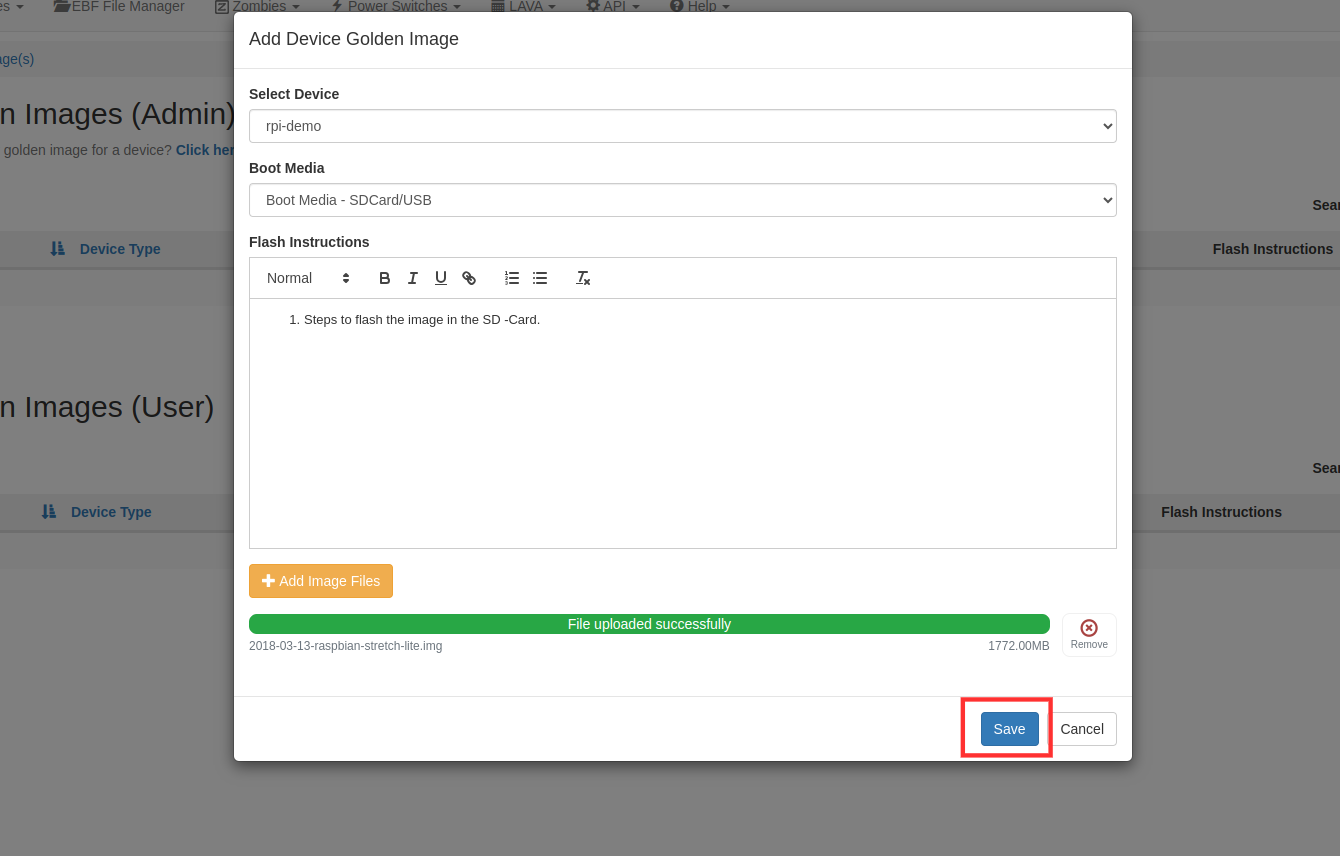
Click on +Add Image files that you want to add for the device. After selecting the image, click on the Upload option to upload the file.
6 After uploading the file, click on the save button.
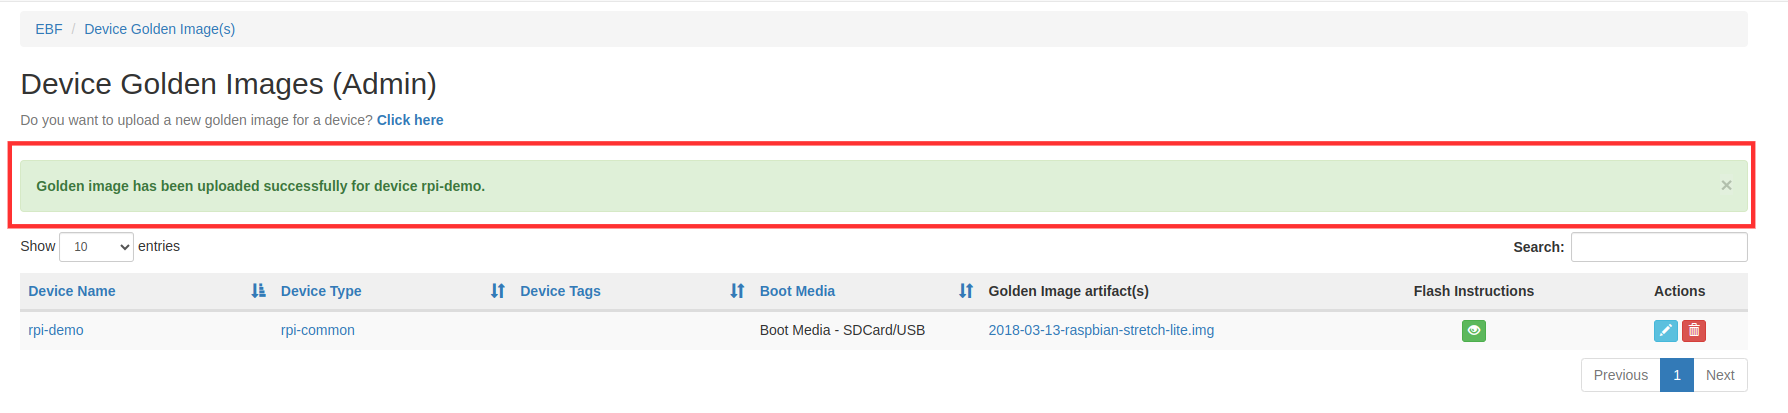
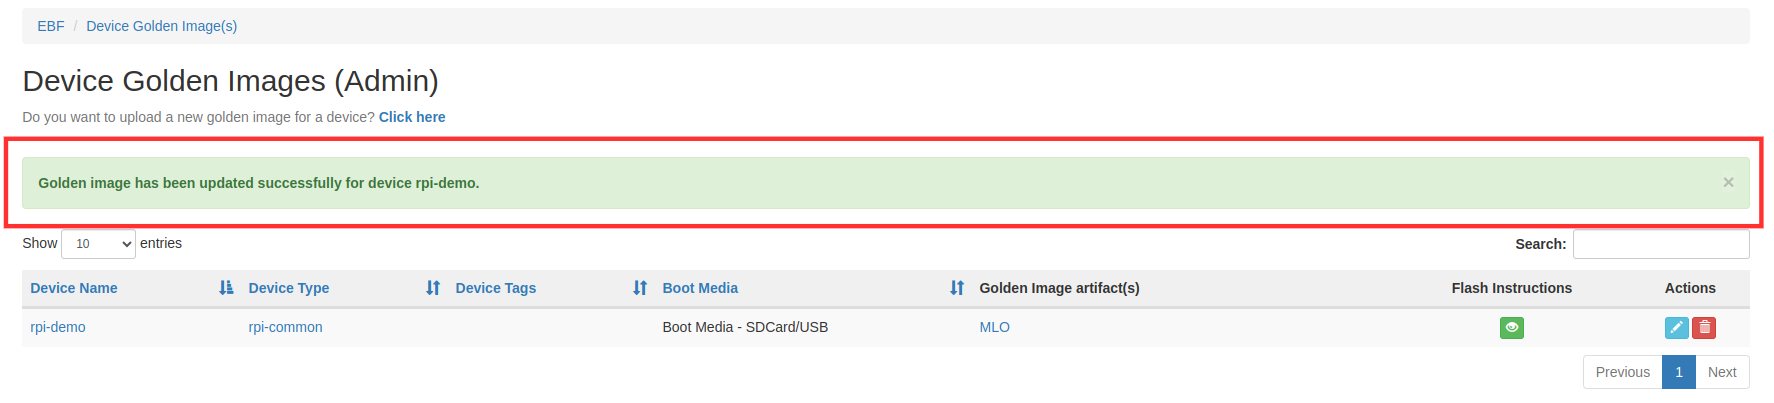
7 After successfully uploading the golden image, details regarding the image will appear under Device Golden Images(admin) Dashboard.
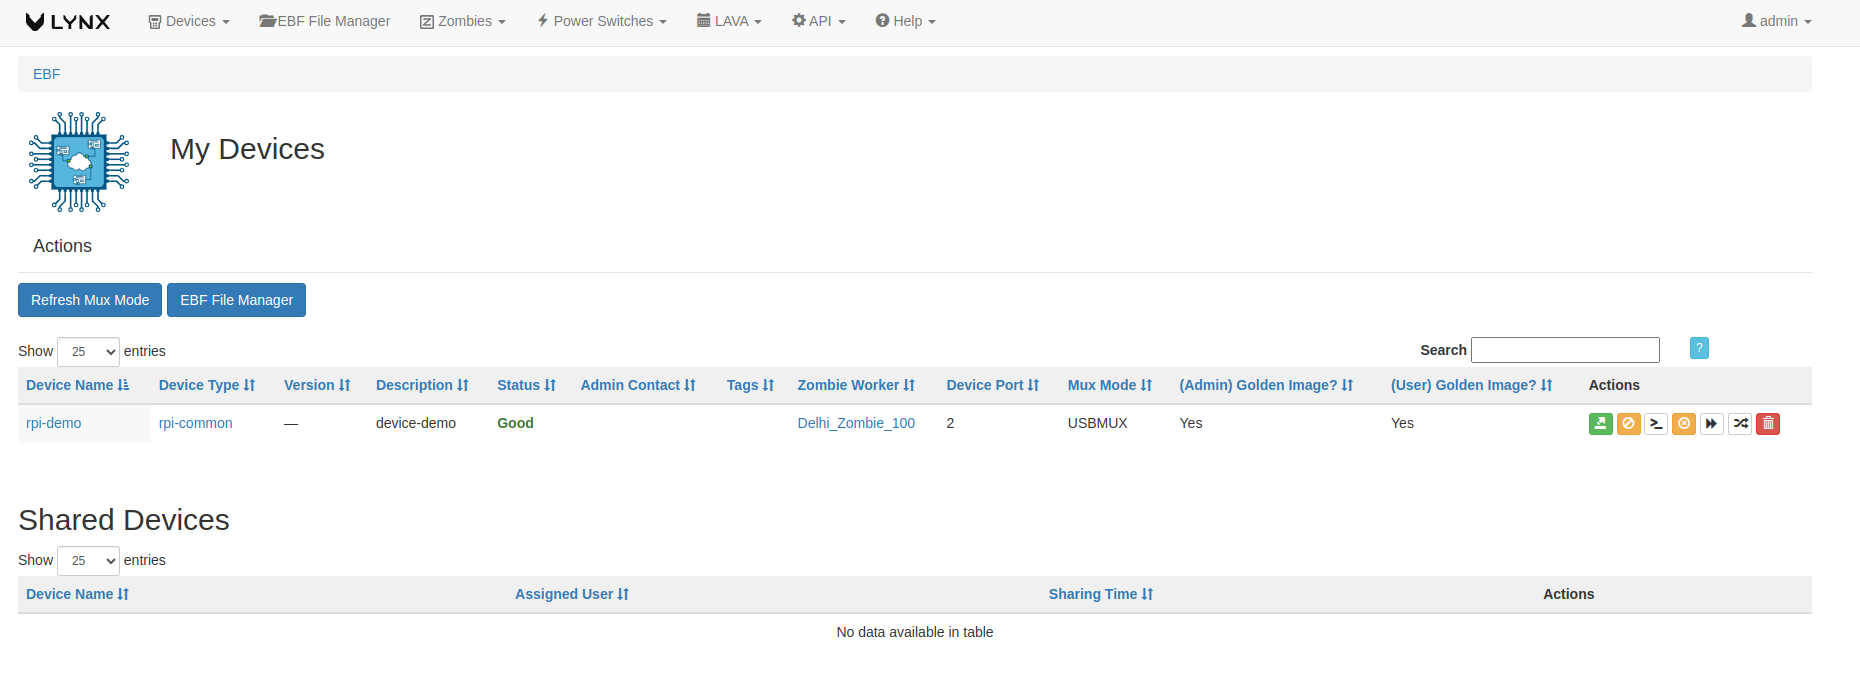
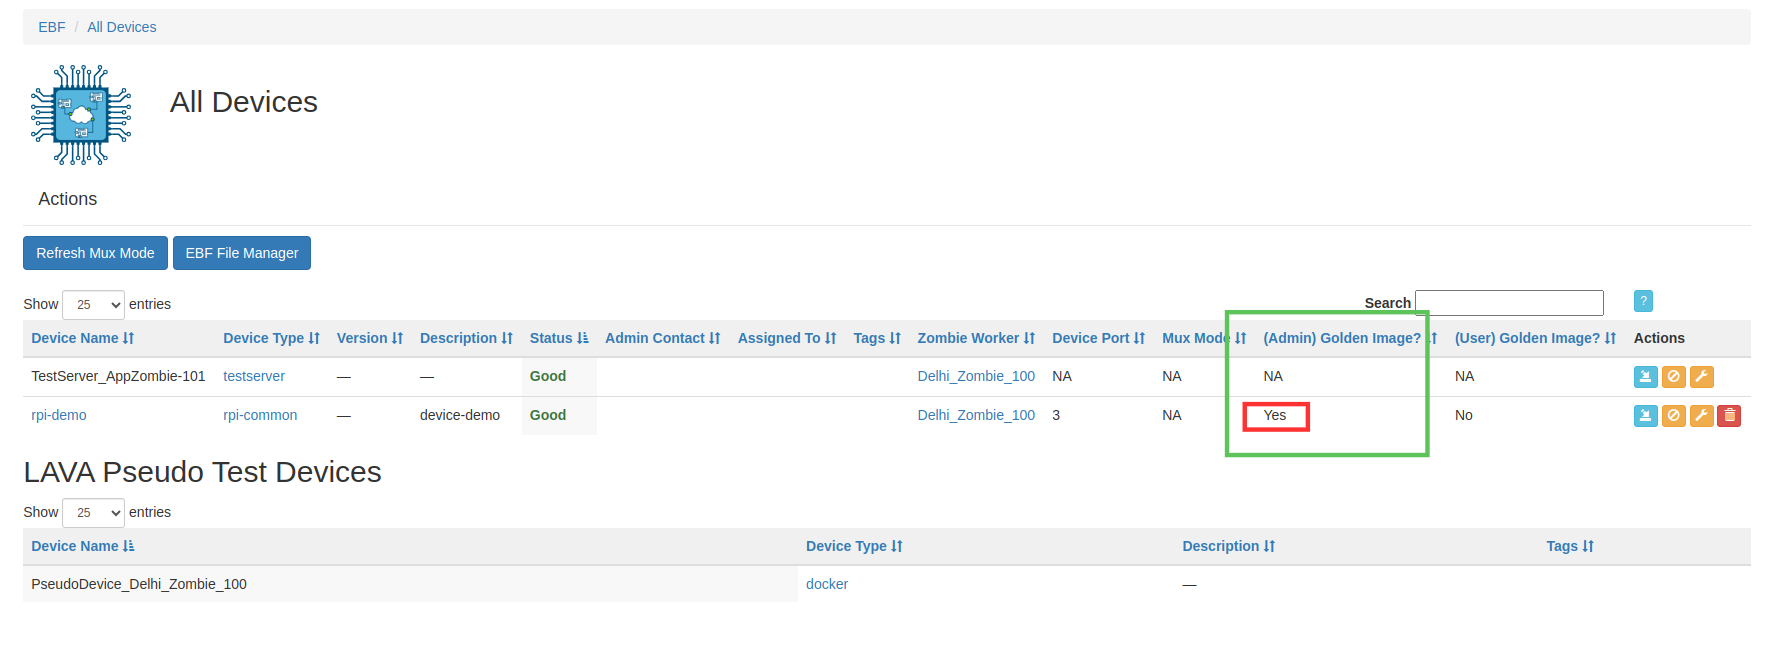
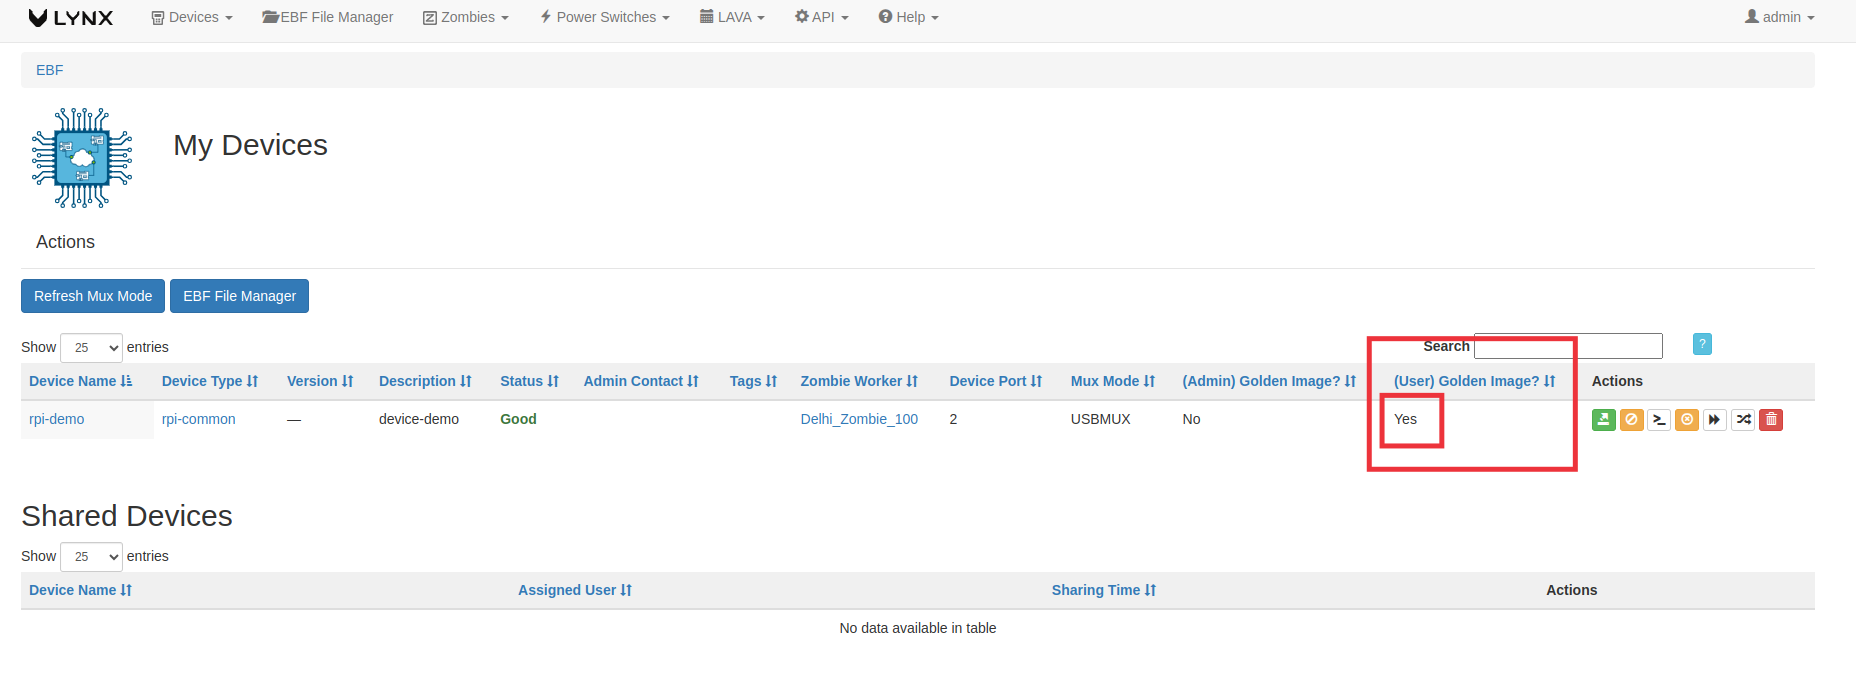
8 If the golden image is successfully uploaded for the respective device, then Yes will be visible under (Admin)Golden Image column on All Devices and MyDevices pages.
Go to Devices -> All Devices
Go to Devices -> My Devices
How to edit Golden Images(Admin Controlled)
Following are the steps to edit Golden Images on EBF Server:
1 Login to the EBF homepage/Dashboard through a web browser with credentials.
Username : <username>
Password : <password>
2 This would open up EBF Dashboard.
3 Go to Devices-> Golden Images
4 Golden Image Dashboard would open up.

5 Click on the edit option, of the respective device of which you have uploaded the golden image.

6 Enter the details you want to change regarding the golden image.
Select the device if you want to change the device
Select the boot-media, SD-Card/USB Boot or Network Boot.
Add/Edit the flash instructions.
If you want to remove the Previously uploaded files, click on the ‘cross sign’ and then Click on +Add Image Files to upload the new image.

After selecting the image, click on Upload button to upload the file.
After successfully uploading the file, click on the update option.
Following message will appear on the screen on successful updation of the golden image.
How to Add Camera Device Resource Map and Resource Config
Steps to add Resource MAP
1 Login to the EBF homepage/Dashboard through a web browser with credentials.
2 Select the ‘Administration’ option from the ‘admin’ drop-down list.
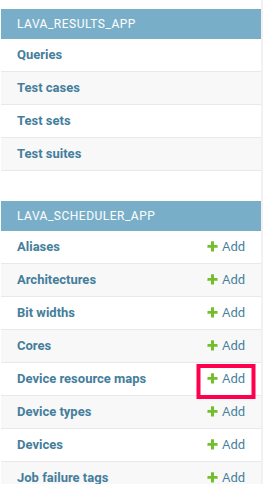
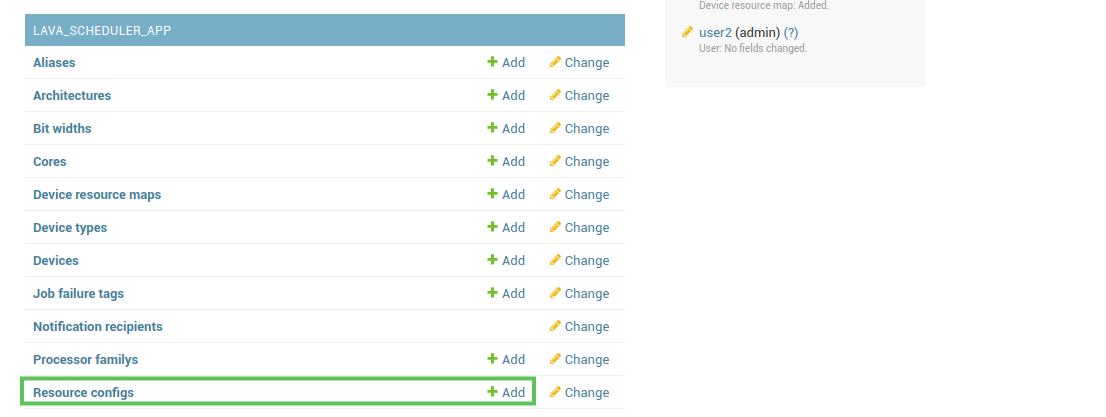
3 Now from LAVA_Scheduler_APP click on Add(Button) corresponding to the Device Resource Map.
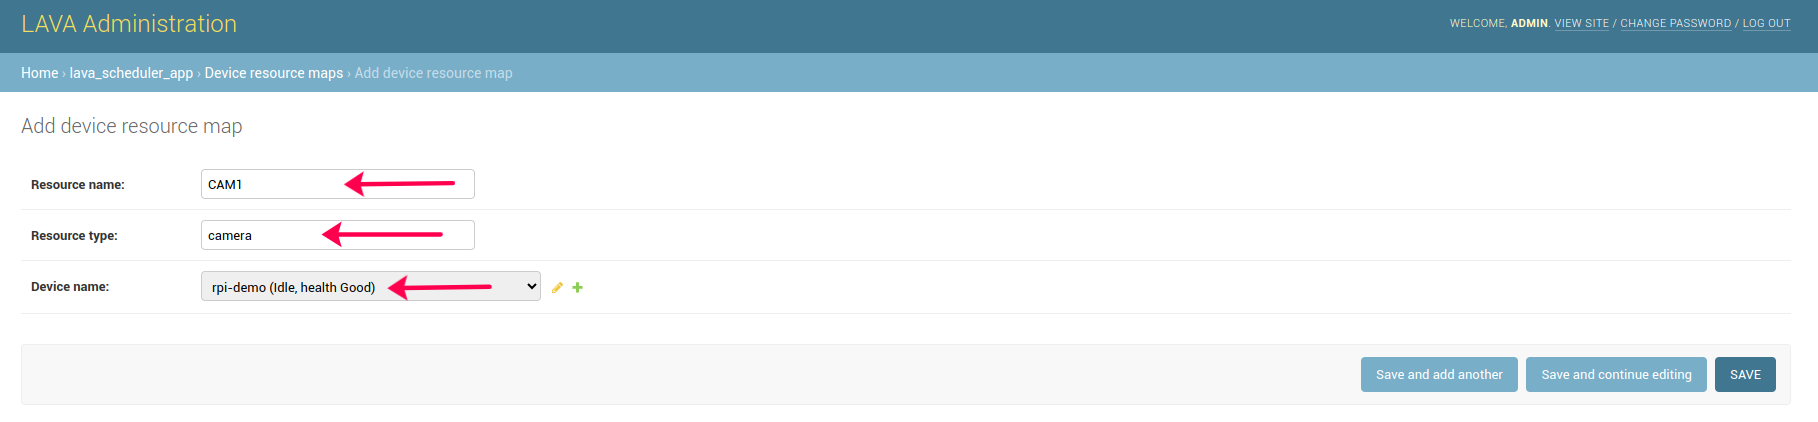
4 Now add a device resource map for the camera. Enter the below information
Resource Name: Enter a unique string representing this camera resource, for example, I have given CAM1
Resource Type: The resource type should be “camera” because we are adding a camera resource
Device name: The name of the Device (DUT) where the camera resources are connected. In my case, I have connected on rpi-demo(DUT)
Steps to add resource config for camera
1 Now click on the +add(button) corresponding to the Resource config from the Lava_scheduler_APP page.
2 Add the following information for the camera resource config.
Resource name: Resources name should match one of the camera resource names in “Device resource maps”. For example, here I added CAM1 as a resource name.
Config name: enter text “IP-ADDRESS”.
Config Value: IP address of the APP-Zombie where the camera is connected.
3 Add the following information for the camera resource config.
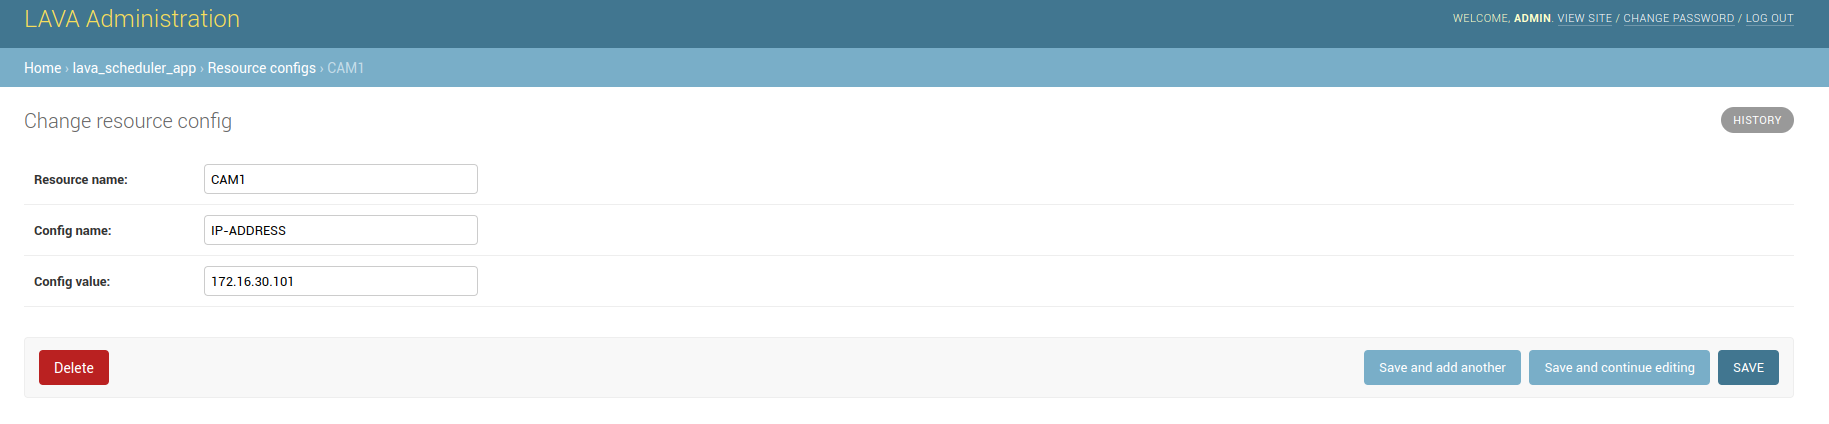
4 After filling all the details, click on the save button.
How to Add Audio Device Resource Map and Resource Config
Steps to add Resource MAP
1 Login to the EBF homepage/Dashboard through a web browser with credentials.
2 Select the ‘Administration’ option from the ‘admin’ drop-down list.
3 Now from LAVA_Scheduler_APP click on Add(Button) corresponding to the Device Resource Map.
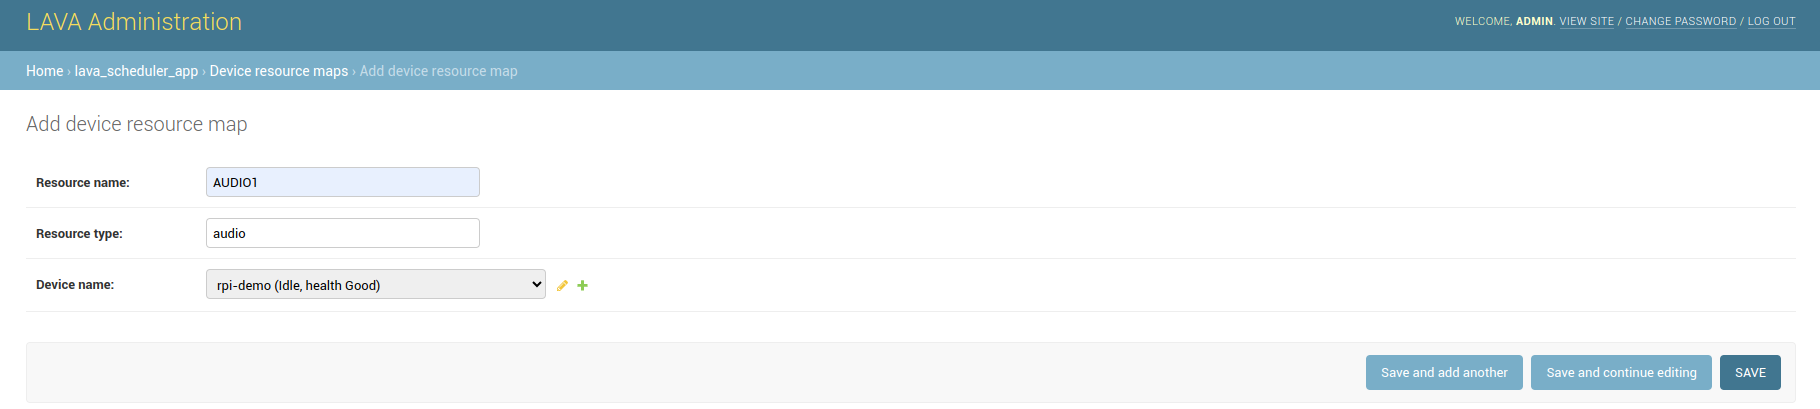
4 Now add a device resource map for the audio. Enter the below information.
Resource Name: Enter a unique string representing this audio resource, for example, I have given AUDIO1.
Resource type: The resource type should be “audio” because we are adding an audio resource.
Device name: The name of the Device (DUT) where the audio resources are connected. In my case, I have connected on rpi-demo(DUT).
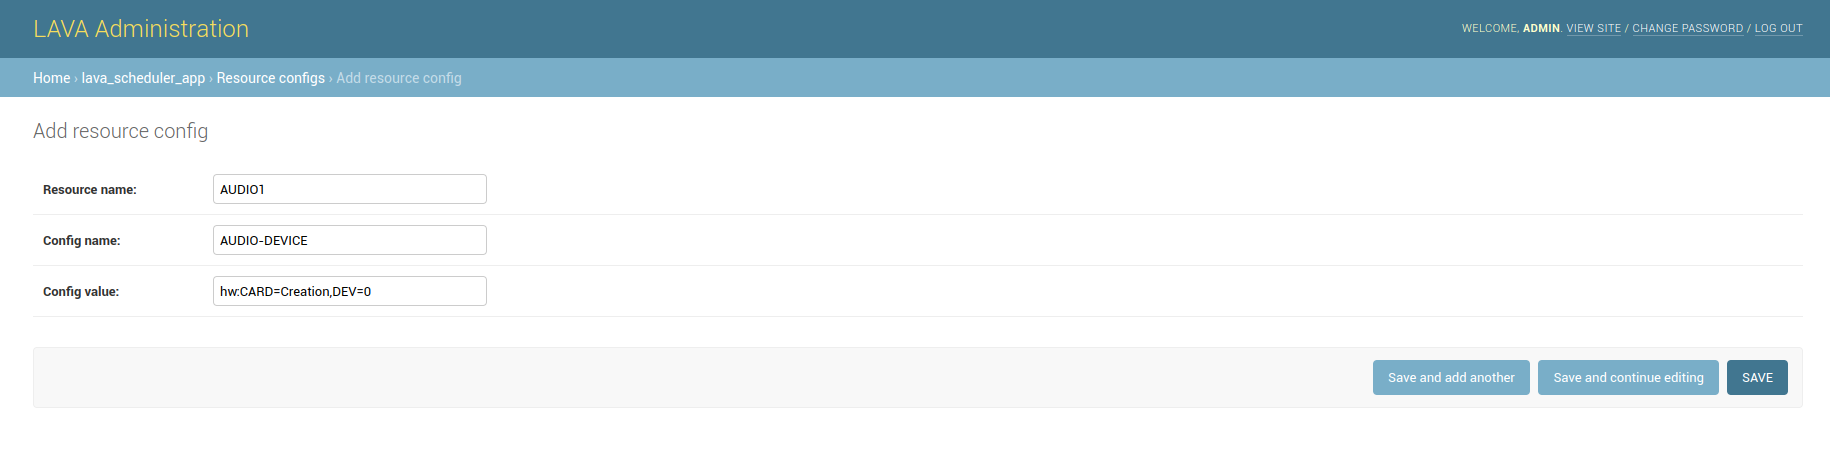
Steps to add resource config for audio
1 Now click on add(button) corresponding to the Resource config from the Lava_scheduler_APP page.
2 3 audio resource configurations should be added to the list for the audio. Once you reach the Add Resource config page you need to fill in the following pieces of information.
Resource name: Resources name should match one of the audio resource names in Device resource maps. For example, here I added AUDIO1 as a resource name.
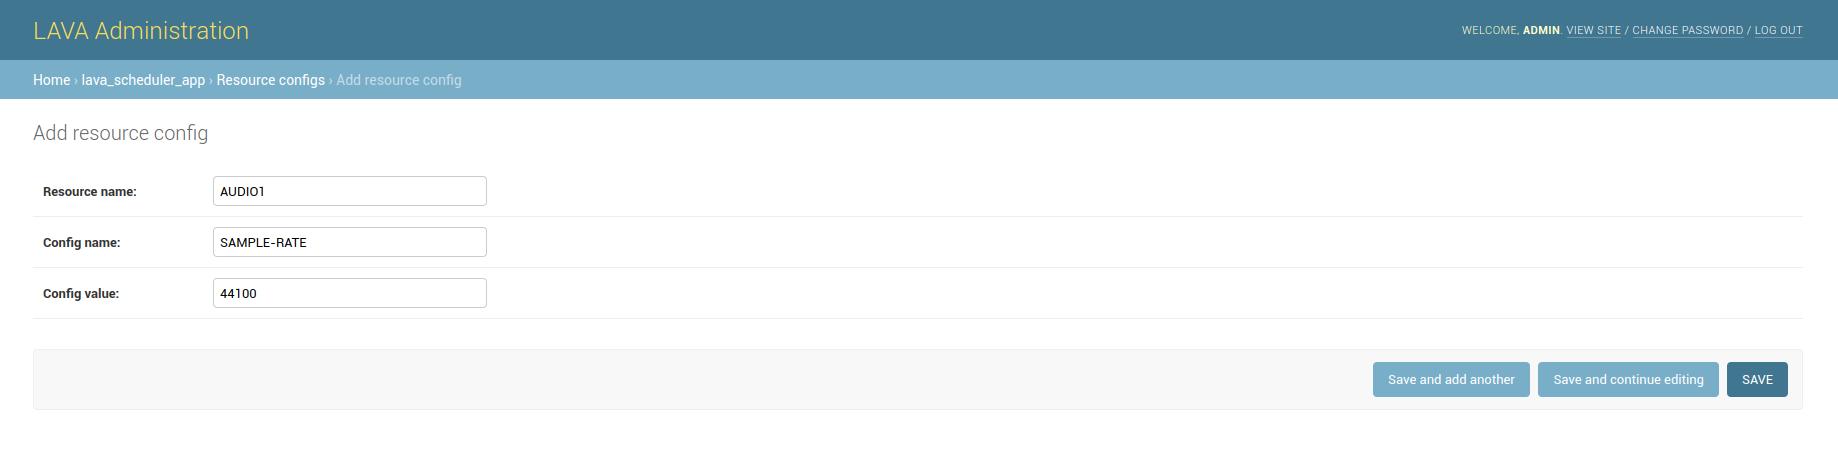
Config name: Enter the following text for the config name (AUDIO-DEVICE, SAMPLE-RATE, SAMPLE-FORMAT).
Config Value: Value for config name. find the below list to set up the Config value for each config name.
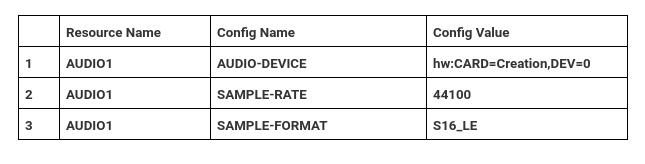

3 After filling all the details, click on the Save button.
How to change any user’s password in EBF
Following are the steps to change the password of any available user:
1 Login to the EBF homepage/Dashboard through a web browser with credentials.
2 Select the Administration option from the admin drop-down list.
3 Users option is available under the Authentication and Authorization section on the Administration page.
4 Select the Change option for editing details of an available user.
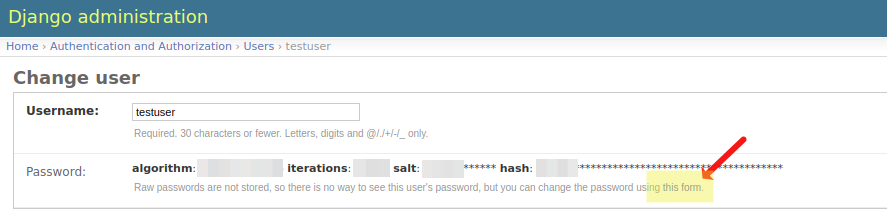
5 List of available users will be shown on the screen. Click on the name of the user whose password you want to change.

6 On this page, click on the this form link in the Password section.
7 Input the new password details and click on the Change Password button.

8 A Password changed successfully notification message will be shown on the screen.
How to Retire and Activate Device
To Retire a device
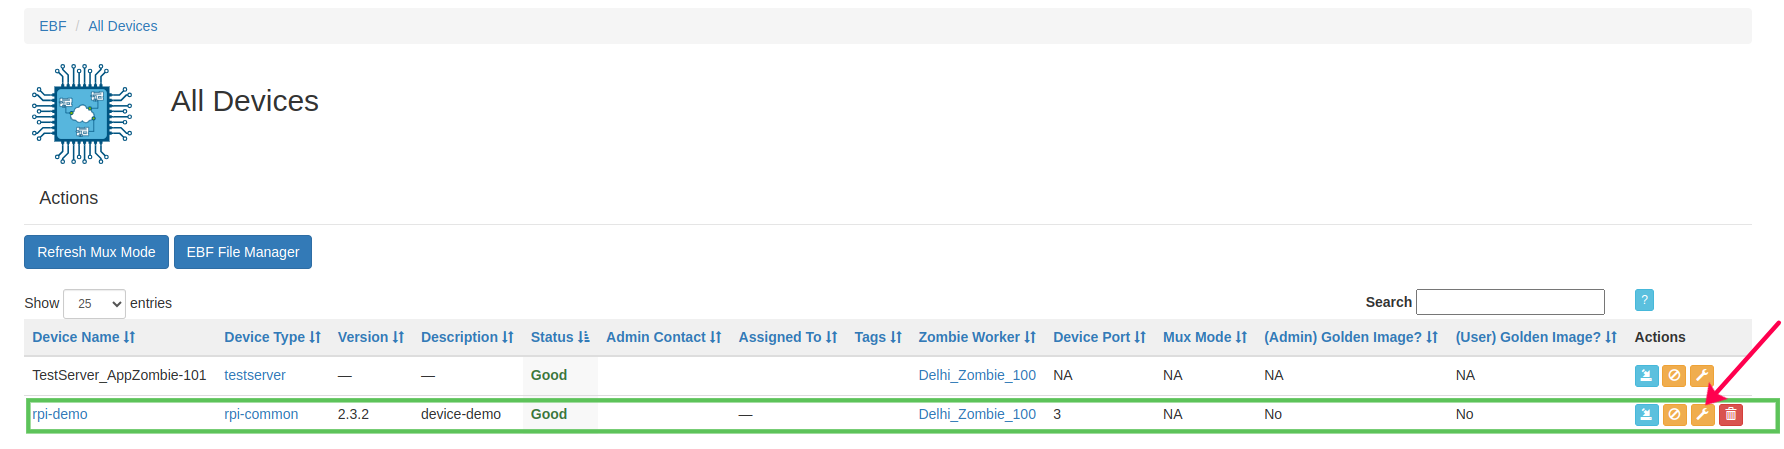
1 In order to retire an active device, the target device must not be allocated to anyone.
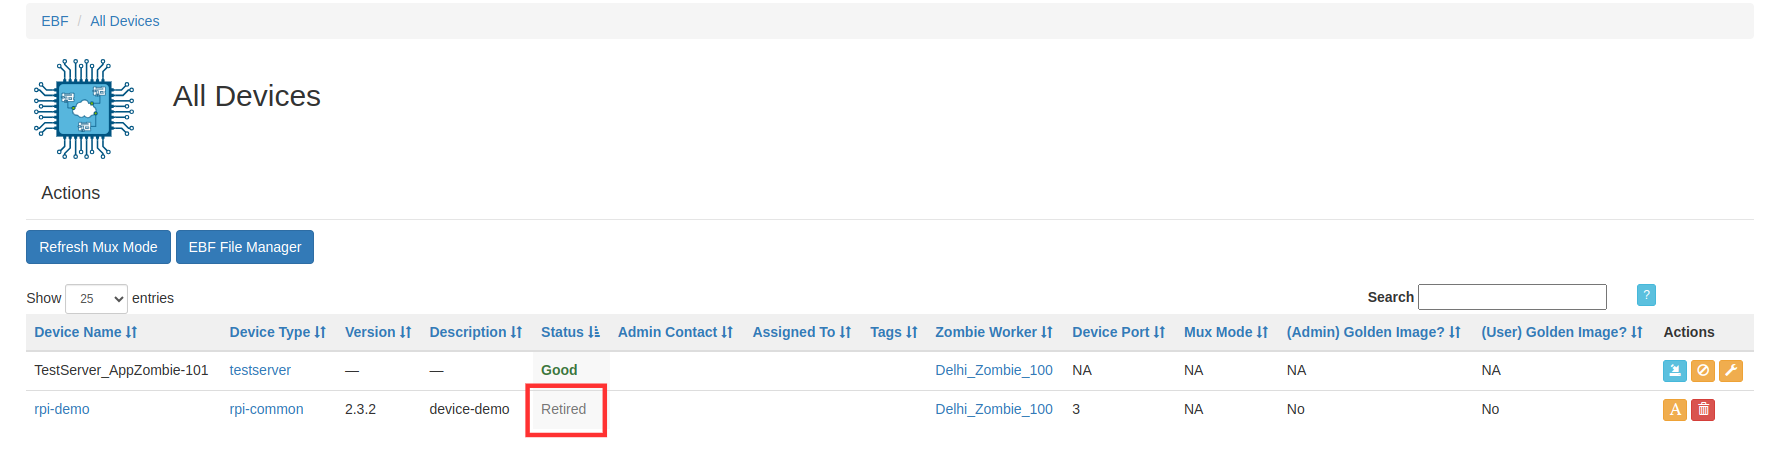
2 Click on the Retire icon present in the Actions column adjacent to the target device that you want to retire.
3 After the device is retired successfully, the Device Status is changed to Retired as shown in the below image.
To Activate a retired device
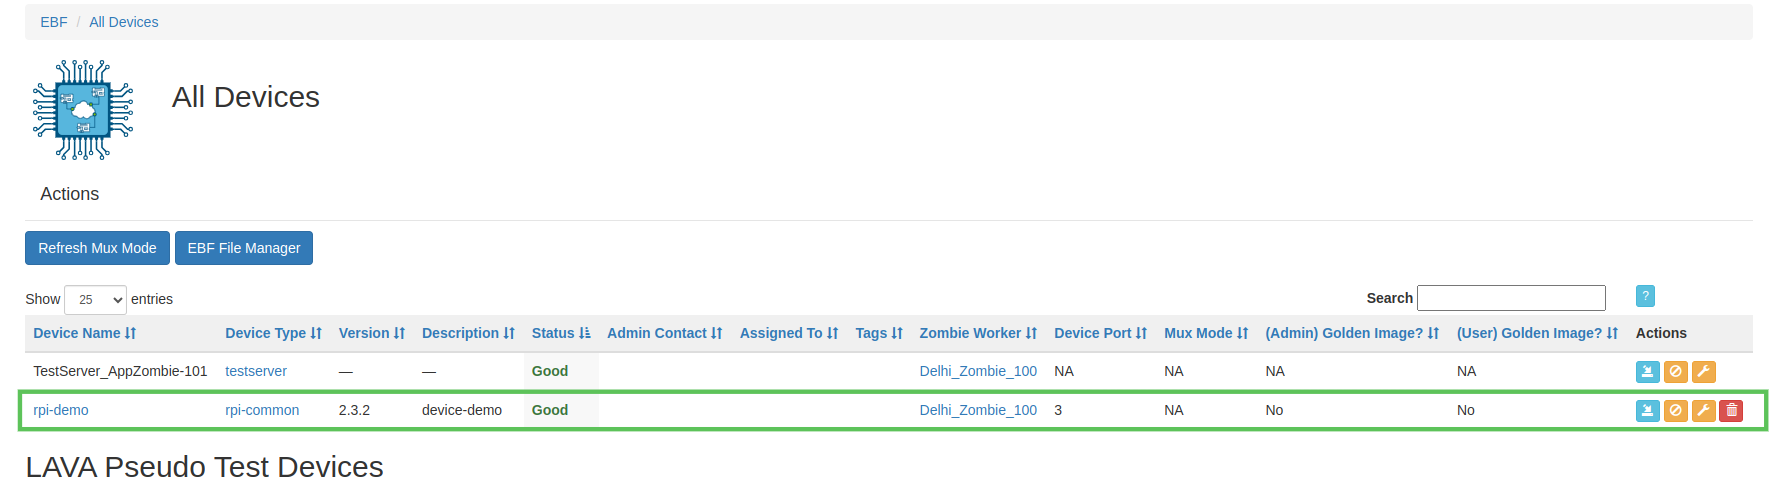
1 Click on the Activate icon present in the Actions column adjacent to the target device that you want to activate.
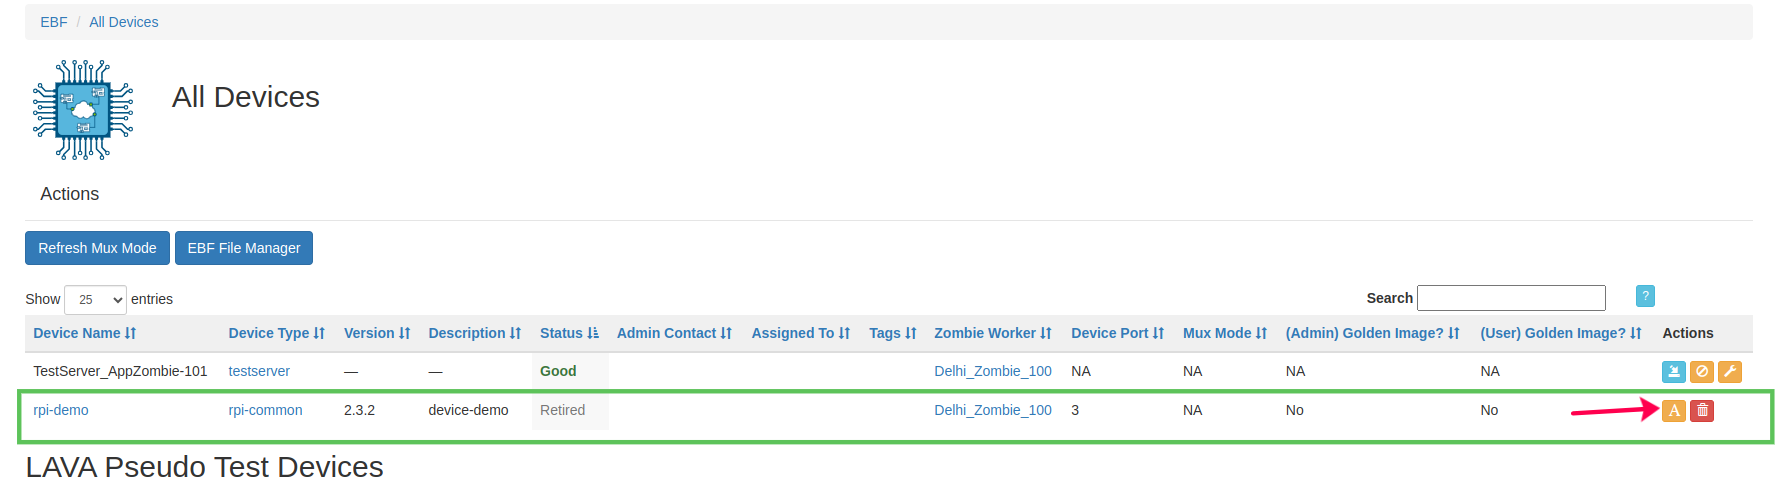
2 The activated device is now ready to be assigned to any user.
How to Install Zombie
1 Zombie image is compressed with 7z compression tool, follow the below steps to install and extract installer files on Linux machine.
sudo apt-get install p7zip-full
2 Obtain the latest Zombie image, typically included in along with the EBF installer (e.g.: File named Zombie_<version>.img.7z)
LinuxLink users can download the same from: https://linuxlink.timesys.com/bfc/
3 Extract the image from the downloaded files by running the below command:
7z x <file_name>.7z
4 Flash the extracted image into a 32GB sd card.
dd if=./<file_name>.img of=/dev/sdX bs=4M status=progress conv=fsync
After flashing image into SD Card, boot the board using this newly created sd-card and login into Zombie E-Z Config with the default username and password to reconfigure the Zombie.
How to Upgrade Zombie
1 To maintain the current settings and configurations, users must back up the current Zombie settings before upgrading.. Refer How-to-Backup-Zombie-Settings
2 Zombie image is compressed with 7z compression tool, follow the below steps to install and extract installer files on Linux machine.
sudo apt-get install p7zip-full
3 Obtain the latest Zombie image, typically included in along with the EBF installer (e.g.: File named Zombie_<version>.img.7z)
LinuxLink users can download the same from: https://linuxlink.timesys.com/bfc/
4 Extract the image from the downloaded files by running the below command:
7z x <file_name>.7z
5 Flash the extracted image into a 32GB sd card.
dd if=./<file_name>.img of=/dev/sdX bs=4M status=progress conv=fsync
6 After flashing image into SD Card, boot the board using this newly created sd-card and login into Zombie E-Z Config with the default username and password to reconfigure the Zombie.
7 To restore Zombie settings to the last saved configuration, Refer How-to-Import-Zombie-Settings
How to remote Upgrade Zombie
Note: Zombie versions 2025.06 and earlier are not allowed for remote upgrade to zombie version 2025.07 or higher.
1 Login to the EBF homepage/Dashboard through a web browser with credentials.
Username : <username>
Password : <password>
2 This would open up EBF Dashboard.
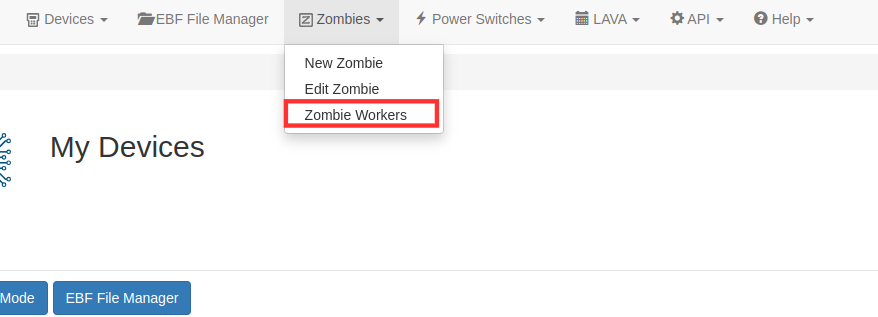
3 Click on the Zombie and select Zombie workers

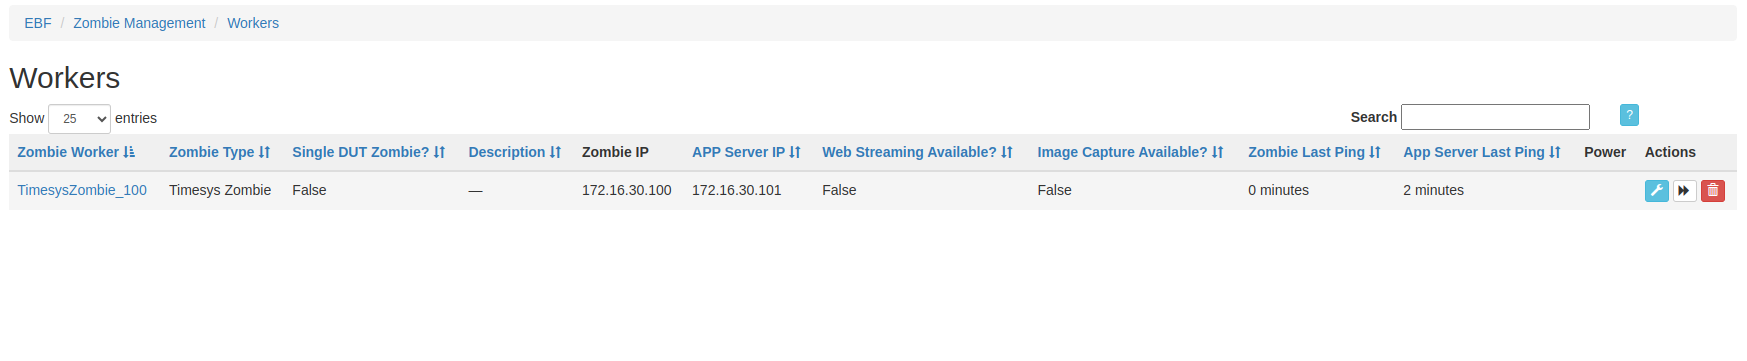
4 It will open the Worker page where all the zombies are listed

5 Now click on Zombie remote upgrade button to upgrade the zombie

6 EBF will start upgrading the zombie
7 After the zombie Upgrade the button will disappear
How to configure Zombie through Zombie E-Z Config
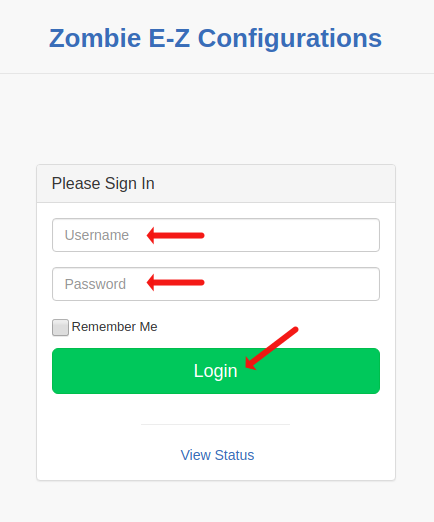
Following are the steps to start Hotspot part for Zombie E-Z Config application:
1 Connect to wireless hotspot as set initially.
SSID: TimesysZombie-Wifi-{Device wireless MAC address}
Password: admin123
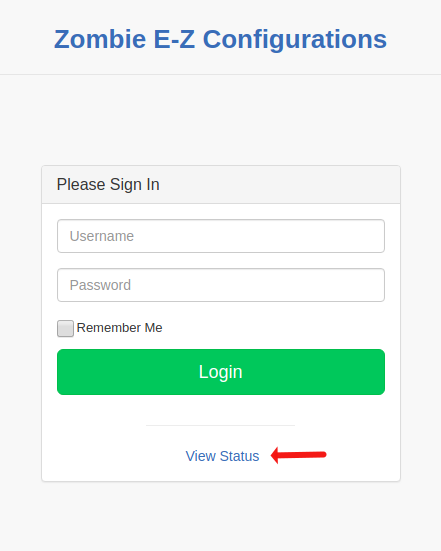
2 Launch Zombie E-Z Config UI with URL 10.10.10.10
3 If logging in for the first time, the default credentials are:
Username: admin
Password: admin123
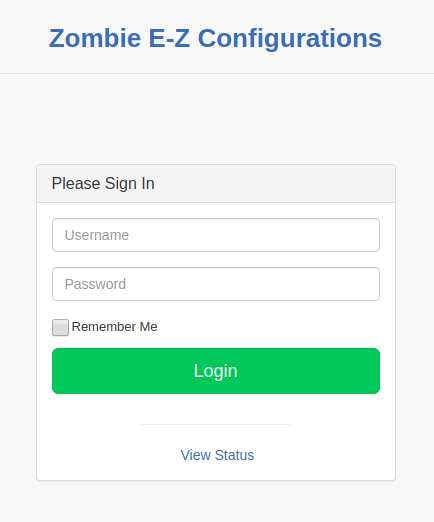
NOTE: Non-admin user can only view details of the page by selecting View Status option
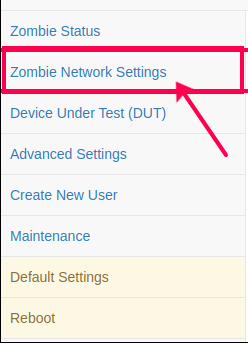
4 Now Click on Zombie Network Settings button
5 Zombie Network Settings page will appear on the screen. Also, the user can change the Zombie Timezone from this page.
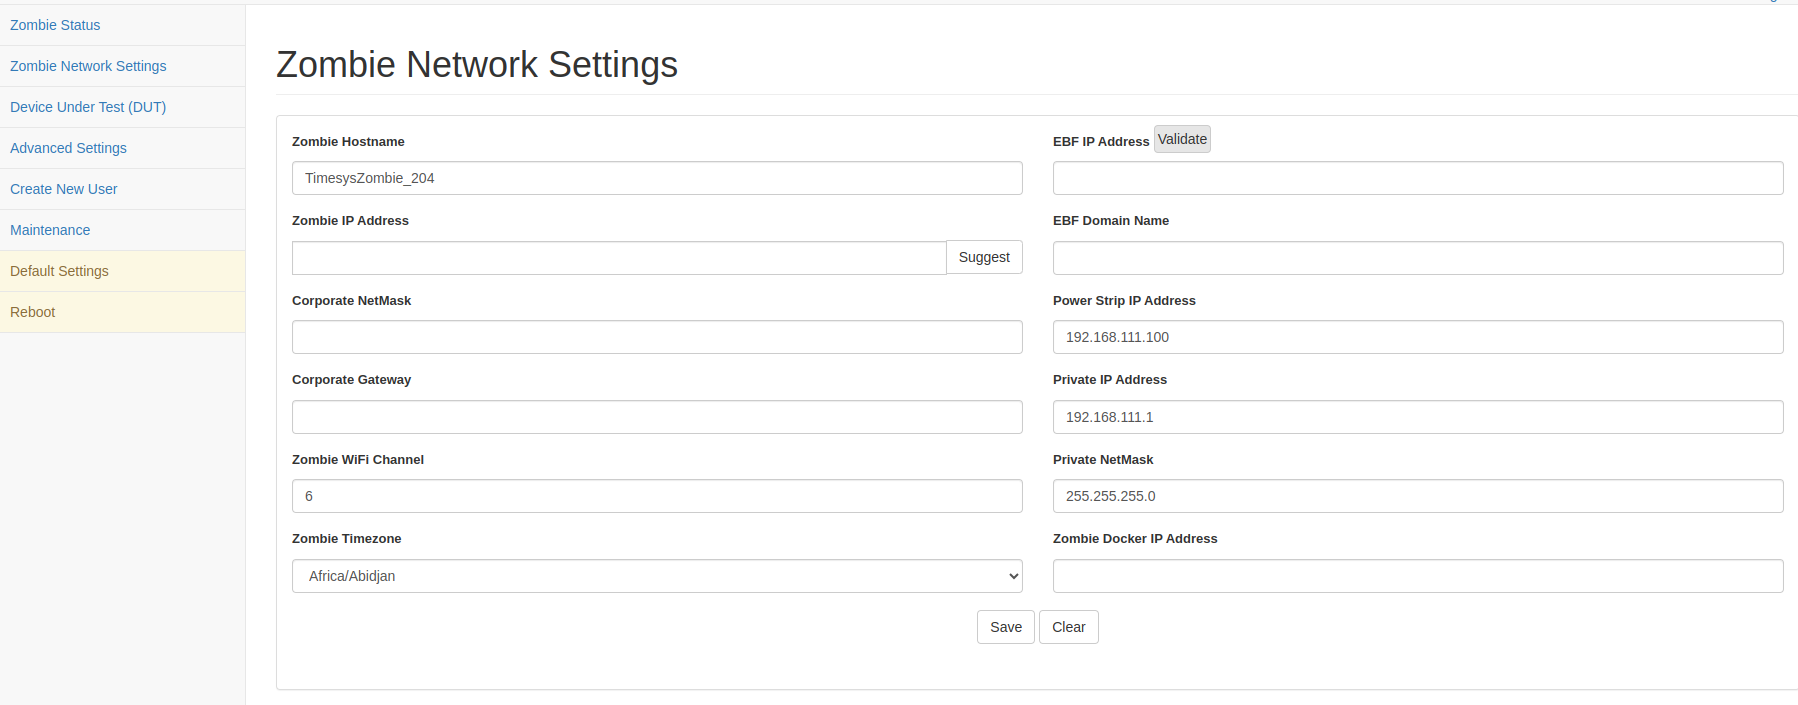
6 On Zombie Network Settings page, change ‘Zombie Hostname’, set ‘Zombie IP Address’ to any available IP Address, set ‘EBF IP Address’, EBF Protocol and input all the other details.
7 Then click on ‘Save’ button.

8 Also from the left navigation, select the page in which the user wants to make any changes.
9 Reboot the Zombie to apply all the changes.
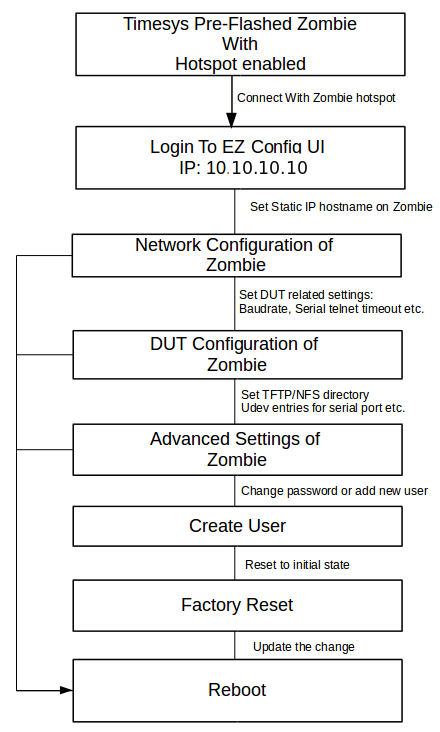
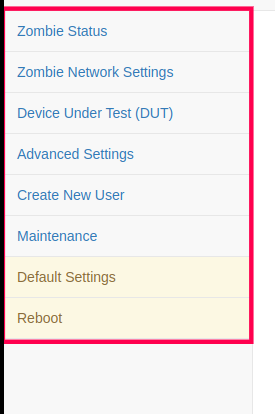
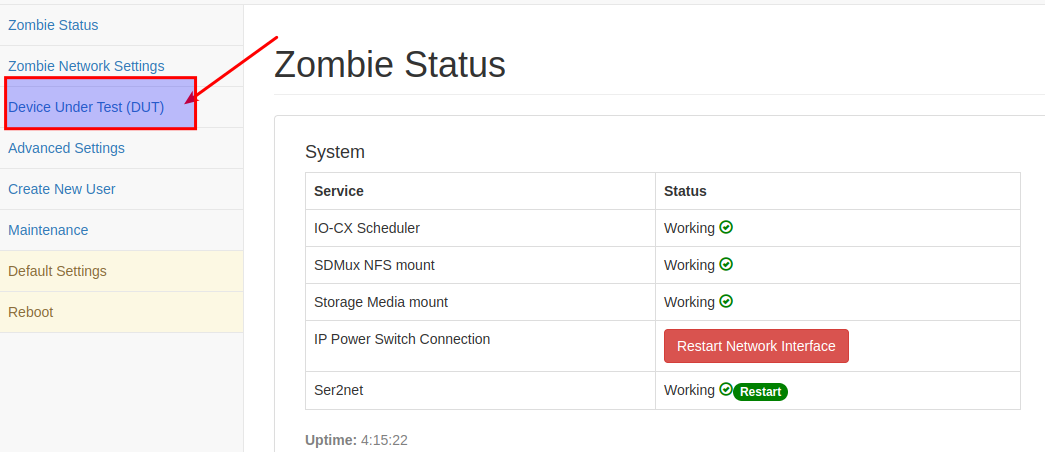
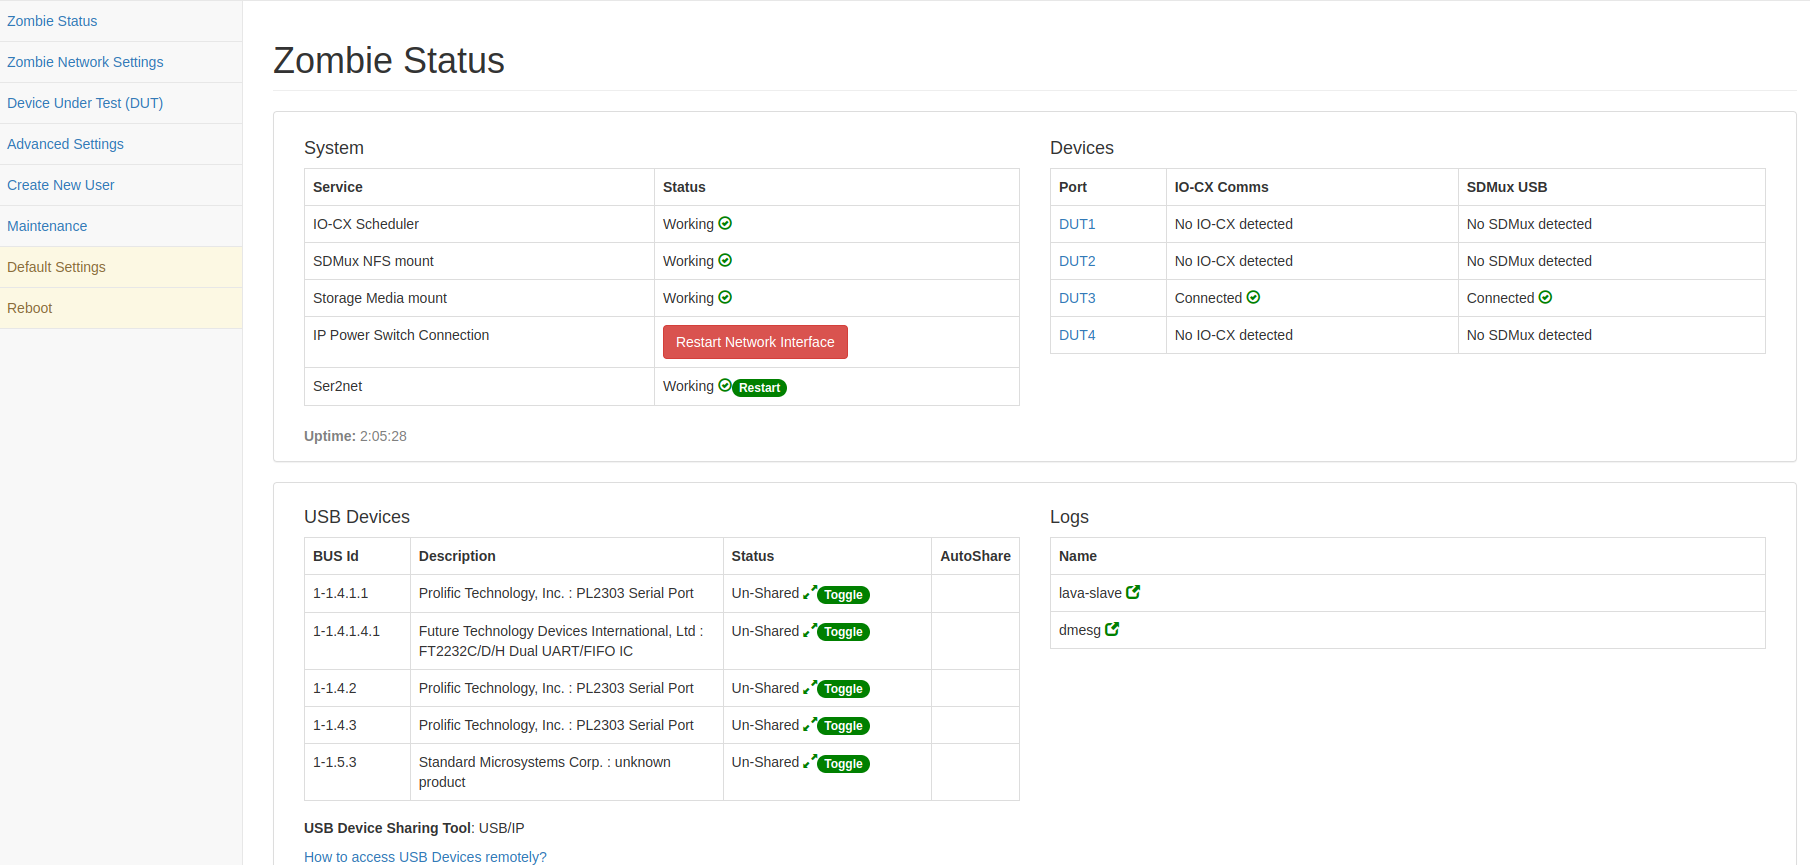
Zombie Status: Displays status of Zombie and connected devices.
Zombie Network Settings: To configure a new Zombie with hostname, Zombie IP address, Gateway IP, Master IP address, refer zombie_network_settings to update Network Settings page.
Device Under Test (DUT): To change the serial settings of a page, refer zombie_dut_settings
Advanced Settings: To change the path for TFTP, NFS directory, udev entries for serial port refer zombie_advanced_settings.
Create New User: Admin user can create a new user by the following steps.
Maintenance: Backup/Import Zombie settings.
Default Settings: Reset Zombie settings to initial shipped-in state.
Reset Password: Admin user can change the password by the following steps.
How to Configure Zombie Private IP Address
Following are the steps to configure zombie private IP address
1 Login to the zombie-ez-config page through a web browser using user credentials.
Username: <Username>
Password: <Password>
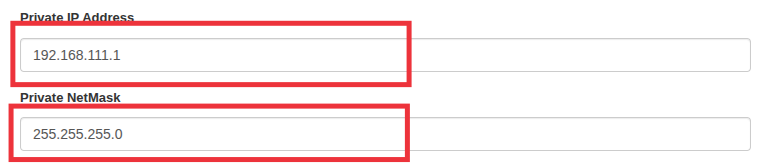
2 Go To zombie-ez-config -> Network Settings
3 Edit the Zombie Private IP address and Netmask.
IP Address Assignment Guideline: The Zombie Private IP address must be assigned the first IP address of its designated private subnet.
Example:
If the subnet is 192.168.111.0/24, then: * Zombie IP address: 192.168.111.1
NOTE: Changing the private IP address of a Zombie will result in the following configuration losses:
All static IP address assignments for DUTs (Devices Under Test) configured on the Zombie will be removed.
All port forwarding rules associated with the previous private IP address will be removed.
4 Click on the Save button and reboot the Zombie.
How to Configure zombie Docker IP
Following are the steps to configure zombie docker IP
1 Login to the zombie-ez-config page through a web browser using user credentials.
Username: <Username>
Password: <Password>
2 Go To zombie-ez-config -> Network Settings
3 Edit the zombie docker IP
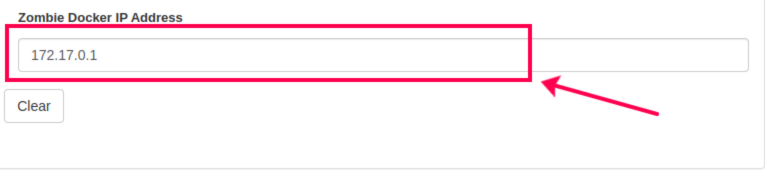
4 Click on the Save button and reboot the Zombie.
How to configure the device’s multiple serial consoles
To configure device multiple serial consoles setup the Following
1 Hardware Connection
2 Zombie Configuration
3 EBF Configuration
Hardware Connection
1 First, connect a USB hub/Mux with one of the serial ports of Zombie.
2 Once the Hub/Mux is connected then you can connect your DUT serial consoles to this hub.
Zombie Configuration
1 Login to the zombie-ez-config page through a web browser using user credentials.
Username: <Username>
Password: <Password>
2 Click on the “Device Under Test” button located on the left side of the zombie-ez-config page.
3 Select the DUT options that you want to configure, In our case we connect the hub on port-1 so we select DUT1 Option on the “Device Under Test” page.
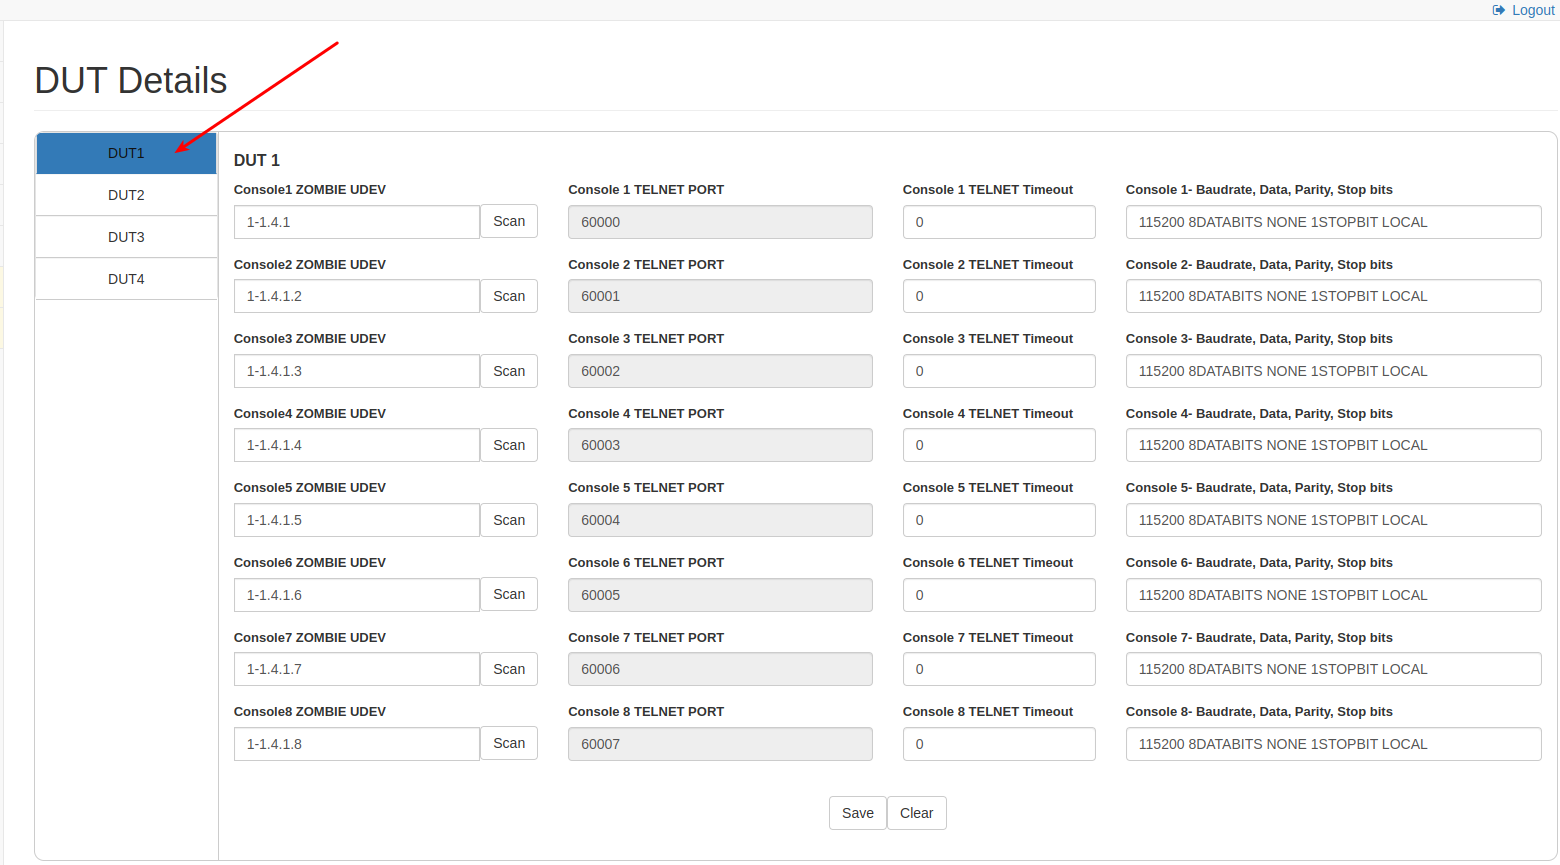
4 Now under the DUT1 section, you can configure a maximum of 8 device consoles and you have to set udev-rules for each device connected to the hub.
5 To configure the device for console-1, click on the “scan” button, it will show all the device’s udev-rules connected physically/logically to port-1.
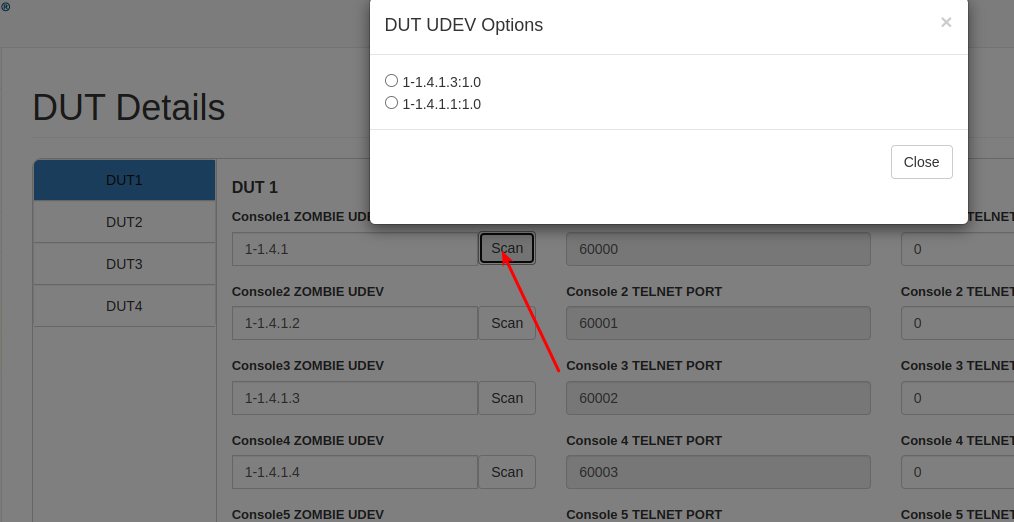
6 Select the rules for console-1 and similarly do the same for all other console devices.
7 Save these settings and reboot the Zombie
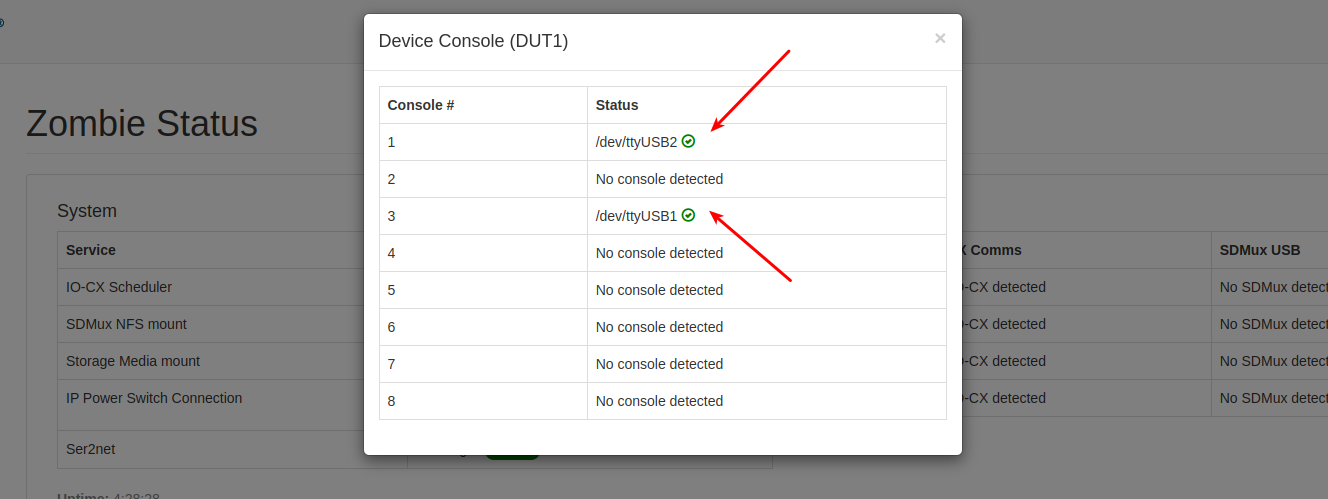
8 Once rebooted you can check the console status from the zombie-ez-config status page.
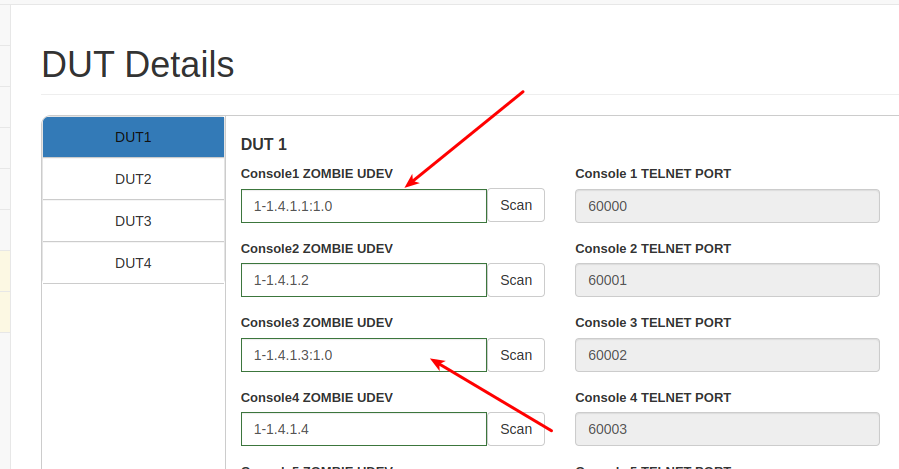
NOTE Two udev-rules should not be the same and if more than one udev-rules qualify for a device then the last one will be applicable.
EBF Configuration
Following are the steps to setup x86 Netboot support
1 Login to the EBF homepage/Dashboard through a web browser with credentials.
Username: <Username>
Password: <Password>
2 Select the ‘Edit Device’ option from the ‘Devices’ drop-down list on the EBF dashboard to edit Device details.
3 Select Device from the drop-down list on the ‘Select Device’ page to edit Device details.
4 ‘Manage Device ’ page will appear on the screen. Edit device details.
5 Click on the ‘Show Advanced Options’
6 select the option No. of Console(s). Set any value 1-8. The default is 1.
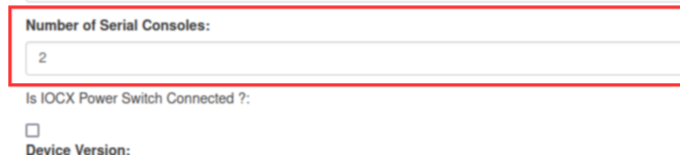
7 After selecting number of serial console. Click on submit button to save the configuration
How to configure the device’s serial consoles name
Zombie Configuration
1 Login to the zombie-ez-config page through a web browser using user credentials.
Username: <Username>
Password: <Password>
2 Click on the “Device Under Test” button located on the left side of the zombie-ez-config page.
3 Select the DUT options that you want to configure, In our case we connect the hub on port-1 so we select DUT1 Option on the “Device Under Test” page.
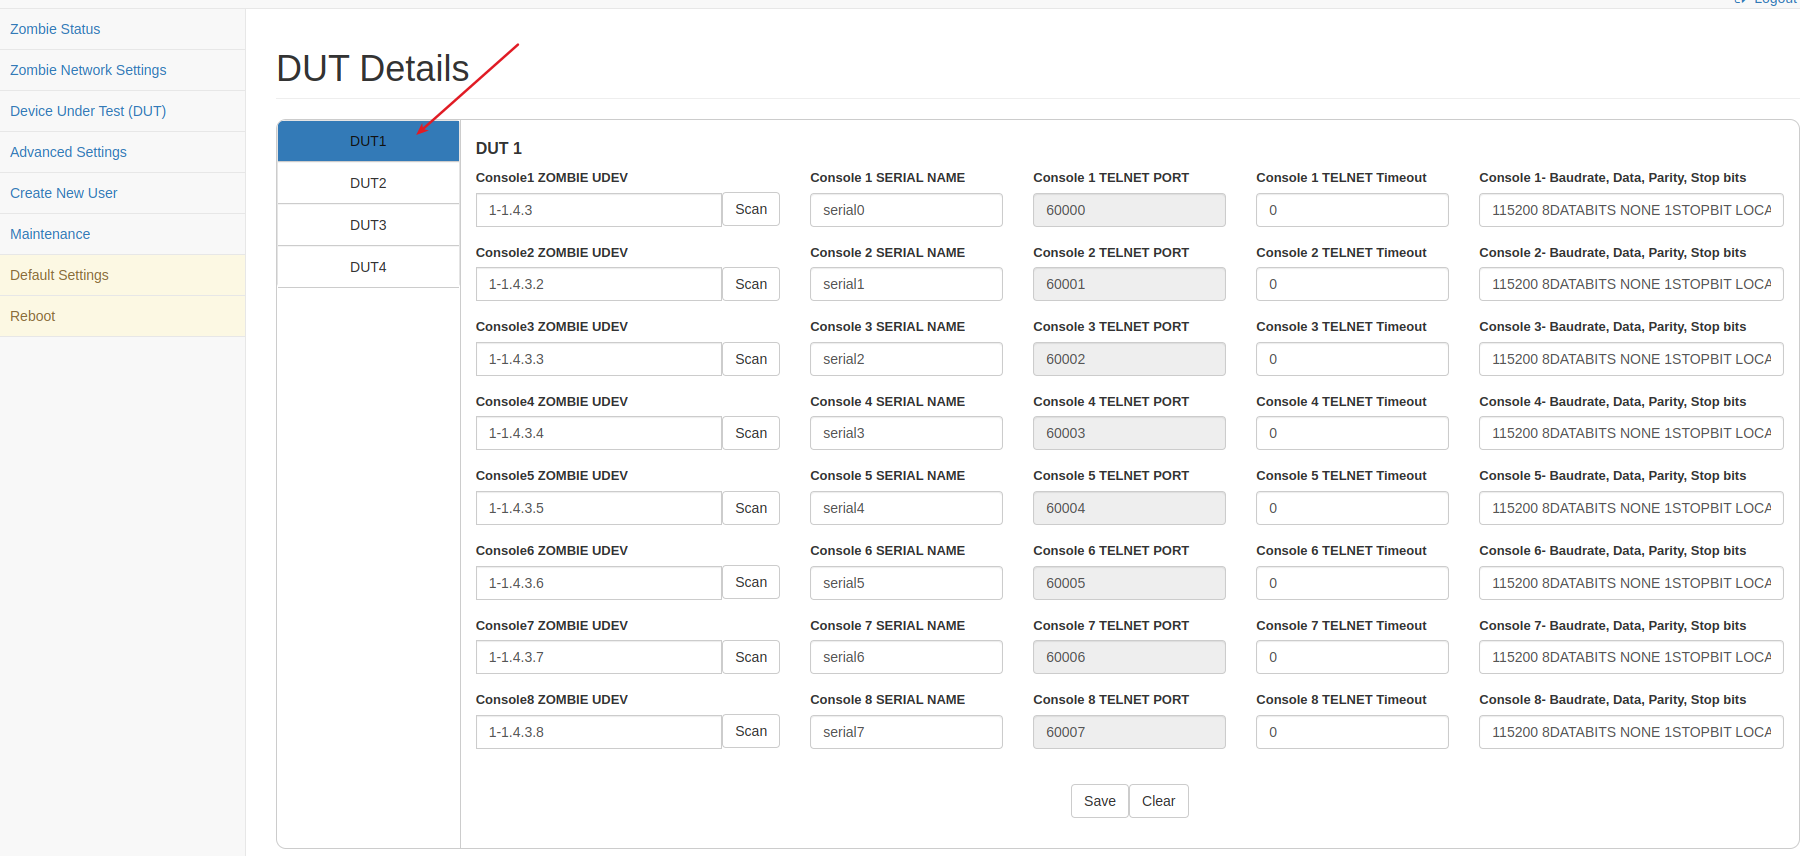
4 Now under the DUT1 section, you can configure a maximum of 8 device console names, the default values will be start from serial0 to serial7.
5 To configure the console name for console-1, type console name under “Console 1 SERIAL NAME”.

6 Save these settings and reboot the Zombie
7 Once rebooted you can check the console names from the zombie-ez-config status page.
NOTE Two console’s name should not be the same for a single device.
How to Install APP Zombie
1 APP Zombie image is compressed with 7z compression tool, follow the below steps to install and extract installer files on Linux machine.
sudo apt-get install p7zip-full
2 Obtain the latest APP-Zombie image, typically included in along with the EBF installer (e.g.: File named APP-Zombie_<version>.img.7z)
LinuxLink users can download the same from: https://linuxlink.timesys.com/bfc/
3 Extract the image from the downloaded files by running the below command:
7z x <file_name>.7z
4 Flash the extracted image into a 32GB sd card.
dd if=./<file_name>.img of=/dev/sdX bs=4M status=progress conv=fsync
After flashing image into SD Card, boot the board using this newly created sd-card and login into APP Zombie E-Z Config with the default username and password to reconfigure the Zombie.
How to Upgrade APP Zombie
1 To maintain the current settings and configurations, users must back up the current APP-Zombie settings before upgrading. Refer How-to-Backup-APP-Zombie-Settings
2 APP Zombie image is compressed with 7z compression tool, follow the below steps to install and extract installer files on Linux machine.
sudo apt-get install p7zip-full
3 Obtain the latest APP-Zombie image, typically included in along with the EBF installer (e.g.: File named APP-Zombie_<version>.img.7z)
LinuxLink users can download the same from: https://linuxlink.timesys.com/bfc/
4 Extract the image from the downloaded files by running the below command:
7z x <file_name>.7z
5 Flash the extracted image into a 32GB sd card.
dd if=./<file_name>.img of=/dev/sdX bs=4M status=progress conv=fsync
6 After flashing image into SD Card, boot the board using this newly created sd-card and login into APP Zombie E-Z Config with the default username and password to reconfigure the APP Zombie.
7 And to restore APP Zombie settings to the last saved configuration import the backup
How to remote Upgrade APP Zombie
Note: App Zombie versions 2025.06 and earlier are not allowed for remote upgrade to app zombie version 2025.07 or higher.
1 Login to the EBF homepage/Dashboard through a web browser with credentials.
Username : <username>
Password : <password>
2 This would open up EBF Dashboard.
3 Click on the Zombie and select Zombie workers
4 It will open the Worker page where all the zombies are listed
5 Now click on APP Zombie remote upgrade button to upgrade the APP Zombie

6 EBF will start upgrading the APP zombie
7 After the zombie Upgrade the button will disappear

How to configure APP Zombie through APP-Zombie E-Z Config
Following are the steps to start Hotspot part for APP-Zombie E-Z Config application:
1 Connect to wireless hotspot as set initially.
SSID: TimesysAPP-Wifi-{Device wireless MAC address}
Password: admin123
2 Launch APP-Zombie E-Z Config UI with URL 10.10.10.10
3 If logging in for the first time, the default credentials are:
Username: admin
Password: admin123
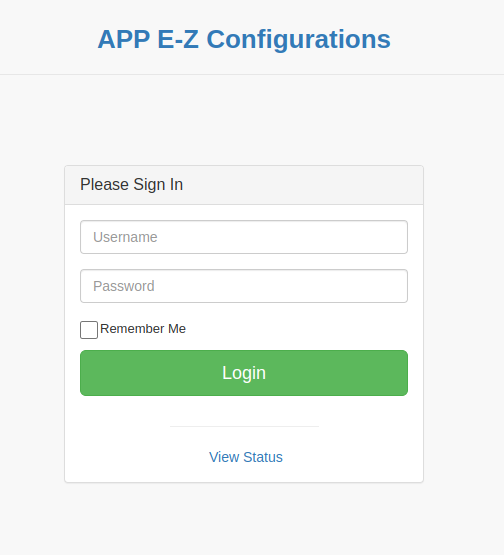
NOTE: Non-admin user can only view details of the page by selecting View Status option
4 APP Network Settings page will appear on the screen. Also, the user can change the APP-Zombie Timezone from this page.
5 On the App Network Settings page, change ‘APP Hostname’ and set ‘APP IP Address’ to any available IP Address, and input all the other details.
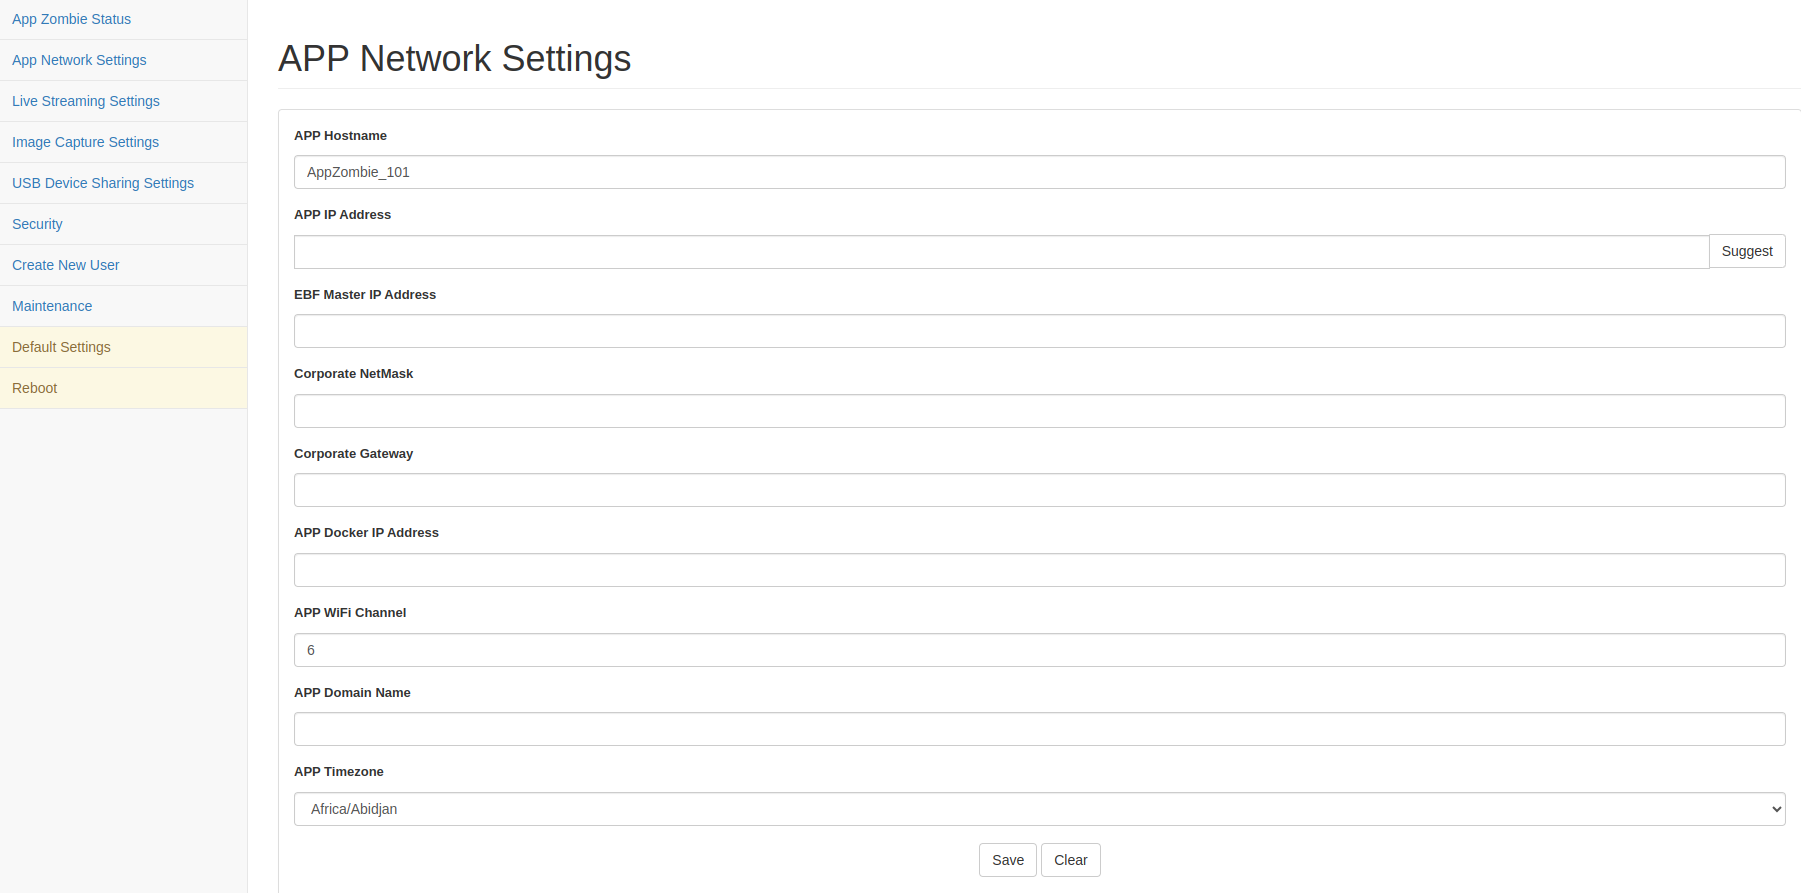
6 Then click on the ‘Save’ button.
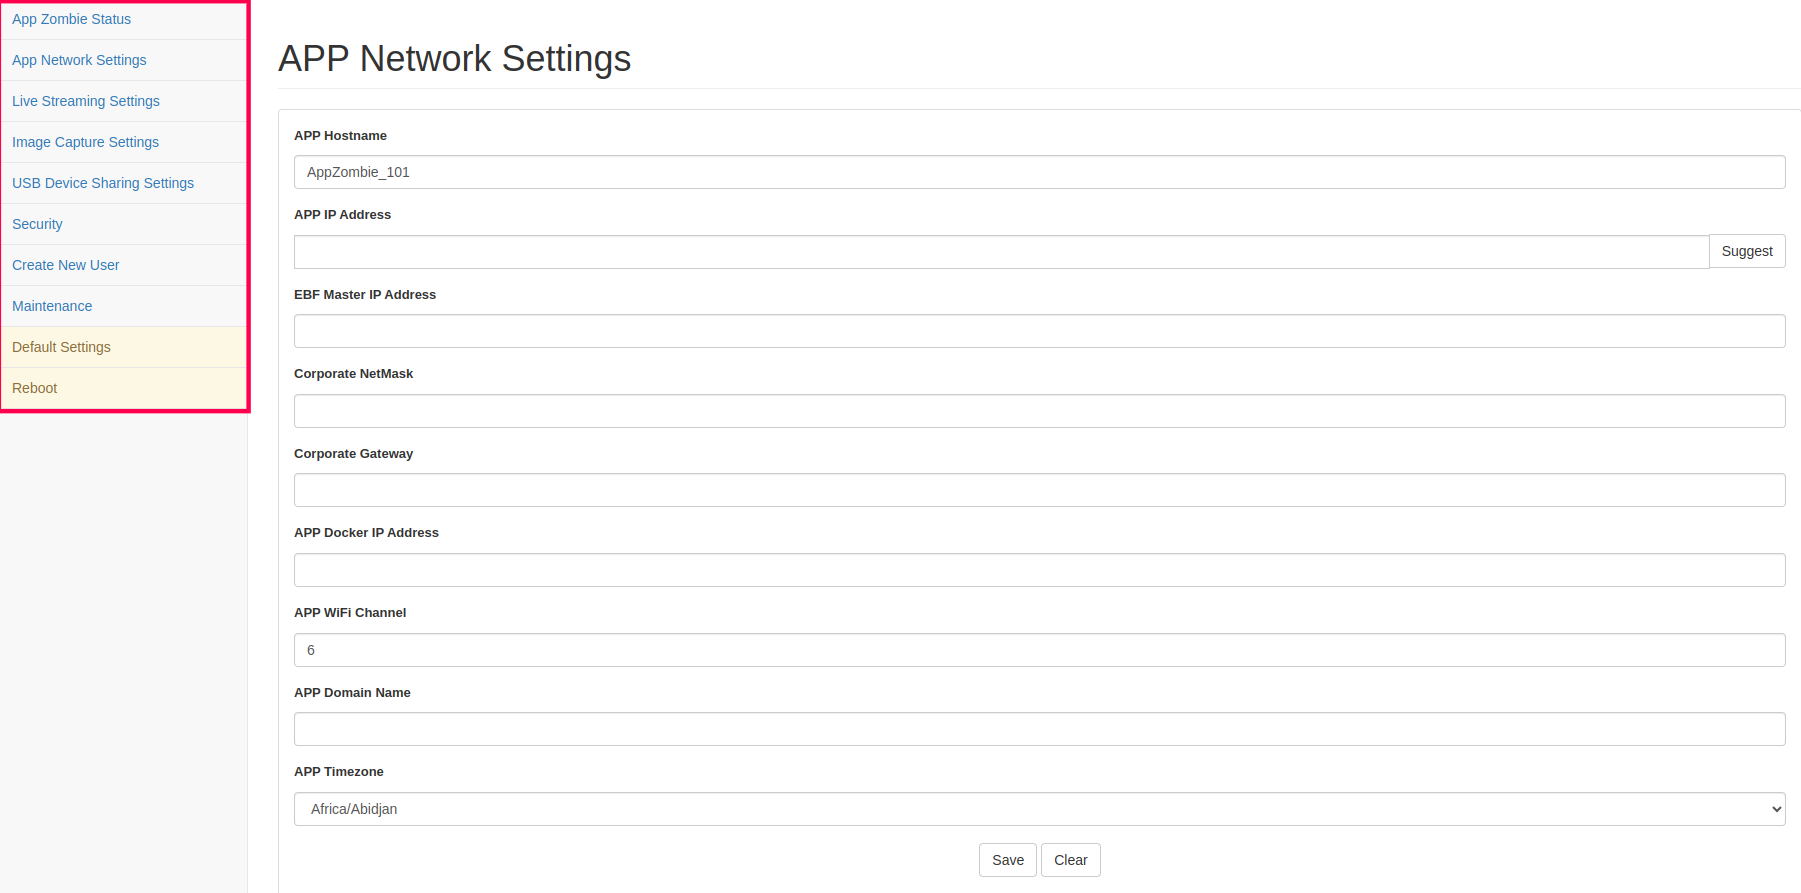
7 From the left navigation, select the page in which the user wants to make any changes.
8 Reboot APP Zombie to apply all the changes.
App Zombie Status: Displays status of App-Zombie and connected devices.
APP Network Settings: To configure a new APP Zombie with hostname, IP address, Gateway IP, Netmask, APP WiFi channel and Timezone.
Live Streaming Settings: Here you can provide the resolution for streaming, the port number on which video will stream and the quality percentage.
Image Capture Settings: Here you can provide the resolution of the image to be captured.
Audio Settings: You can set the port on which the mic is connected.
USB Device Sharing Settings: Here you can switch the USB device sharing tool between USB/IP and USB network gate.
Create New User: Admin user can create a new user.
Maintenance: Backup/Import Zombie settings.
Default Settings: Reset Zombie settings to initial shipped-in state.
Reset Password: Admin users can change the password.
How to Configure APP-Zombie Private IP Address
Following are the steps to configure appzombie private IP address
1 Login to the app-ez-config page through a web browser using user credentials.
Username: <Username>
Password: <Password>
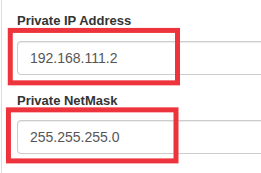
2 Go To app-ez-config -> Network Settings
3 Edit the APP Zombie Private IP address and Netmask.
IP Address Assignment Guideline:
The private IP address of APP-Zombie must be assigned as the next consecutive IP address following the Zombie private IP address.
Example:
Zombie Private IP Address: 192.168.111.1
APP-Zombie Private IP Address: 192.168.111.2
This ensures a logical and consistent IP address assignments for easier identification and management.
4 Click on the Save button and reboot the Zombie.
APP-Zombie Security
Enable HTTPS
Following are the steps to enable HTTPS on APP-Zombie for Secure Video Streaming access:
If you are using EBF over HTTPS, Please upload the SSL key and certificate files here and reboot APP-Zombie to use the USB WebCam Video Streaming feature.
From the local machine terminal, run the following command:
sudo openssl req -newkey rsa:2048 -new -nodes -x509 \
-days 3650 -keyout pad.js.key -out pad.js.crt
Input all the details as asked.
In the field: ‘Common Name (e.g. server FQDN or YOUR name) []:’ ,enter the IP Address of the Zombie set in the previous step.
Now 2 files are generated, namely ‘pad.js.crt’ and ‘pad.js.key’.
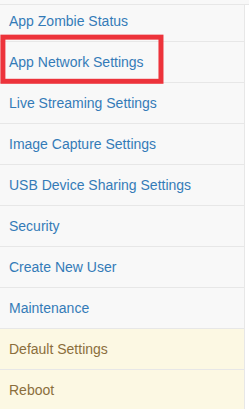
From the left navigation, click on ‘Security’ option.
The APP-Zombie Security page will be shown on the screen.
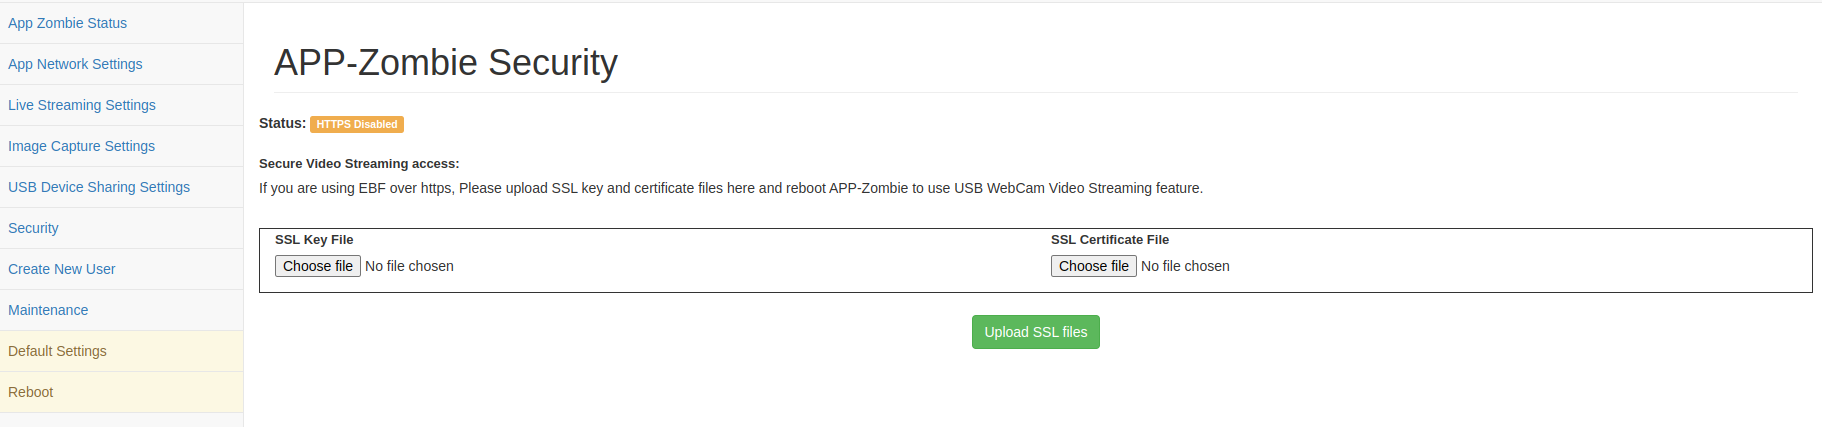
In the ‘SSL Key File’ section, click on the ‘Choose file’ button and upload ‘<file_name>.key’ file.
In the ‘SSL Certificate File’ section, click on the ‘Choose file’ button and upload ‘<file_name>.crt’ file.
After Successful file upload reboot APP-Zombie to use the USB WebCam Video Streaming feature.
How to add a New Zombie on EBF Server

Following are the steps to add a new Zombie on the EBF server:
1 Login to the EBF homepage/Dashboard through a web browser with credentials.
Username : <username>
Password : <password>
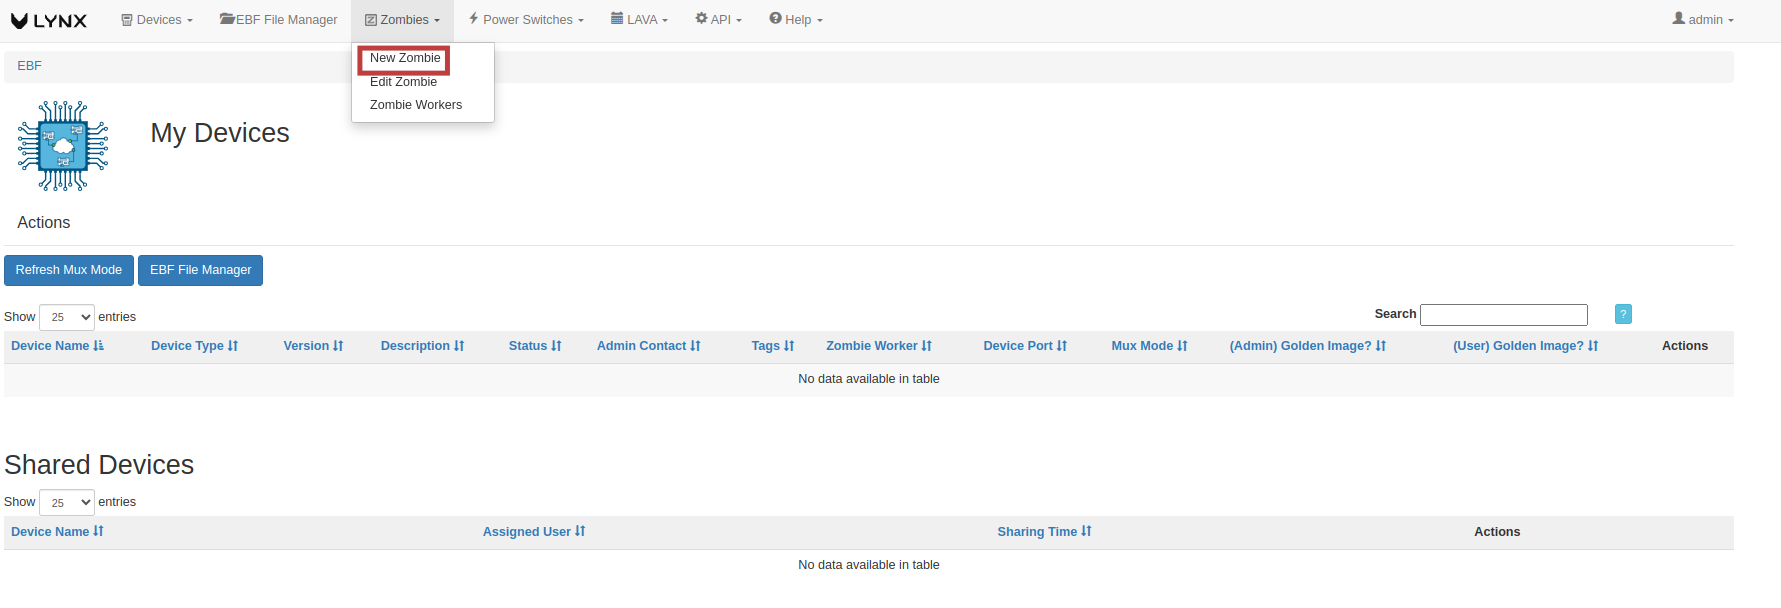
2 EBF Dashboard will appear on the screen.
Select the ‘New Zombie’ option from the ‘Zombies’ drop-down list.
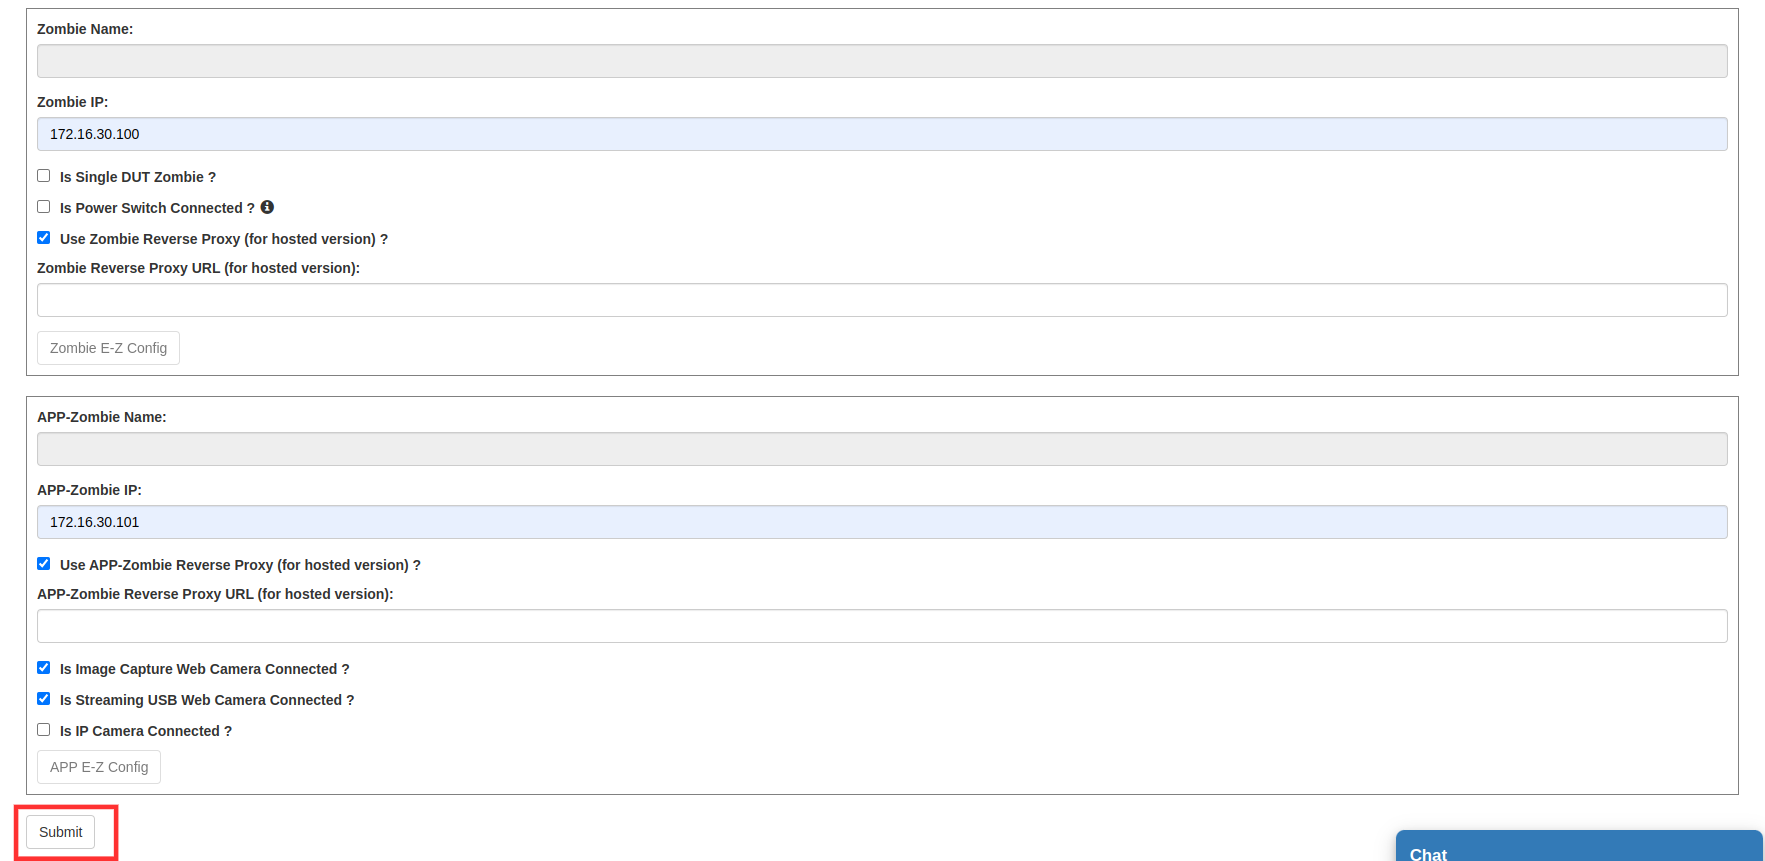
3 ‘Add New Zombie’ page will appear on the screen.

4 Fill in the necessary fields available on the screen.
Zombie IP: <Zombie Corporate IP>
App Zombie IP: <App Zombie Corporate IP>
5 After entering the details, click on the ‘Submit’ button.
NOTE: Tick the Is Image Capture Web Camera Connected ? checkbox if a camera is connected to the AppZombie (Optional).
NOTE: Tick the Is Streaming USB Web Camera Connected ? checkbox if a camera is connected to the AppZombie (Optional).
NOTE: Tick Use Zombie Reverse Proxy (for hosted version) ? if reverse proxy configured (Optional).
NOTE: Tick Use Use APP-Zombie Reverse Proxy (for hosted version) ? if reverse proxy configured (Optional).
6 Give Zombie Reverse Proxy URL (for hosted version): if reverse proxy is setup.
7 Give APP-Zombie Reverse Proxy URL (for hosted version): if reverse proxy is setup.
8 A confirmation message will be displayed on the screen to confirm that a new Zombie has been added.

How to edit details of an existing Zombie
Following are the steps to edit the details of added Zombie on EBF server:
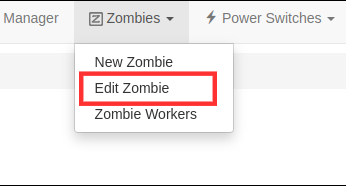
1 Click on the Edit Zombie option from the Zombies drop-down list on EBF Dashboard to edit Zombie details.
2 Select the Zombie from drop-down list on the Select Zombie page to edit Zombie details.

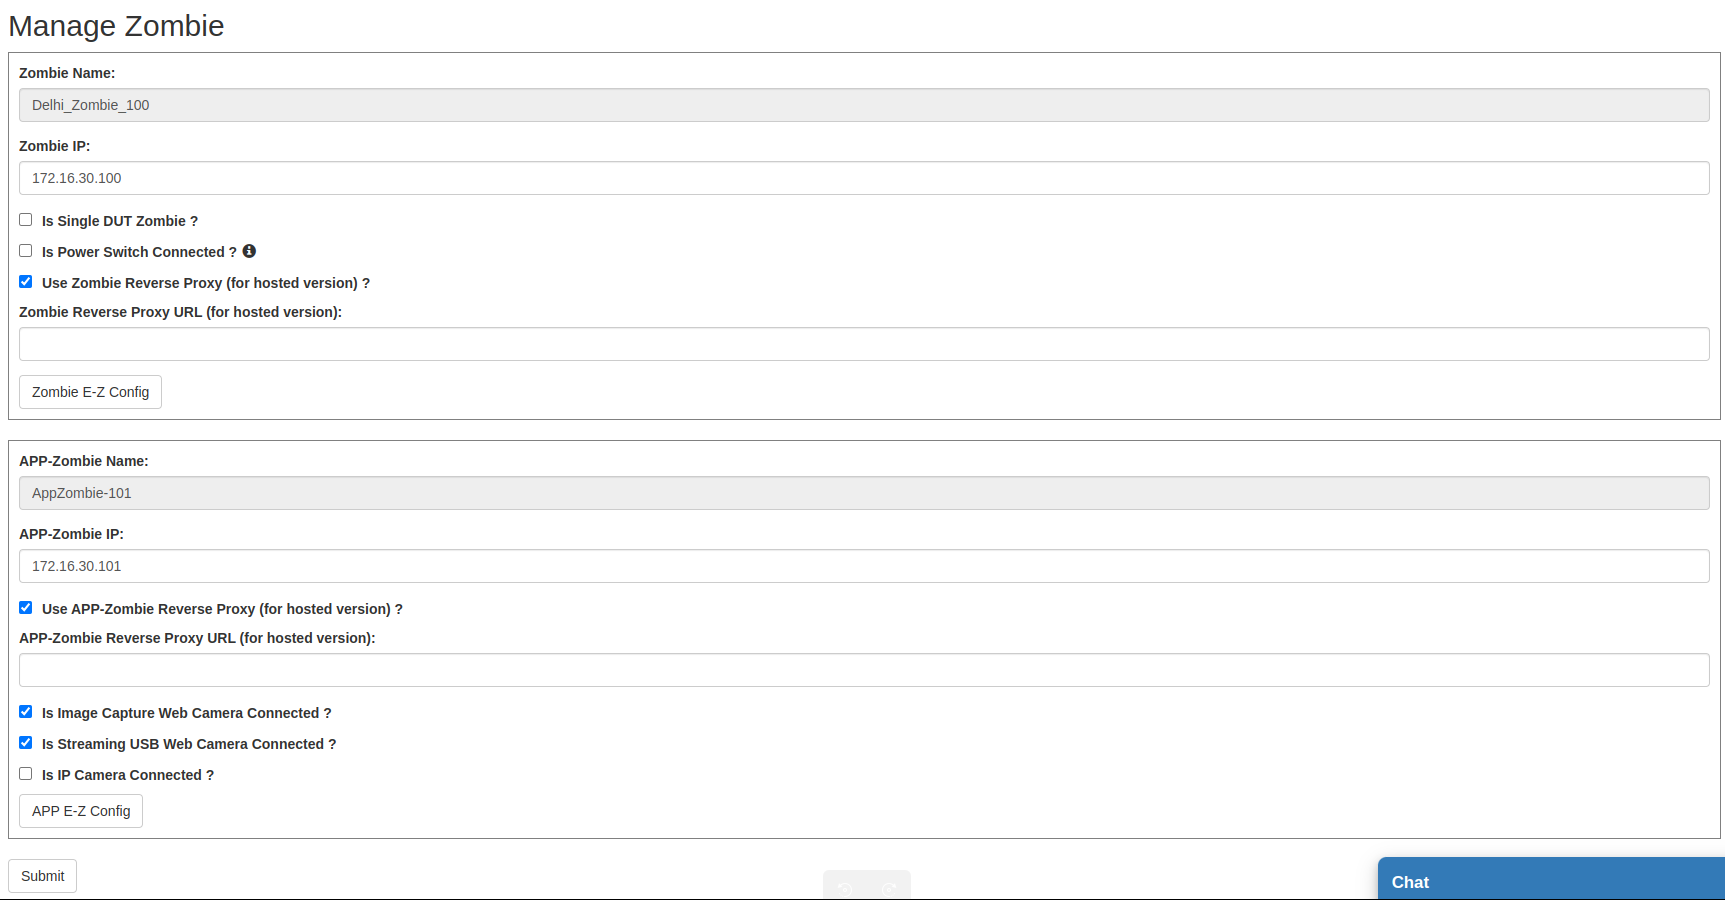
3 Manage Zombie page will appear on the screen. Edit the Zombie details and click on the Submit button.
NOTE: Tick the web-cam checkbox, if a camera is connected to the AppZombie (Optional).
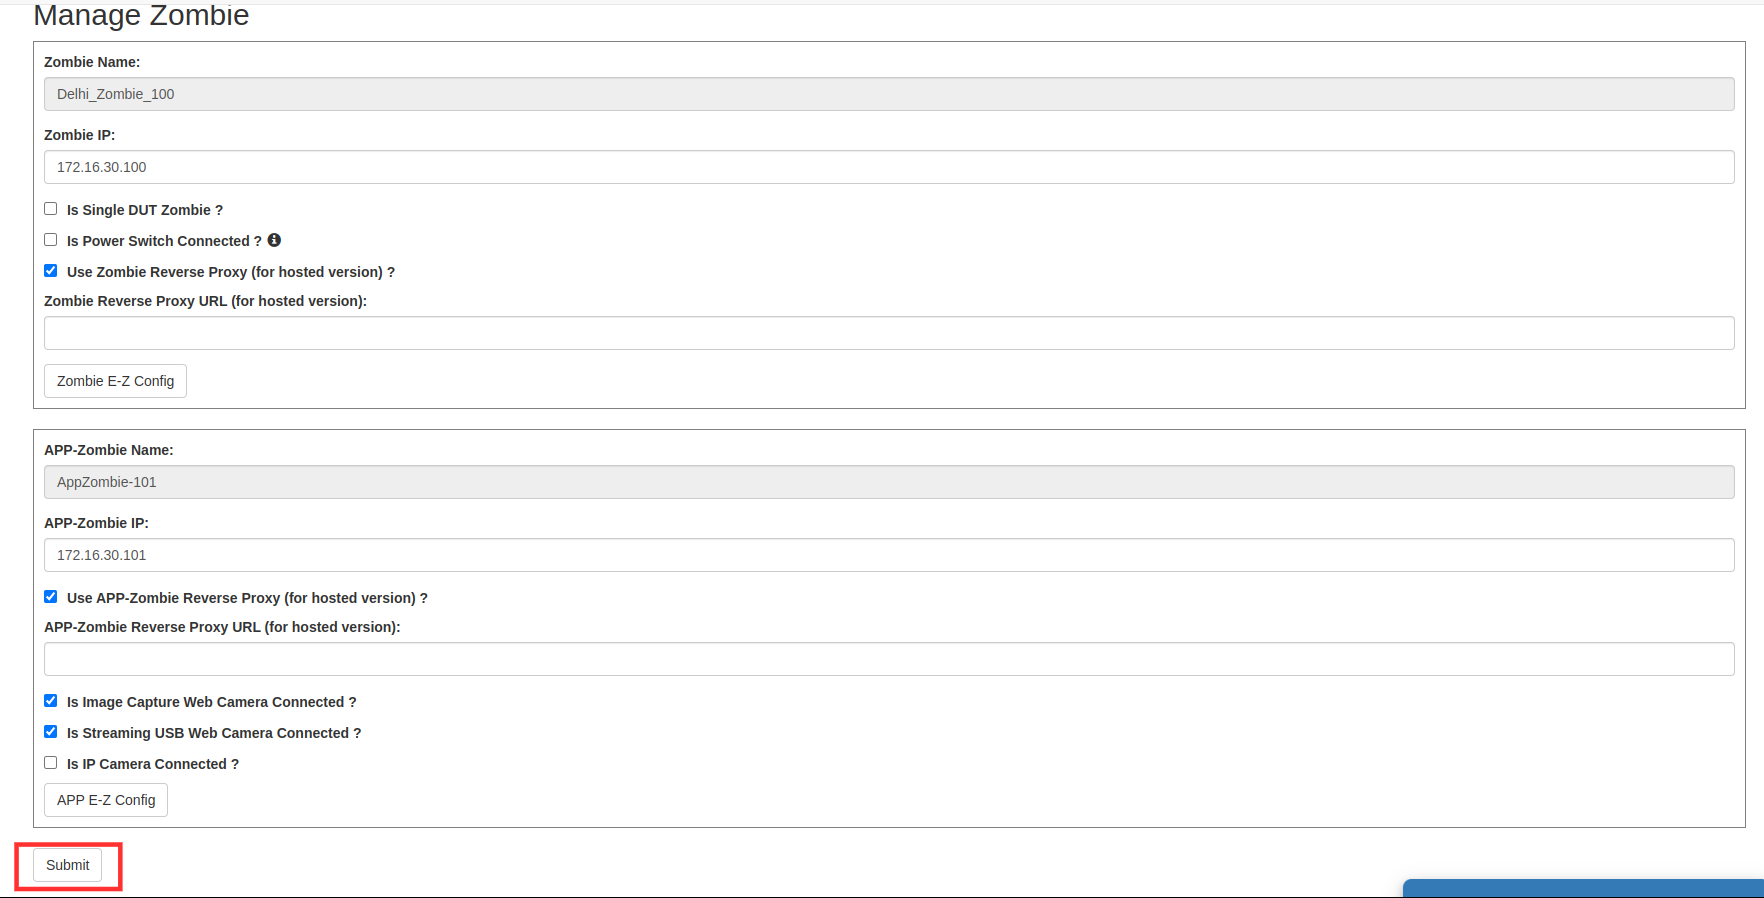
4 A confirmation message of updated Zombie details will be displayed on the screen.

How to Power Control the Zombie
Following are the steps to Add Zombie Power Switch on EBF:
First, Add the Power Switch on the EBF Server.
To see, How to Add Power Switch, Please Refer Link
1 After adding the power switch on the EBF-Server, Connect the zombie main power to the Power switch configured.
2 Go to Zombies -> Edit Zombie
3 Select the Zombie you want to edit

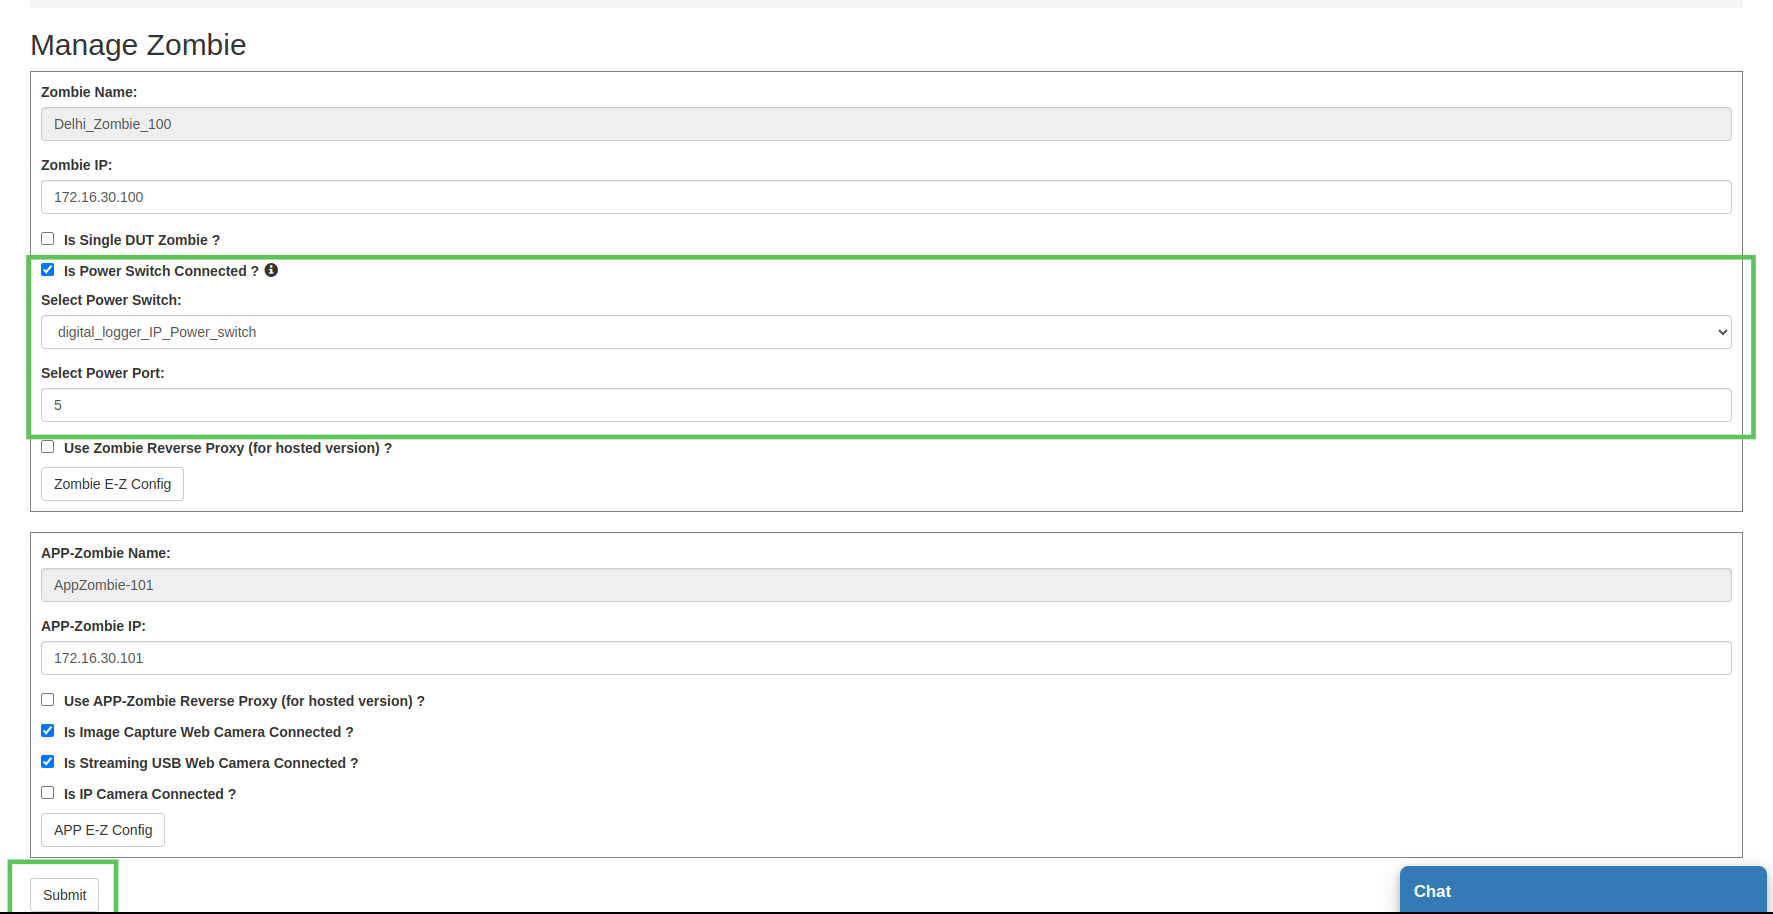
4 On Manage Zombie page, Check the checkbox (Is Power Switch Connected)
5 Select Power Switch
6 Select Power Port on which zombie power is connected.
7 After filling all the details, click on the ‘Submit’ button.
8 On successful updation of zombie, a successful message will appear on the screen.

9 Now, Go to Zombies -> Zombie Workers
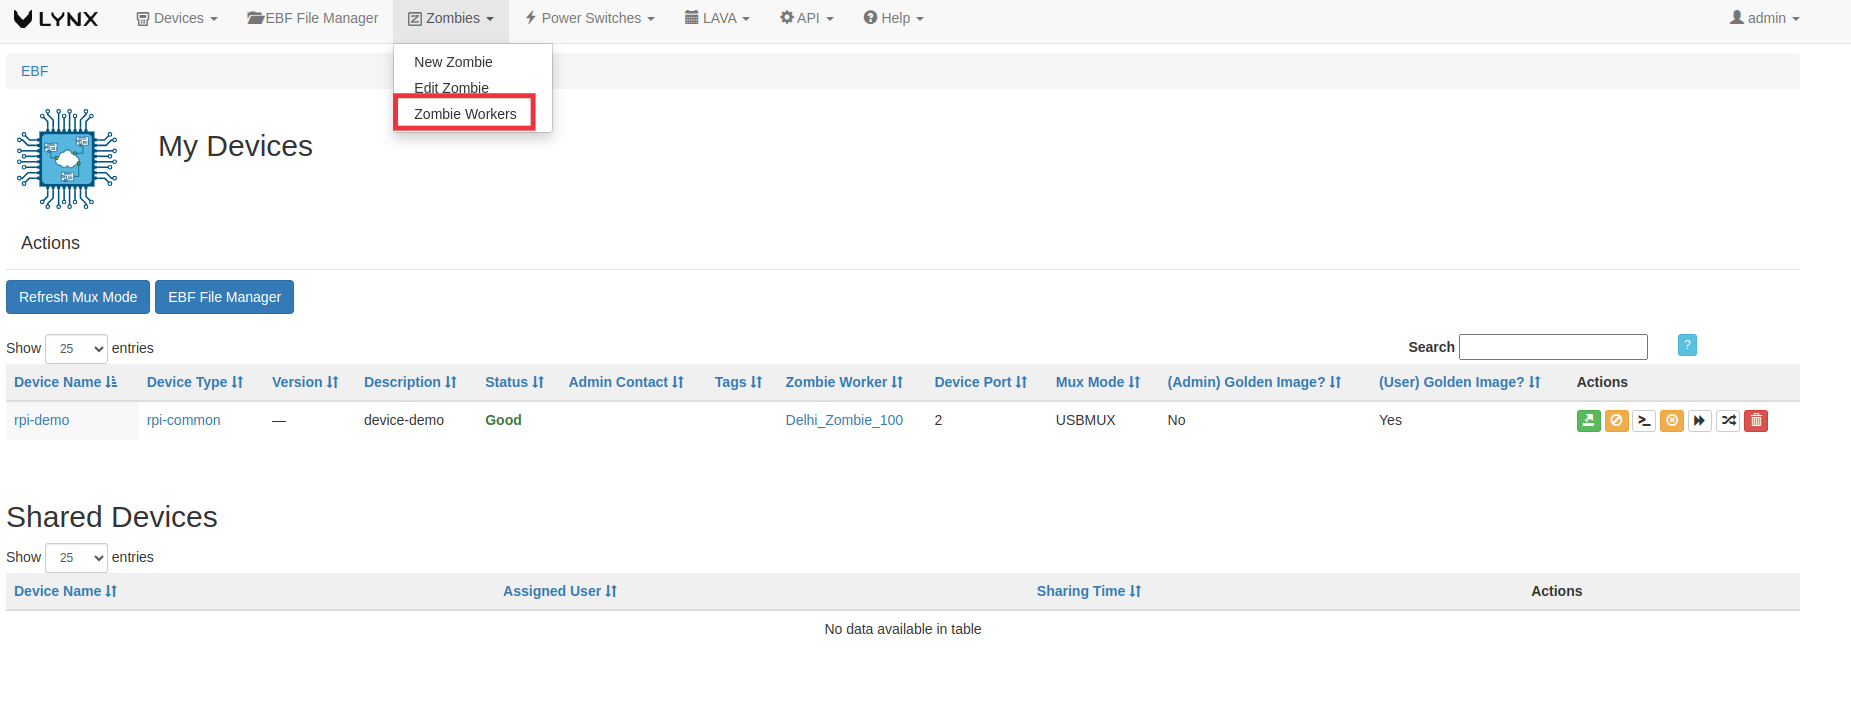
10 Power control(ON,OFF), power switch configure and power status options are visible to the corresponding zombie, on which you have added power switch.

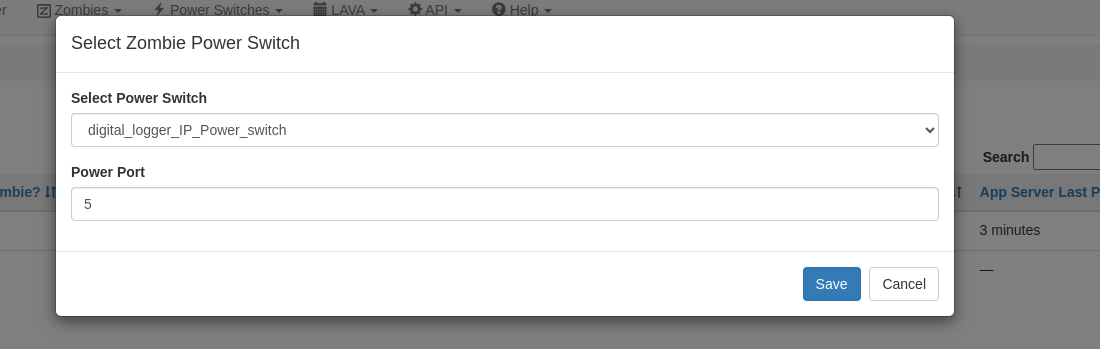
11 To Configure power switch for zombie, Select the Power Switch and Power Port.
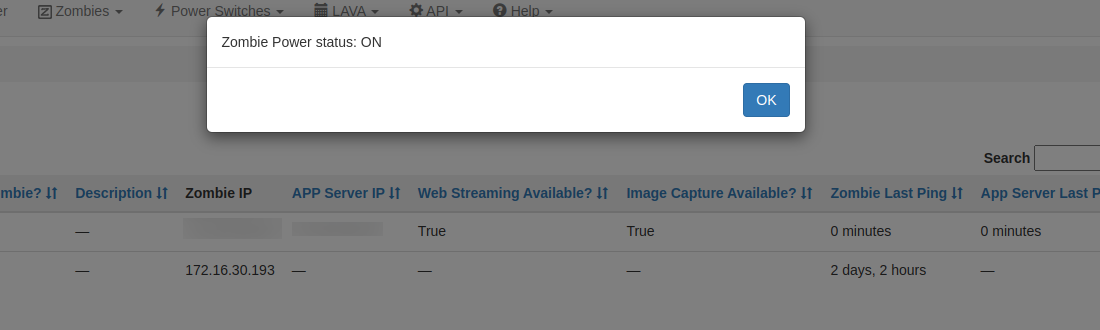
12 To Check the power status of the Zombie. ‘Click on the ‘Check power status of the zombie’ option
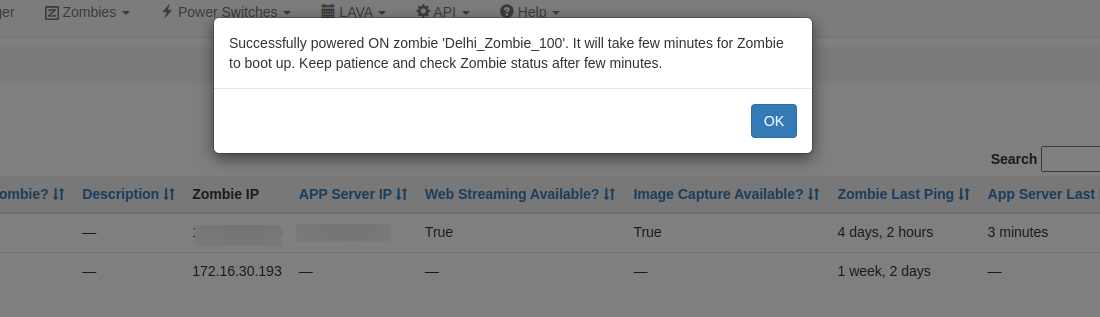
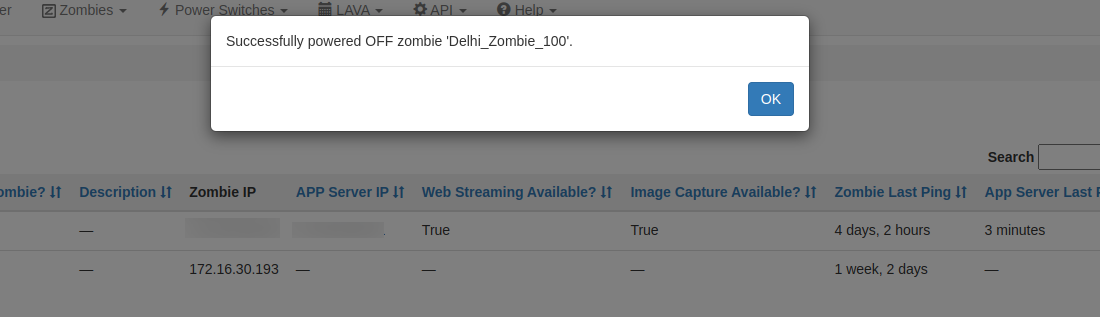
13 To Power ‘ON’ the Zombie, Click on the power on option.
14 To Power ‘OFF’ the Zombie, Click on the power off option.
How to Delete an existing Zombie
Following are the steps to delete an existing Zombie on EBF server:
1 Click on the ‘Zombie Workers’ option from the ‘Zombies’ drop-down list on EBF Dashboard to delete an existing zombie.
2 Select the Zombie from Zombie workers list to delete the zombie.

3 Click on the delete icon of the corresponding zombie, you want to delete.

Launch Zombie E-Z Config application
The following are the ways to launch the Zombie E-Z Config application:
1 Click on the ‘Edit Zombie’ option from the ‘Zombies’ drop-down list on EBF Dashboard to edit Zombie details.
2 Select the Zombie from the drop-down list on the ‘Select Zombie’ page to launch the Zombie E-Z config application of that Zombie.
3 ‘Manage Zombie’ page will appear on the screen.
4 Click on the ‘Launch Zombie E-Z Config’ button. In the new tab, the user is directed to the Zombie E-Z Config application of the selected Zombie.
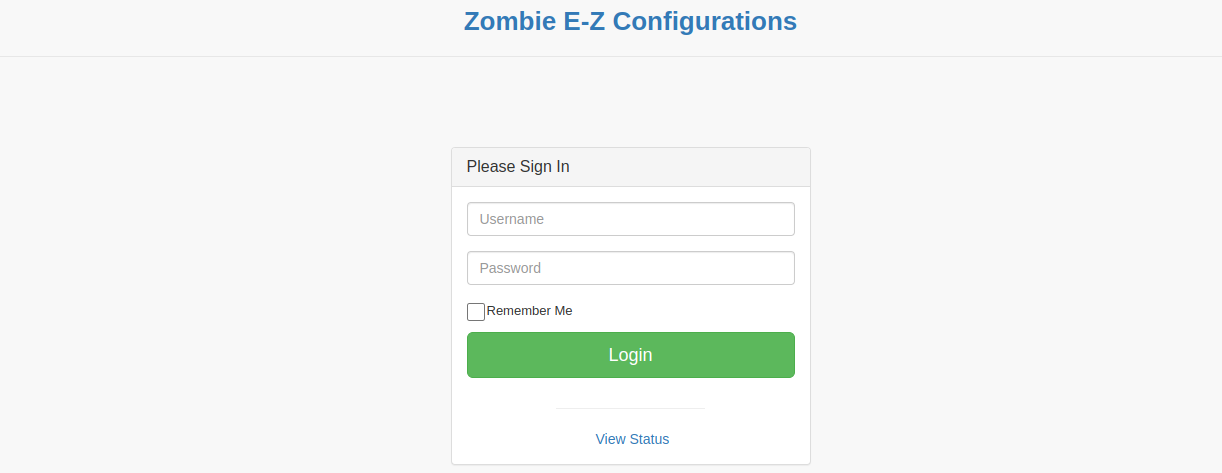
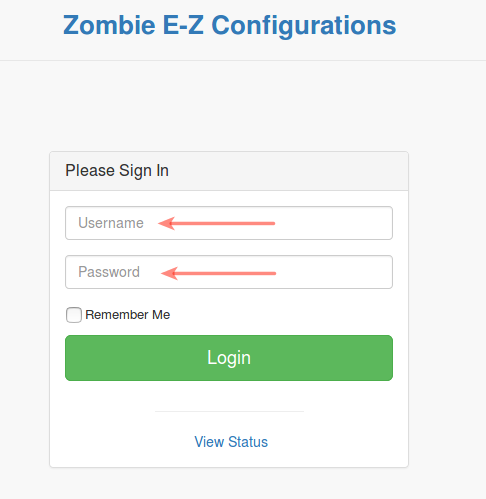
5 Enter Username and Password and select the Login button to login to the Zombie E-Z Config application.
OR
One can also “Launch Zombie E-Z config Application” from the Zombie workers page.
The following are the steps to launch the Zombie E-Z Config application:
1 Click on the ‘Zombie Worker’ option from the ‘Zombies’ drop-down list on EBF Dashboard to edit Zombie details.
2 After reaching the Zombie workers page. Click on any zombie name to reach to the particular zombie worker page.

3 From the selected Zombie workers page. Click on ‘Zombie E-Z Config’ to reach the Zombie status page.
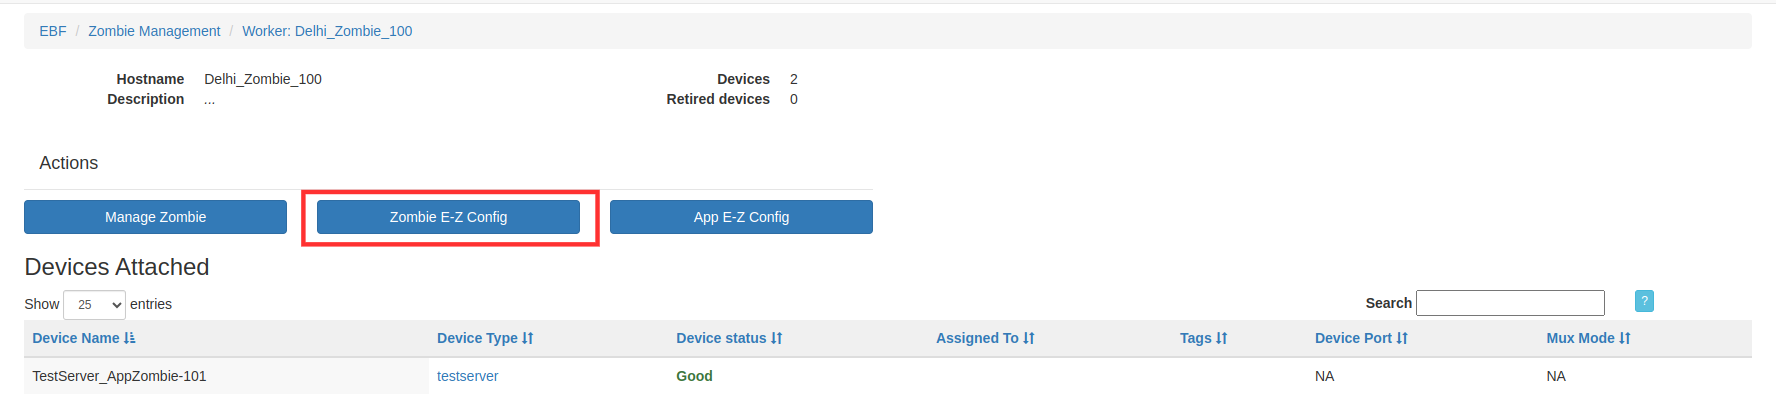
4 From the Zombie status page. click on the arrow button to launch the Zombie E-Z Config application.
5 Enter Username and Password and select the Login button to login to the Zombie E-Z Config application.
How to add SSH Zombie on EBF Server
SSH-Zombie feature provides the capability to use any General purpose machine as a Zombie with limited functionality.
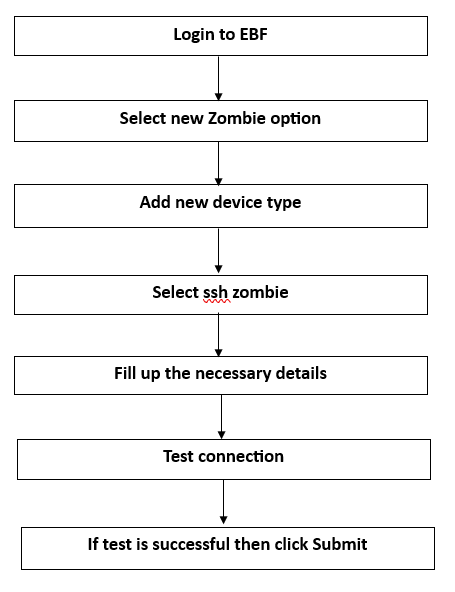
Following are the steps to add SSH Zombie on the EBF server:
1 Login to the EBF homepage/Dashboard through a web browser with credentials.
Username : <username>
Password : <password>
2 EBF Dashboard will appear on the screen.
3 Select the ‘New Zombie’ option from the ‘Zombies’ drop-down list.
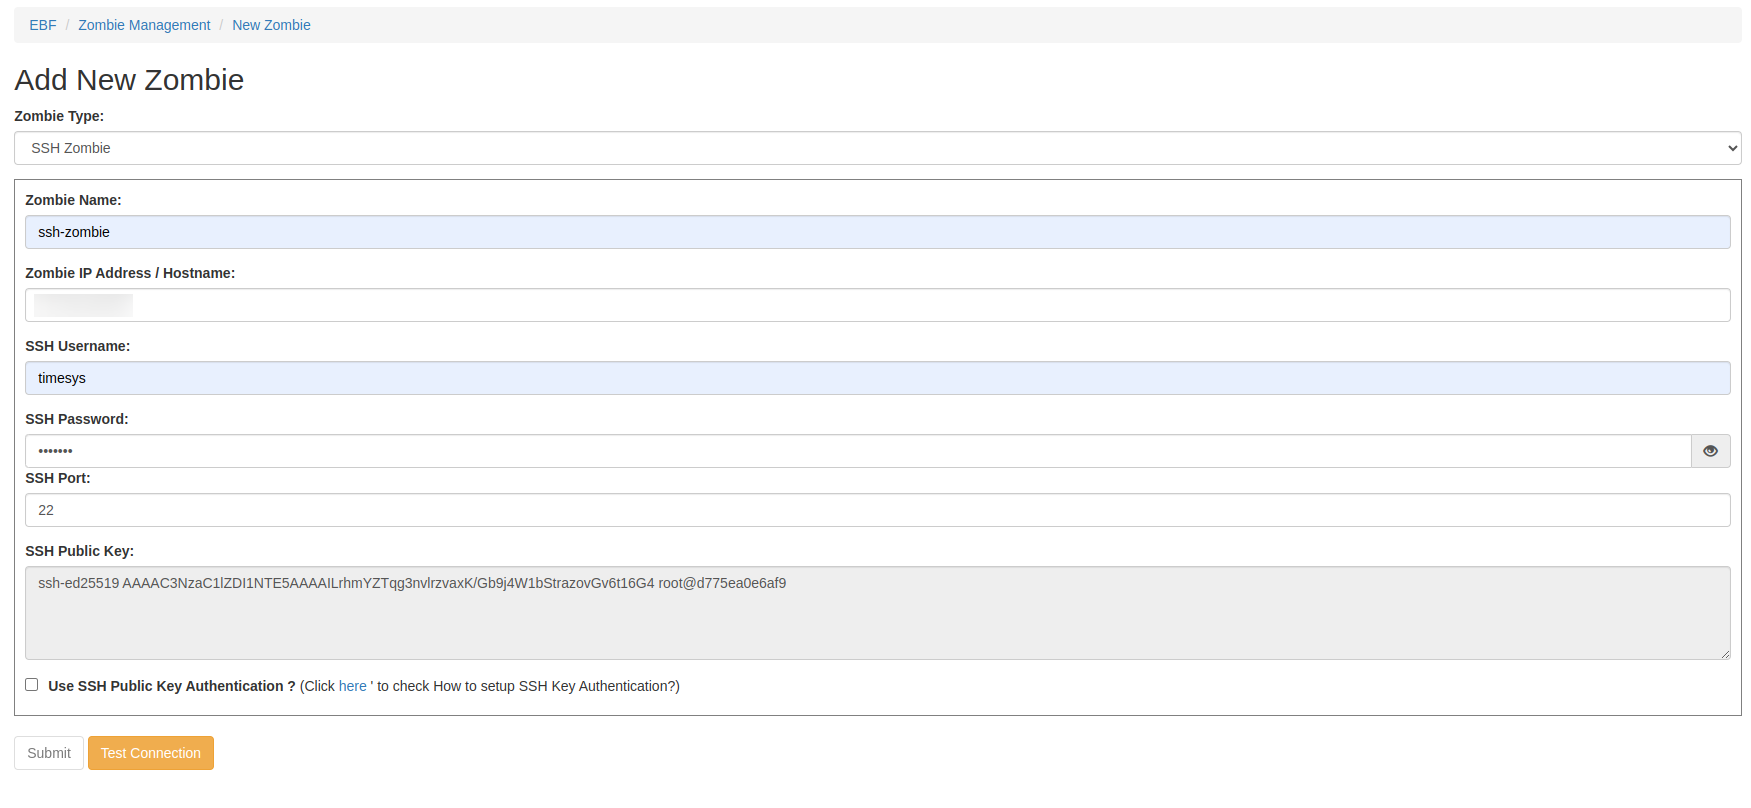
4 ‘Add New Zombie’ page will appear on the screen. Select SSH Zombie from the drop down.

5 Fill in the necessary fields available on the screen.
Name, IP address/Hostname, SSH Username, SSH Password, SSH port of your machine that is going to add as a SSH-Zombie.
OR:
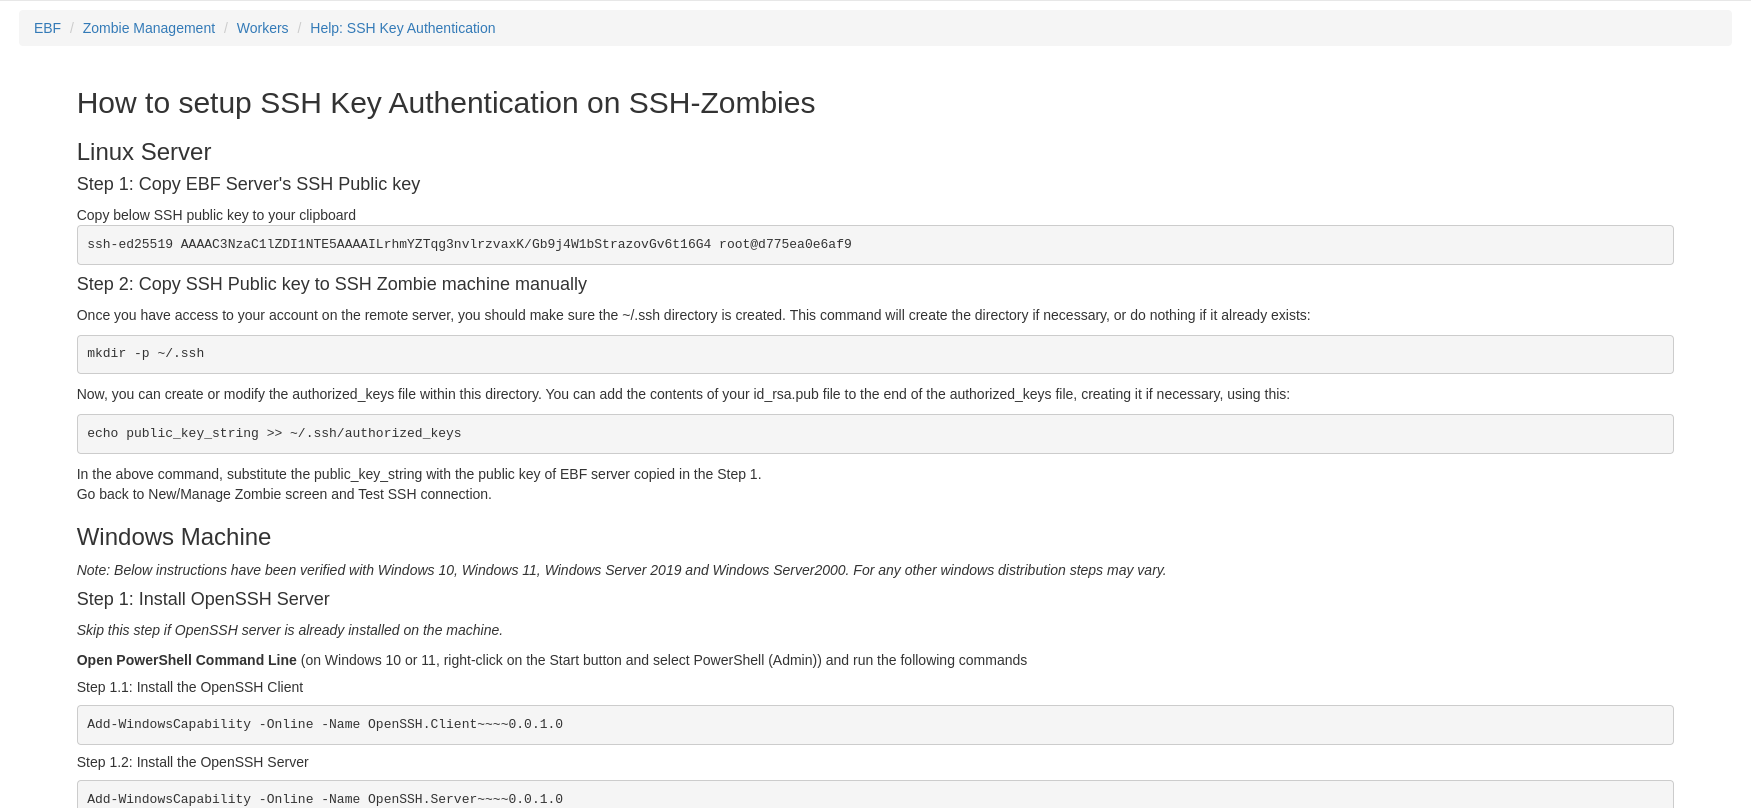
You can also use ssh-key authentication instead of password and for how to set up ssh-key authentication, Click on ‘Click here’ option.
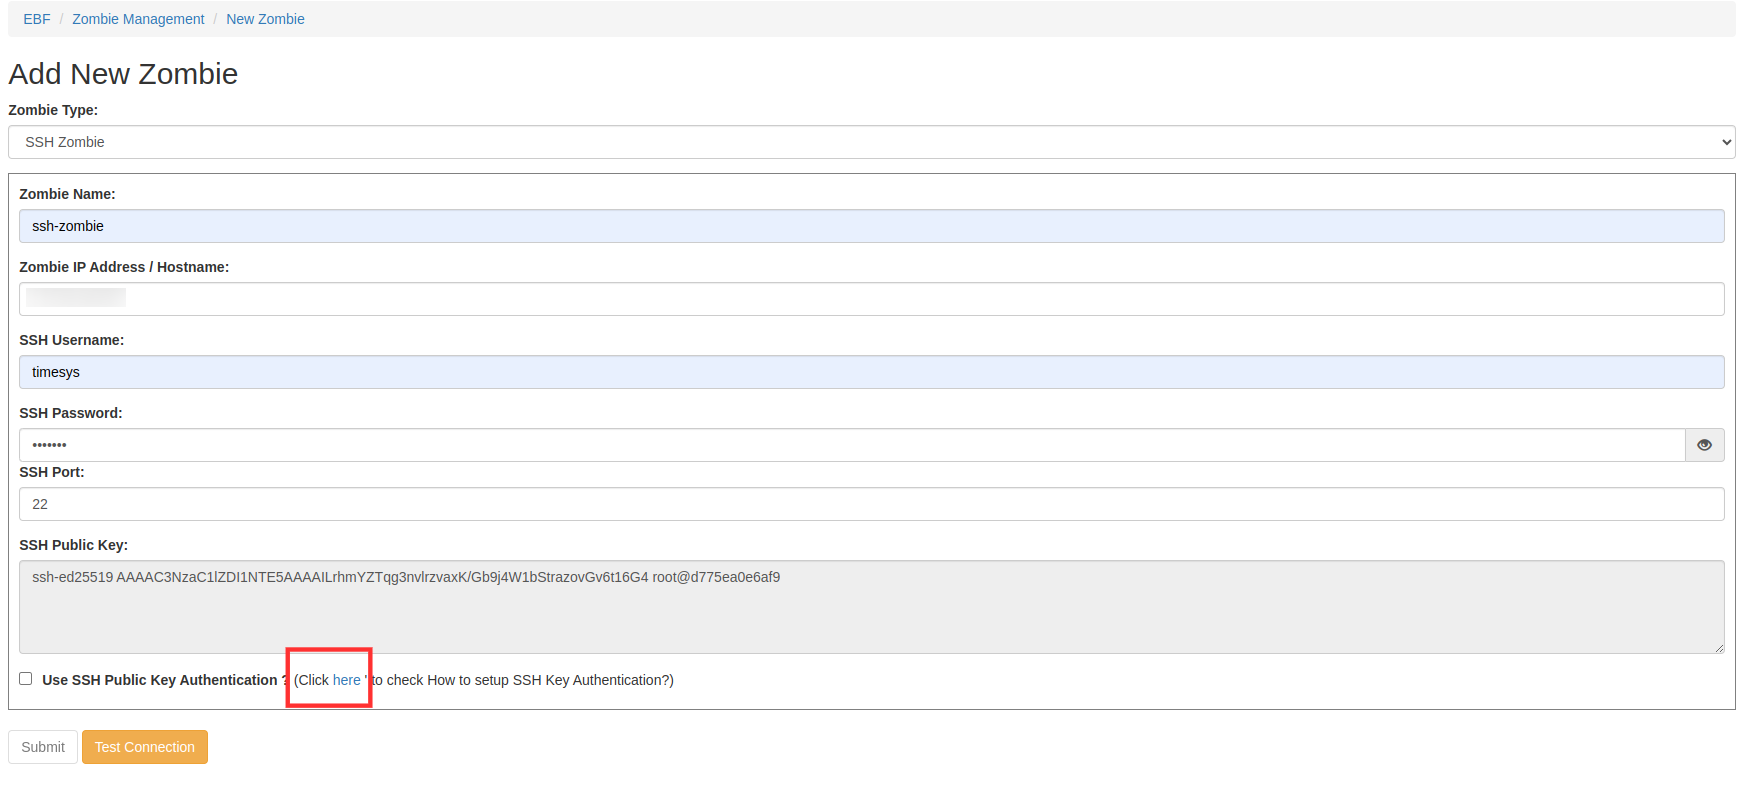
Follow the instructions.
1 After entering the details, click on the ‘Test Connection’ button. It will check whether the remote machine is up and the ssh server is running on the provided port.
2 If the Test connection is successful then click on ‘Ok’ and then click on ‘Submit’ button.
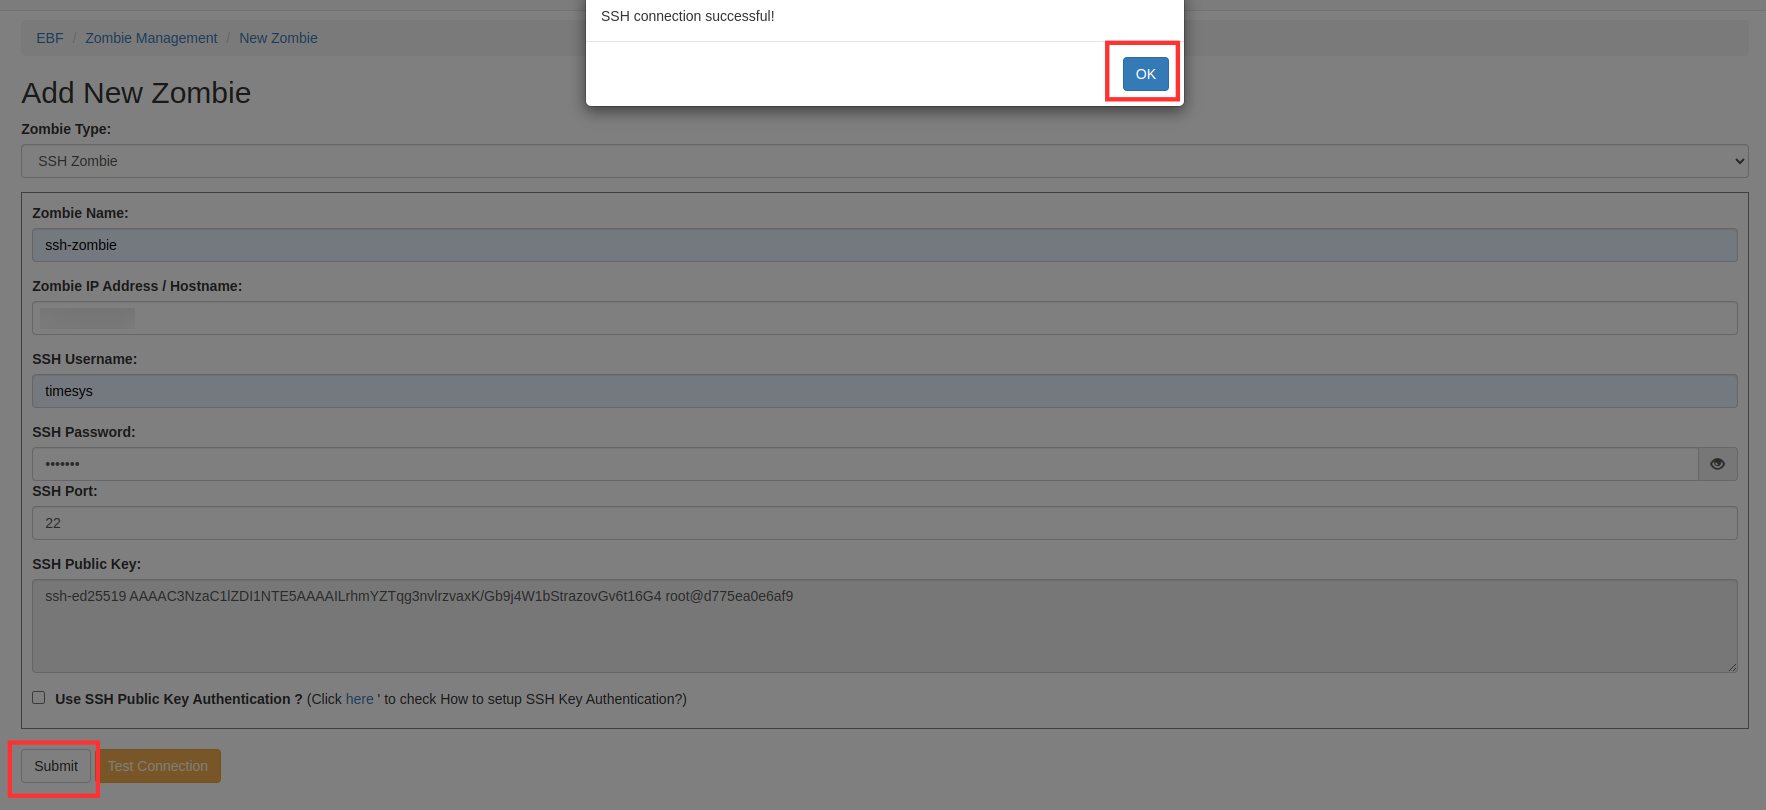
3 After click on submit button, ssh zombie added successfully message displayed on the screen.

4 You can also check the newly added SSH Zombie on the Zombie workers page.
5 Newly added SSH-Zombie is displayed on the zombie workers dashboard.

How to edit details of an existing SSH Zombie
Following are the steps to edit the details of added Zombie on EBF server:
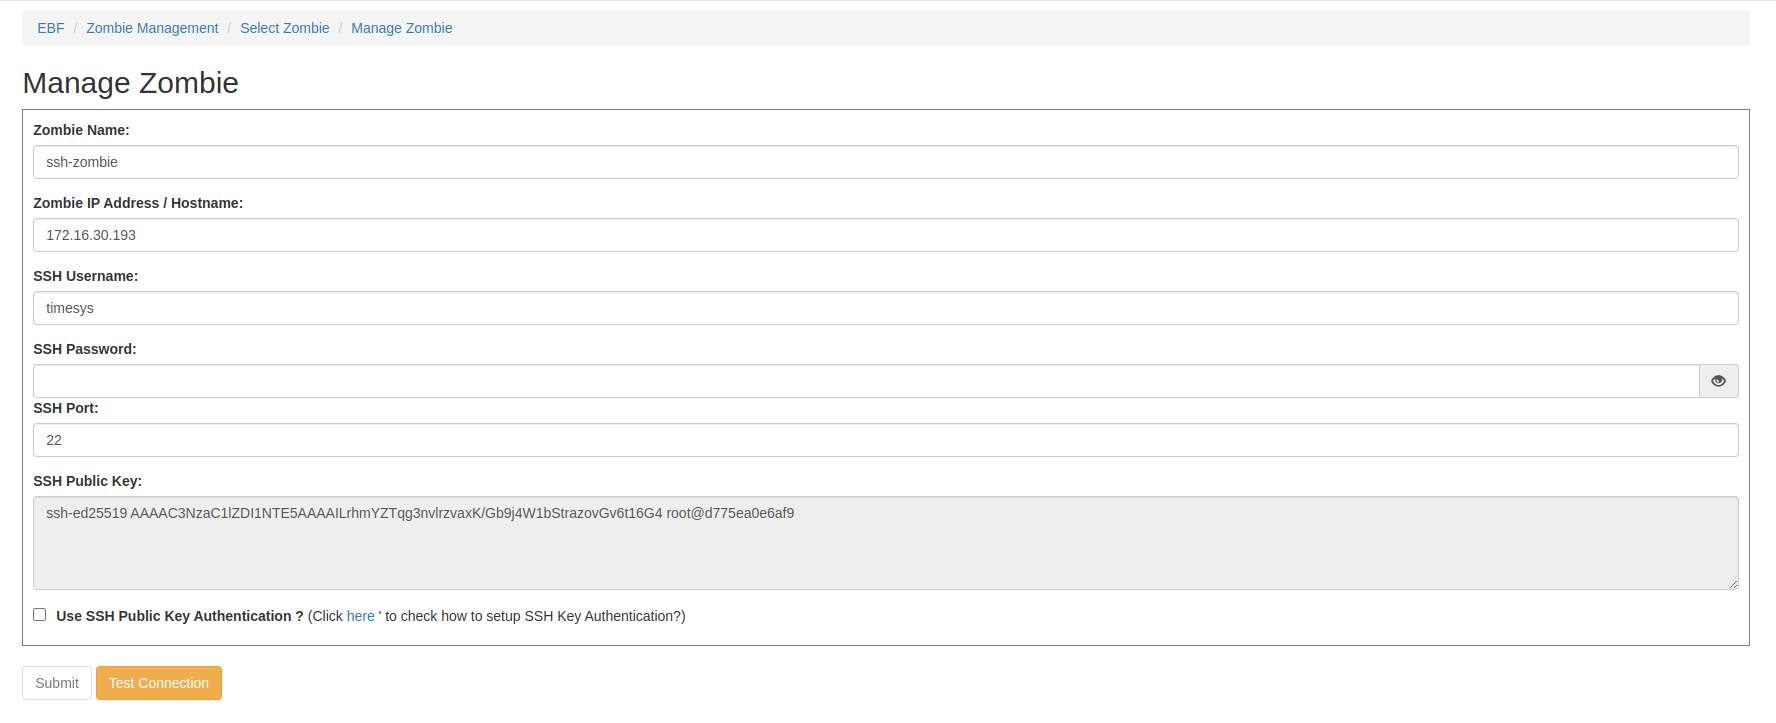
1 Click on the ‘Edit Zombie’ option from the ‘Zombies’ drop-down list on EBF Dashboard to edit Zombie details.
2 Select the Zombie from drop-down list on the ‘Select Zombie’ page to edit Zombie details.

3 ‘Manage Zombie’ page will appear on the screen. Edit the Zombie details and click on the ‘Test Connection’ button. If the test connection is successful,click on the ‘Submit’ button.
4 A confirmation message of updated Zombie details will be displayed on the screen.

How to Delete an existing SSH Zombie
Following are the steps to delete the Existing SSH Zombie on EBF server:
1 Click on the ‘Zombie Workers’ option from the ‘Zombies’ drop-down list on EBF Dashboard to delete an existing SSH Zombie.
2 Select the Zombie from the ‘Workers’ page to delete SSH Zombie.

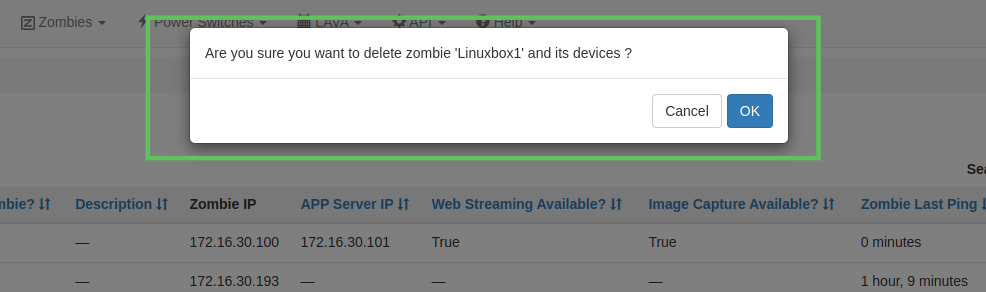
3 Click on the ‘Delete icon’ of the corresponding zombie, of which you want to delete.
4 A confirmation pop-up will come on the screen. Click on the ‘OK’ button to delete the Zombie.
5 After deleting the zombie, zombie will no longer will be seen on the screen.
How to whitelist Zombie ports for port forwarding
Following are the steps to whitelist Zombie ports for port forwarding:
1 Login to the EBF homepage/Dashboard through a web browser with credentials.
Username : <username>
Password : <password>
2 This would open up EBF Dashboard.

3 Select the zombie workers option from the ‘zombie’ option drop-down.
4 Select port forwarding option of the respective zombie on which you want to add the port forwarding.

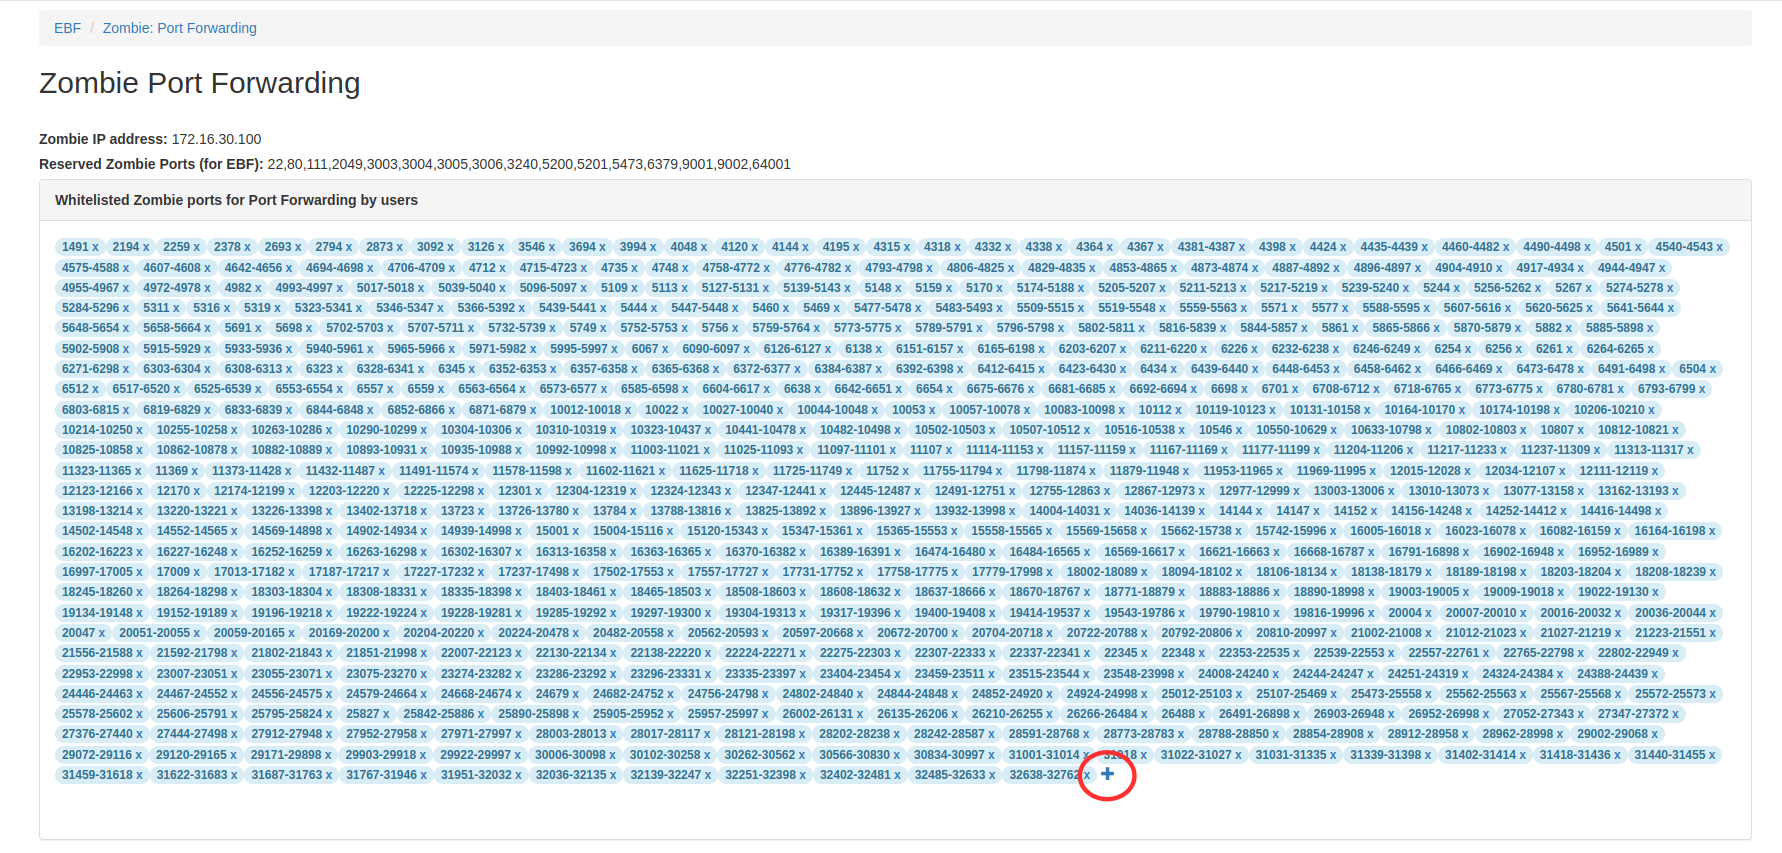
5 Zombie port forwarding pages would open up.

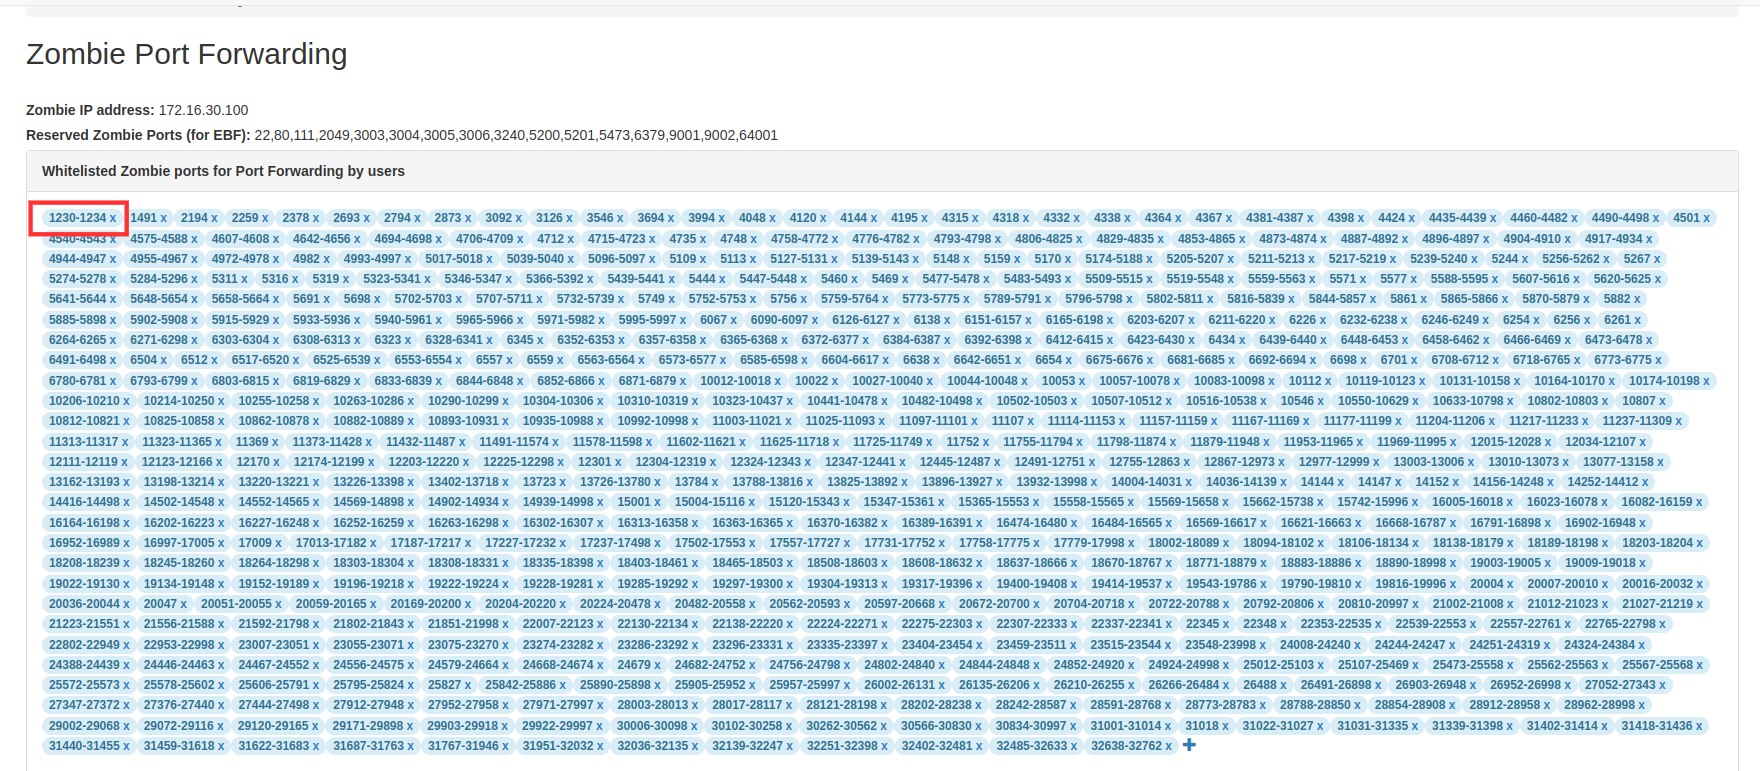
6 Click on ‘+’ to add the port.
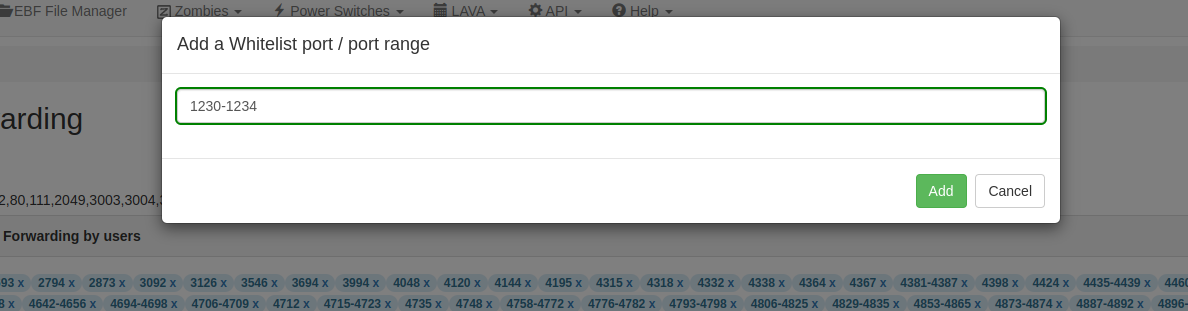
7 Enter port no. or you can also add port range. For e.g. I have added port range(1230-1234).After that, click on add button.
8 Click on ‘save’ button.
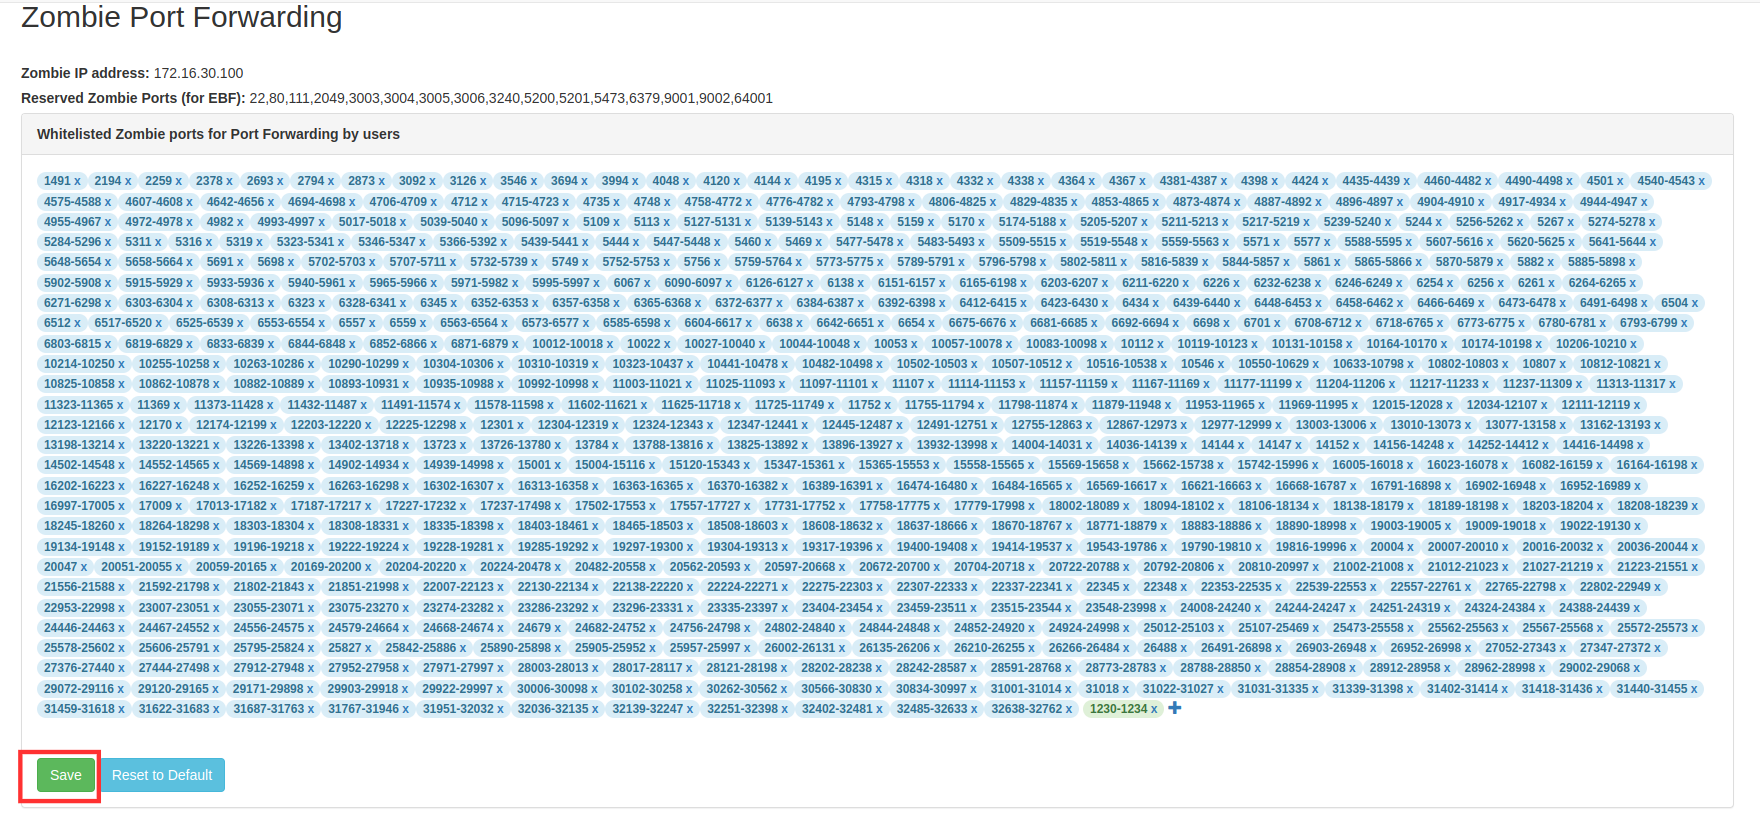
9 Port range is successfully added.
How to add a New Device Type

A device type is a generic description of a device and identifies different qualities of that device. In EBF, a particular DUT is an instance of a device type. For example, if beaglebone-black is a device type, then it can have many device instances like bbb01, bbb02, BBB, etc that share the same device type with the same set of commands.
When adding a device, a device type needs to be added corresponding to the device to be added. The device type can be added only by the admin.
For example:
The following are the steps to add a new Device type on the EBF server:
1 Login to the EBF homepage/Dashboard through a web browser with credentials.
Username : <Username>
Password : <Password>
2 This would open the EBF home page. Select the ‘New Device type’ option from the ‘Devices’ drop-down list.
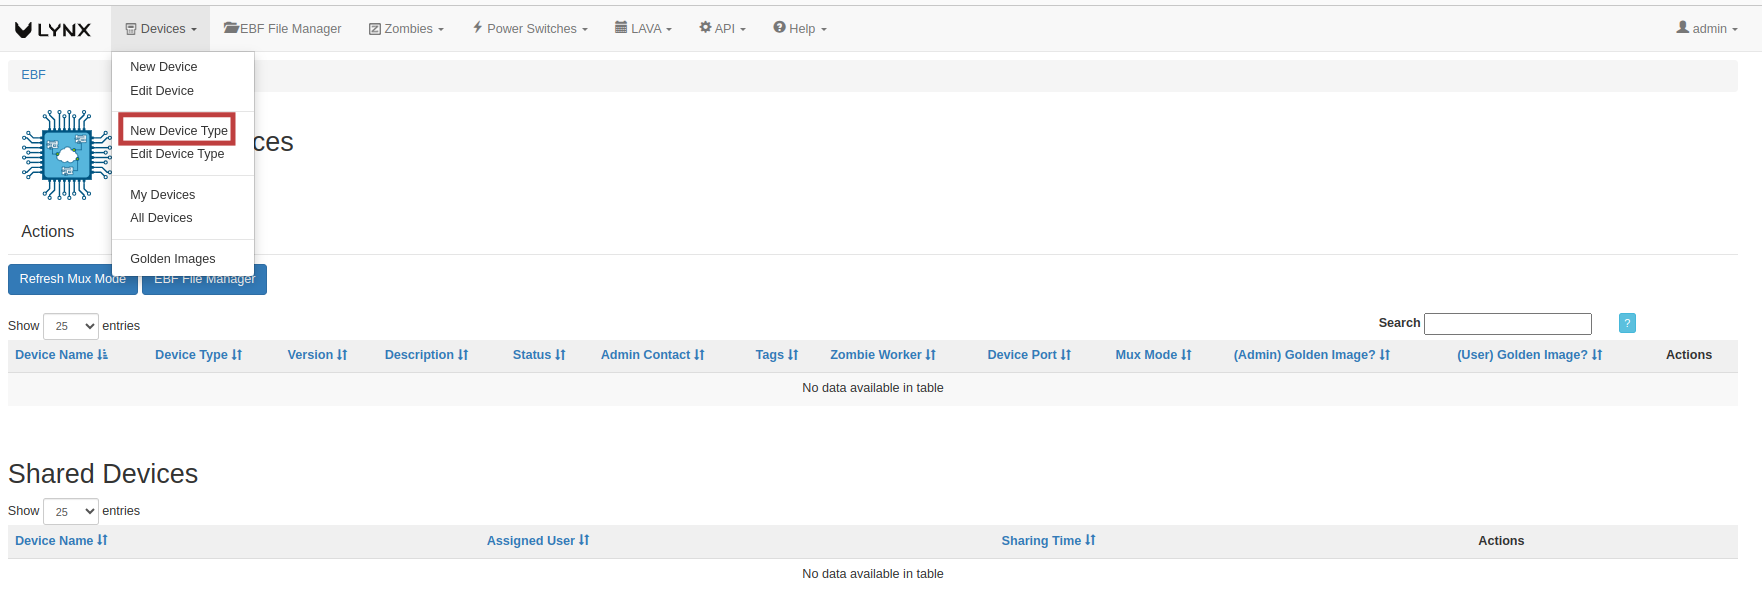
The ‘Add New Device Type’ page will appear on the screen.
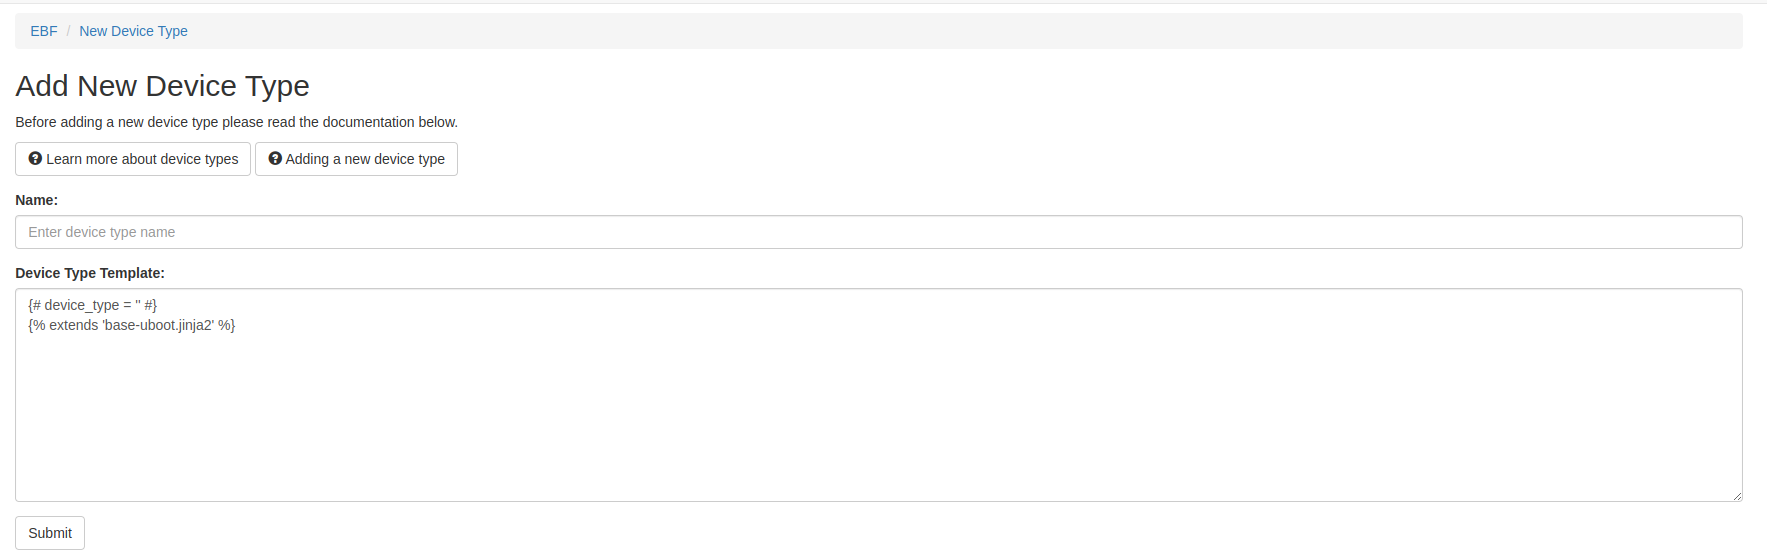
4 Fill all the fields available on the screen.
Name:<Device type name>
Device Type Template: Valid definition for device type.
Must Parameters in Device type template
{% extends 'base-uboot.jinja2' %}
{% set device_type = "" %}
Specifications:
% extends ‘base-uboot.jinja2’% - The device type extends base-uboot.jinja2 available in device-type folder.
% set device_type = “”% - Provide a unique name for device type in this section
After filling in all the fields, click on the ‘Submit button.

The device type will be added to the EBF server.
How to edit the details of a Device type
The following are the steps to edit the details of the added Device type on the EBF server:
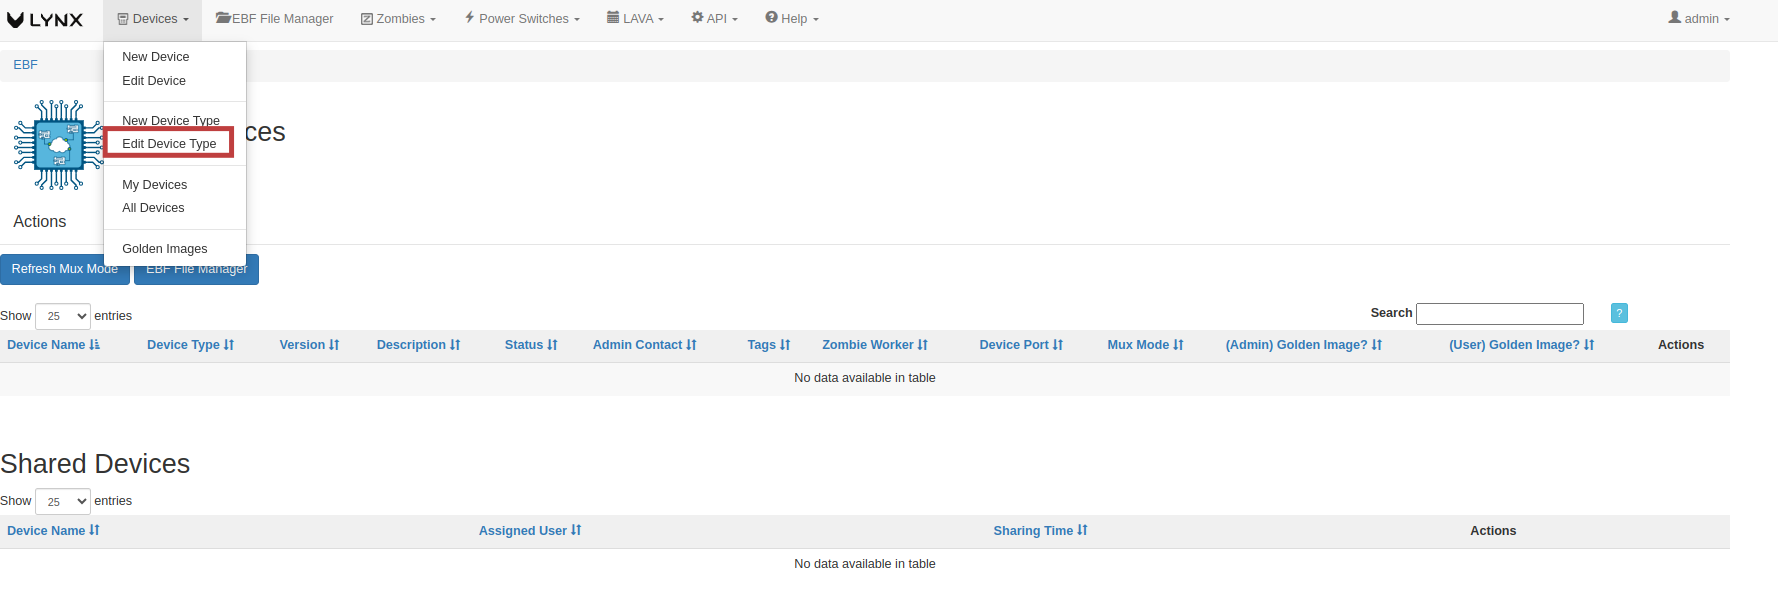
1 Select the ‘Edit Device Type’ option from the ‘Devices’ drop-down list on the EBF dashboard to edit Device type details.
2 Select Device type from the drop-down list on the ‘Select Device type’ page to edit Device type details.

3 ‘Manage Device Type’ page will appear on the screen. Edit the Device type details.
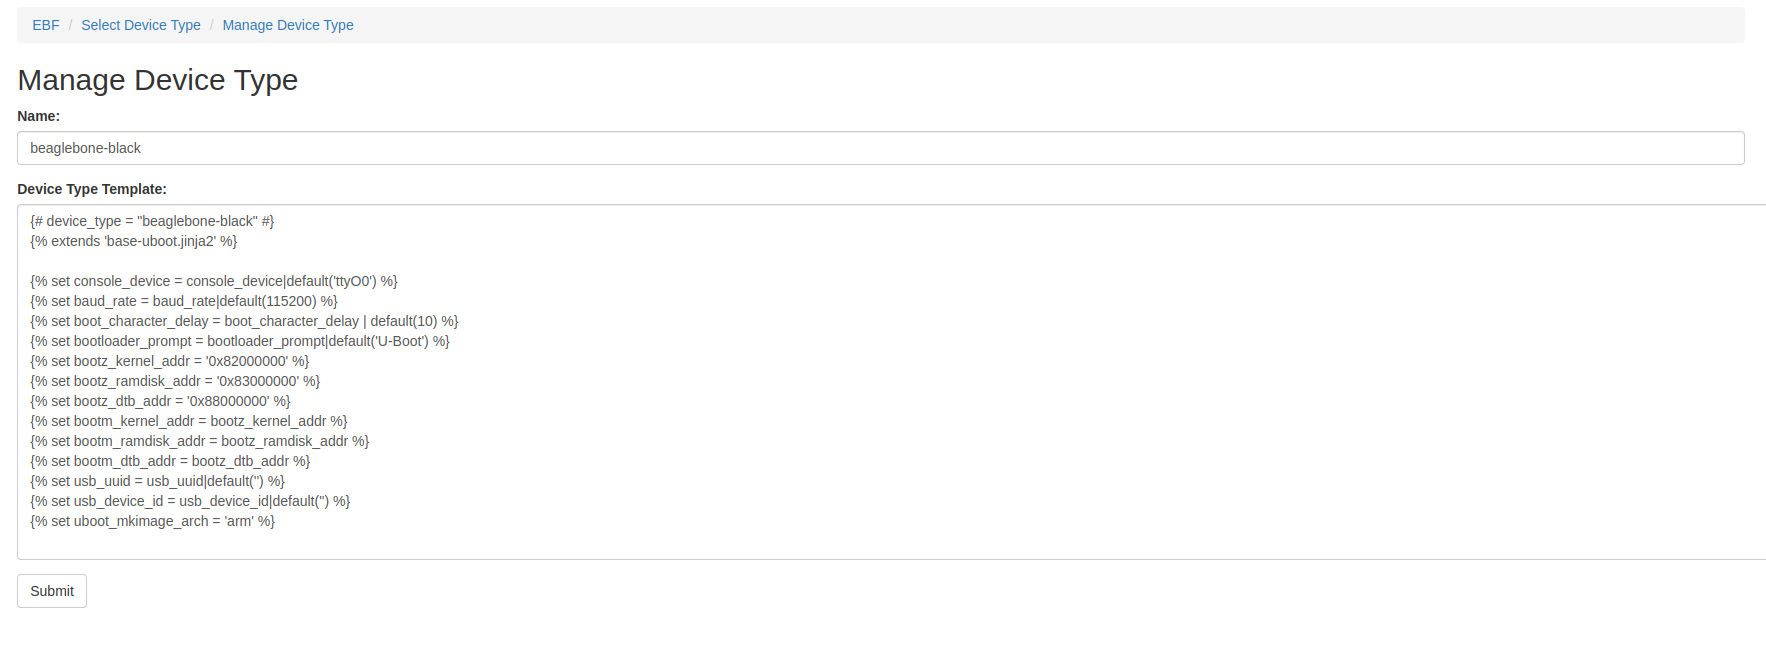
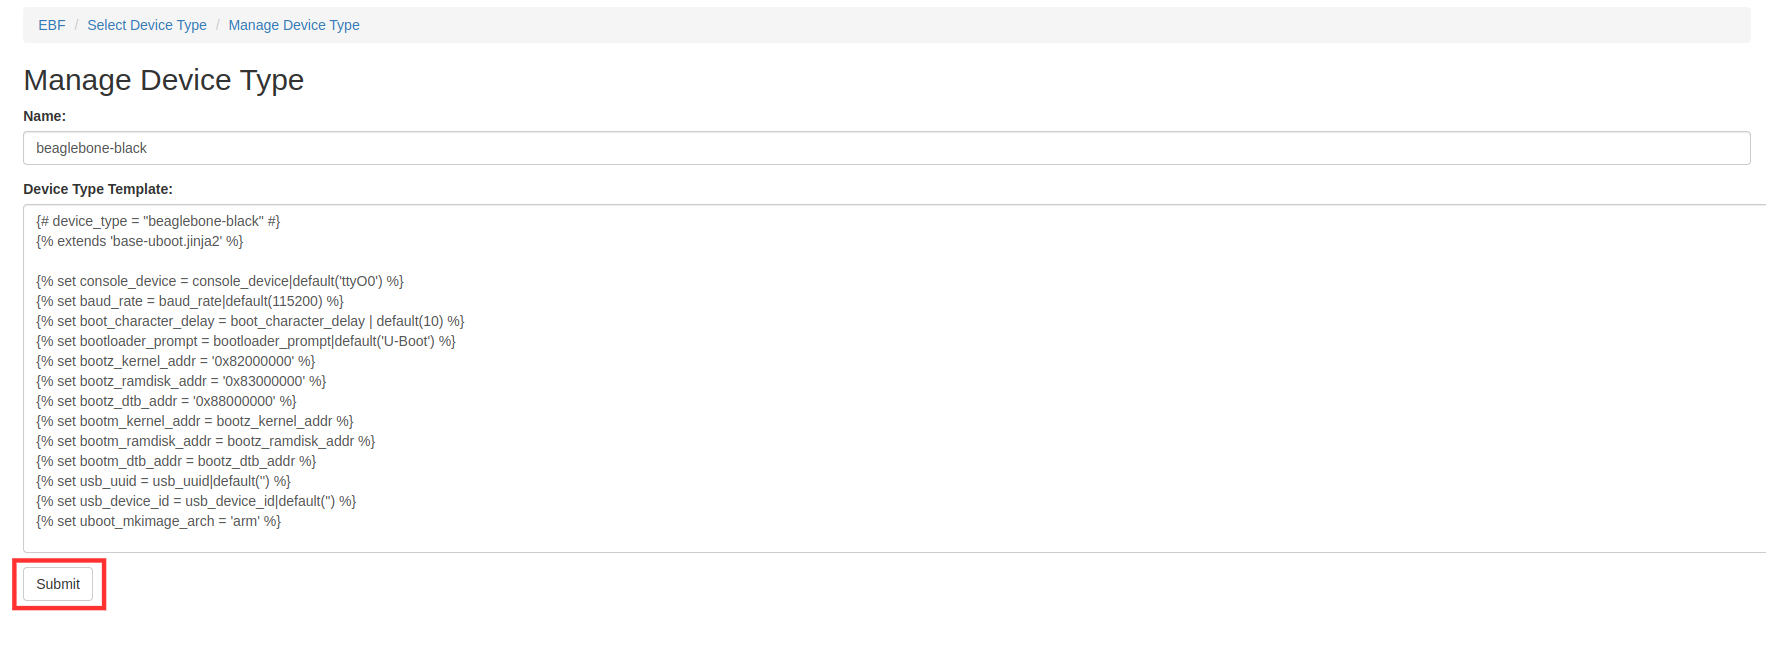
4 Click on the ‘Submit’ button, and details of the Device type are edited and saved.
5 Device type details are saved and updated.

How to edit Device type Template
1 Login to the EBF homepage/Dashboard through a web browser with credentials.
Username: <username>
Password: <password>
2 Go to Devices -> Edit Device Type. Select the device type for which the device type template needs to be edited. The device type page will appear on the screen.
3 The device type template has the following parameters by default while adding a new device type.
Must Parameters in Device type template
{% extends 'base-uboot.jinja2' %}
{% set device_type = "am335x" %}
Specifications:
extends ‘base-uboot.jinja2’ - The device type extends base-uboot.jinja2 available in device-type folder.
set device_type = “” - Provide a unique name for device type in this section
Other optional parameters with example for reference
{% set console_device = console_device|default('ttyS0') %}
{% set baud_rate = baud_rate|default(115200) %}
{% set bootloader_prompt = bootloader_prompt|default('U-Boot') %}
{% set bootm_kernel_addr = '0x82000000' %}
{% set bootm_ramdisk_addr = '0x81600000' %}
{% set bootm_dtb_addr = '0x88000000' %}
{% set bootz_kernel_addr = '0x82000000' %}
{% set bootz_ramdisk_addr = '0x83000000' %}
{% set bootz_dtb_addr = '0x88000000' %}
{% set uboot_mkimage_arch = 'arm' %}
Specifications:
Console device: The device serial port is defined in this console device section. For reference, “ttyS0” is taken as the console port in this example.
{% set console_device = console_device|default('ttyS0')%}
Baud Rate: Baud rate depends on the device used. For reference in this example, the baud rate is set to 115200. Other “standard” baud rates are 1200, 2400, 4800, 9600, 19200, 38400, and 57600.
{% set baud_rate = baud_rate|default(115200)%}
Bootloader Prompt: The user can set the bootloader prompt when the board first boots up. What prompt does the device get the bootloader that needs to be mentioned here. Example: In this case, “U-boot” is used as a bootloader prompt.
{% set bootloader_prompt = bootloader_prompt|default('U-Boot')%}
Bootm kernel address, ramdisk address, dtb address: Set device kernel address, dtb address, and ramdisk address. Here, the Kernel file address needs to be mentioned for the device. bootm_kernel_addr is used when the kernel image type is uImage. This can be checked from the artifacts of the device build.
{% set bootm_kernel_addr = '0x82000000'%}
Here, the dtb file address needs to be mentioned for the device. bootm_dtb_addr is used when the kernel image type is uImage. This can be checked from the artifacts of the device build.
{% set bootm_ramdisk_addr = '0x81600000'%}
{% set bootm_dtb_addr = '0x88000000'%}
Bootz kernel address, ramdisk address, dtb address: Set device kernel address, dtb address, and ramdisk address. Here, the kernel file address needs to be mentioned for the device. bootz_dtb_addr is used when the kernel image type is zImage. This can be checked from the artifacts of the device build.
{% set bootz_kernel_addr = '0x82000000'%}
Here, the dtb file address needs to be mentioned for the device. bootz_dtb_addr is used when the kernel image type is zImage. This can be checked from the artifacts of the device build.
{% set bootz_ramdisk_addr = '0x83000000'%}
{% bootz_dtb_addr = '0x88000000'%}
Uboot_mkimage_arch: The uboot_mkimage_arch value will need to be set according to the requirements of the device. Most ARMv7 devices will use arm as the architecture, and most ARMv8 devices will use arm64, but this is not always the case. For example, the APM Mustang is an arm64 device, but the U-Boot build on the Mustang pre-dates arm64 support in mainline U-Boot. It uses:
{% set uboot_mkimage_arch = 'arm' %}
How to create a new user in Zombie E-Z Config
A new user can be created by an Admin user. The admin user can create a new user using the following steps:
1 Login to Zombie E-Z config using admin credentials.
Username: <admin name>
Password:<Admin Password>
2 In the left navigation panel, select the ‘Create New User’ option to register a new user.
3 Register New User page will appear on the screen. Provide Username and password for registering a new user. The username must be unique.
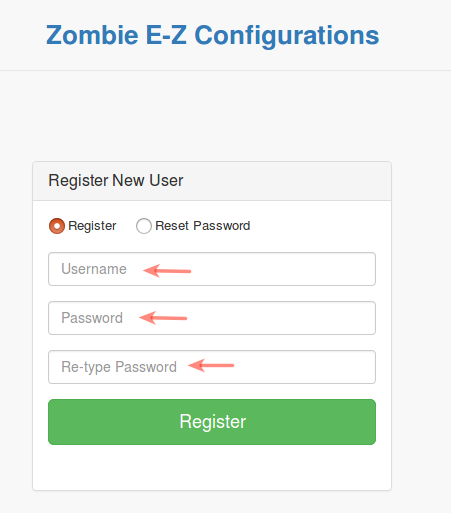
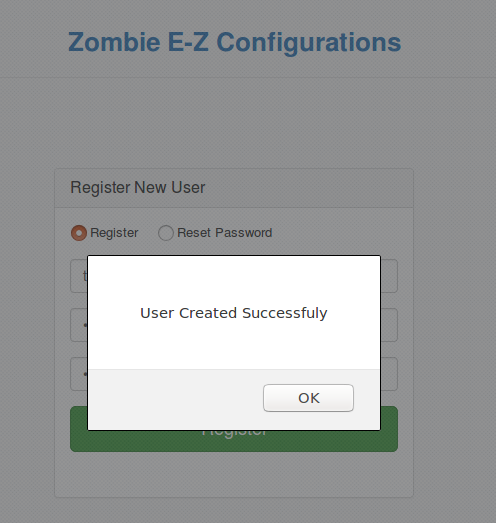
4 After providing Username and password, click on the Register button. The new user is created successfully.
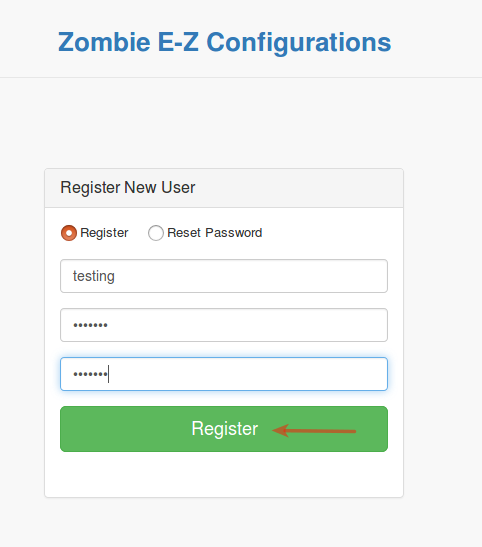
5 After selecting the Register button, a message that the new User created successfully appears on the screen.
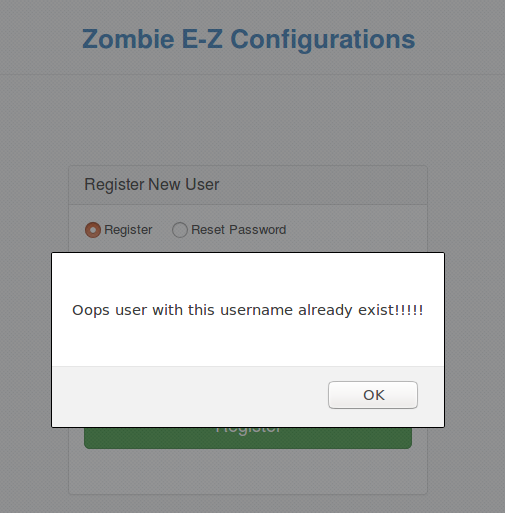
NOTE: If a username already exists, then on selecting the Register button a message will appear on the screen.
6 Re-verify by logging in using new user credentials.

Reset Password of existing User in Zombie E-Z Config
The user can reset the password of their own or another user using the following steps:
1 Login to Zombie E-Z config using user credentials.
Username: <Username>
Password:<User Password>
2 In the left navigation pane, select Create New User option to Reset the password of an existing user.
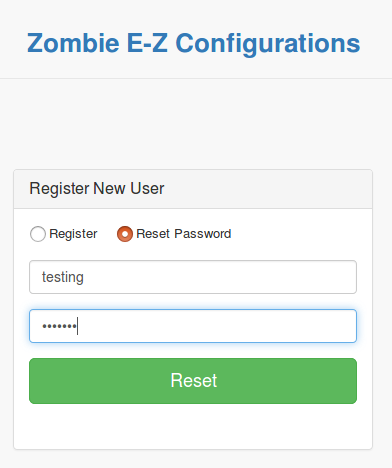
3 Select Reset Password radio button available on Register New User page.
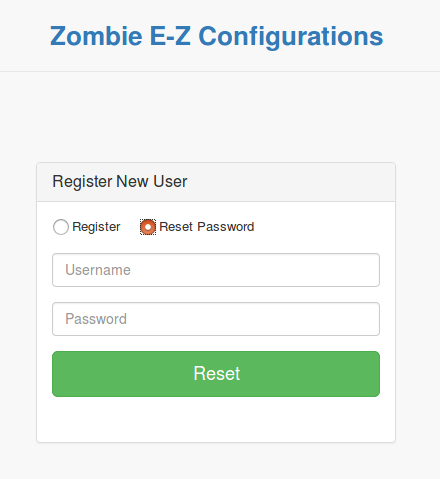
4 Enter existing Username and enter new password.
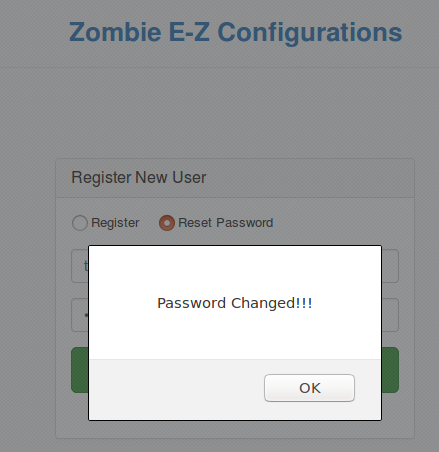
5 A confirmation message of password changed will appear on the screen.
6 Re verify the new password by logging in to the Zombie E-Z Config application.
How to Backup/Import Zombie Settings
When Zombie SD card is re-flashed Zombie settings are lost. To preserve and import them again, you can use this Backup and Import feature.
How to Backup Zombie Settings
1 Login to Zombie E-Z config using user credentials.
Username: <Username>
Password:<User Password>
2 Click on the ‘Maintenance’ link on the left navigation panel.
3 Click on ‘Backup Current Settings’ button to preserve current Zombie EZ-config settings.

4 A confirmation message of successful backup will be shown on the screen.
How to Import Zombie Settings
1 Login to Zombie E-Z config using user credentials.
Username: <Username>
Password:<User Password>
2 Click on the ‘Maintenance’ link on the left navigation panel
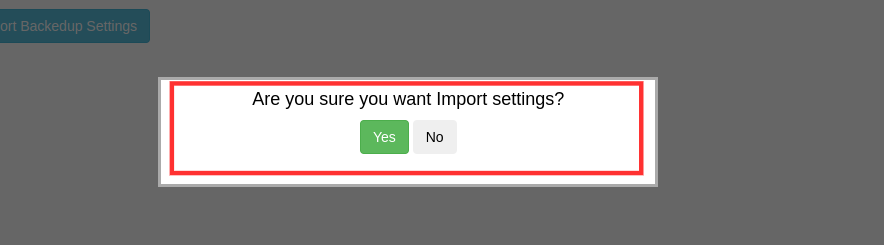
3 Click on the ‘Import Backedup Settings’ button to load the historically preserved setting into Zombie EZ-config.

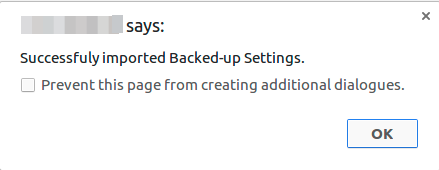
4 Importing of settings will begin and a message is shown on the screen as follows:
5 A confirmation message of successful import will be shown on the screen.
6 You will be redirected to the ‘Zombie Status’ screen.
7 Now Click on Zombie Network Settings button
8 Click on the ‘Save’ button to save the imported settings.
9 Click on the ‘Reboot’ button on the left navigation panel for the imported settings to take effect.
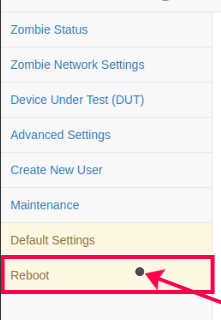
How to Backup/Import APP-Zombie Settings
When APP-Zombie SD card is re-flashed Zombie settings are lost. To preserve and import them again, you can use this Backup and Import feature.
How to Backup APP-Zombie Settings
1 Login to APP Zombie E-Z config using user credentials.
Username: <Username>
Password:<User Password>
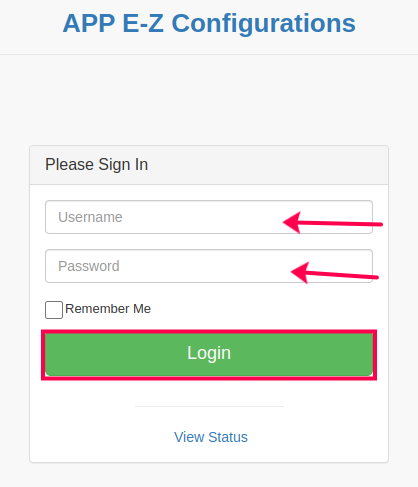
2 Click on the ‘Maintenance’ link on the left navigation panel.
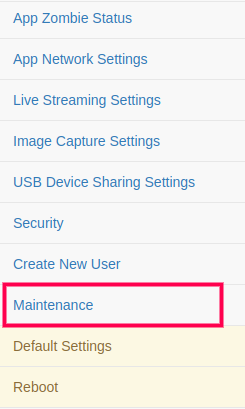
3 Click on ‘Backup Current Settings’ button to preserve current APP Zombie EZ-config settings.

4 A confirmation message of successful backup will be shown on the screen.
How to Import APP-Zombie Settings
1 Login to APP Zombie E-Z config using user credentials.
Username: <Username>
Password:<User Password>
2 Click on the ‘Maintenance’ link on the left navigation panel
3 Click on the ‘Import Backedup Settings’ button to load the historically preserved setting into APP Zombie EZ-config.
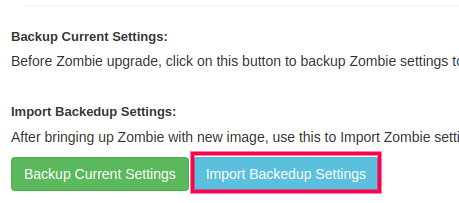
4 Importing of settings will begin and a message is shown on the screen as follows:
5 A confirmation message of successful import will be shown on the screen.
6 You will be redirected to the ‘APP Zombie Status’ screen.
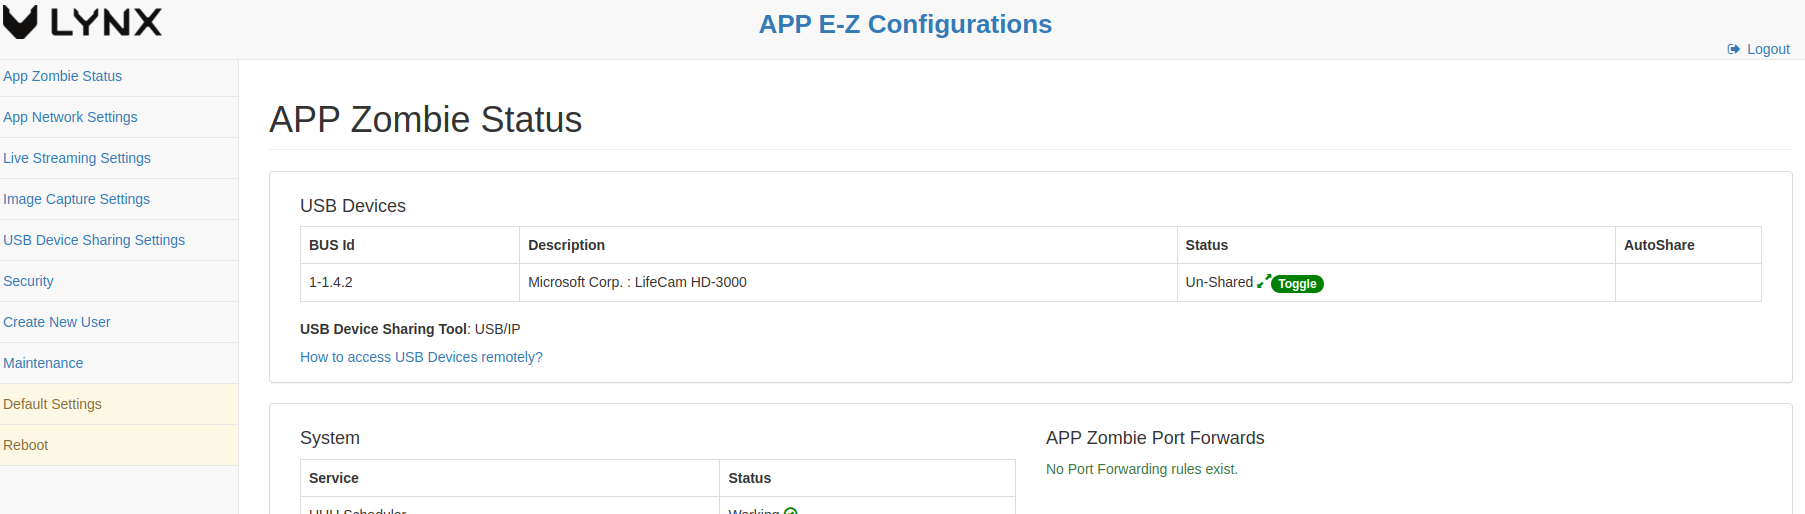
7 Now Click on APP Network Settings button
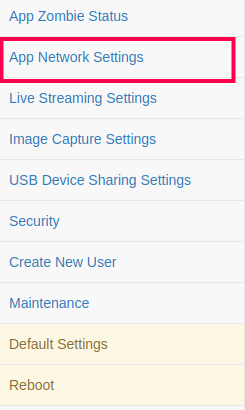
8 Click on the ‘Save’ button to save the imported settings.
9 Click on the ‘Reboot’ button on the left navigation panel for the imported settings to take effect.
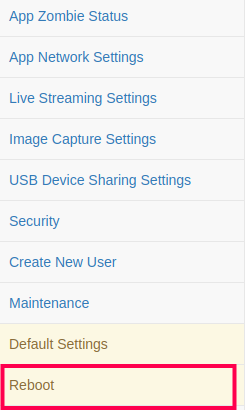
How To setup Live Streaming
How to Connect a USB webcam for live streaming
1 Connect Local Lan of Zombie and APP-Zombie using an ethernet cable.
2 Connect USB Webcam to USB port of APP-Zombie for live streaming.
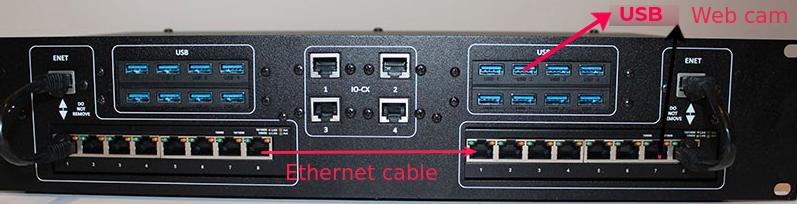
How to Configure USB webcam for live streaming
NOTE: Camera model which supports Live Streaming:
1 MicroSoft HD-3000
2 Megapixel 10x Digital Zoom
3 Quantum USB Camera(QHM-495LM)
Following are the steps to configure USB webcam on the EBF server:
1 Login to the EBF homepage/Dashboard through a web browser with credentials.
Username: <username>
Password: <password>
2 Click on the Edit Zombie option from the Zombies drop-down list on EBF Dashboard to edit Zombie details.
3 Select the Zombie from the drop-down list on the Select Zombie page to edit Zombie details.

4 Tick the USB webcam checkbox if a camera is connected to the APP Zombie.
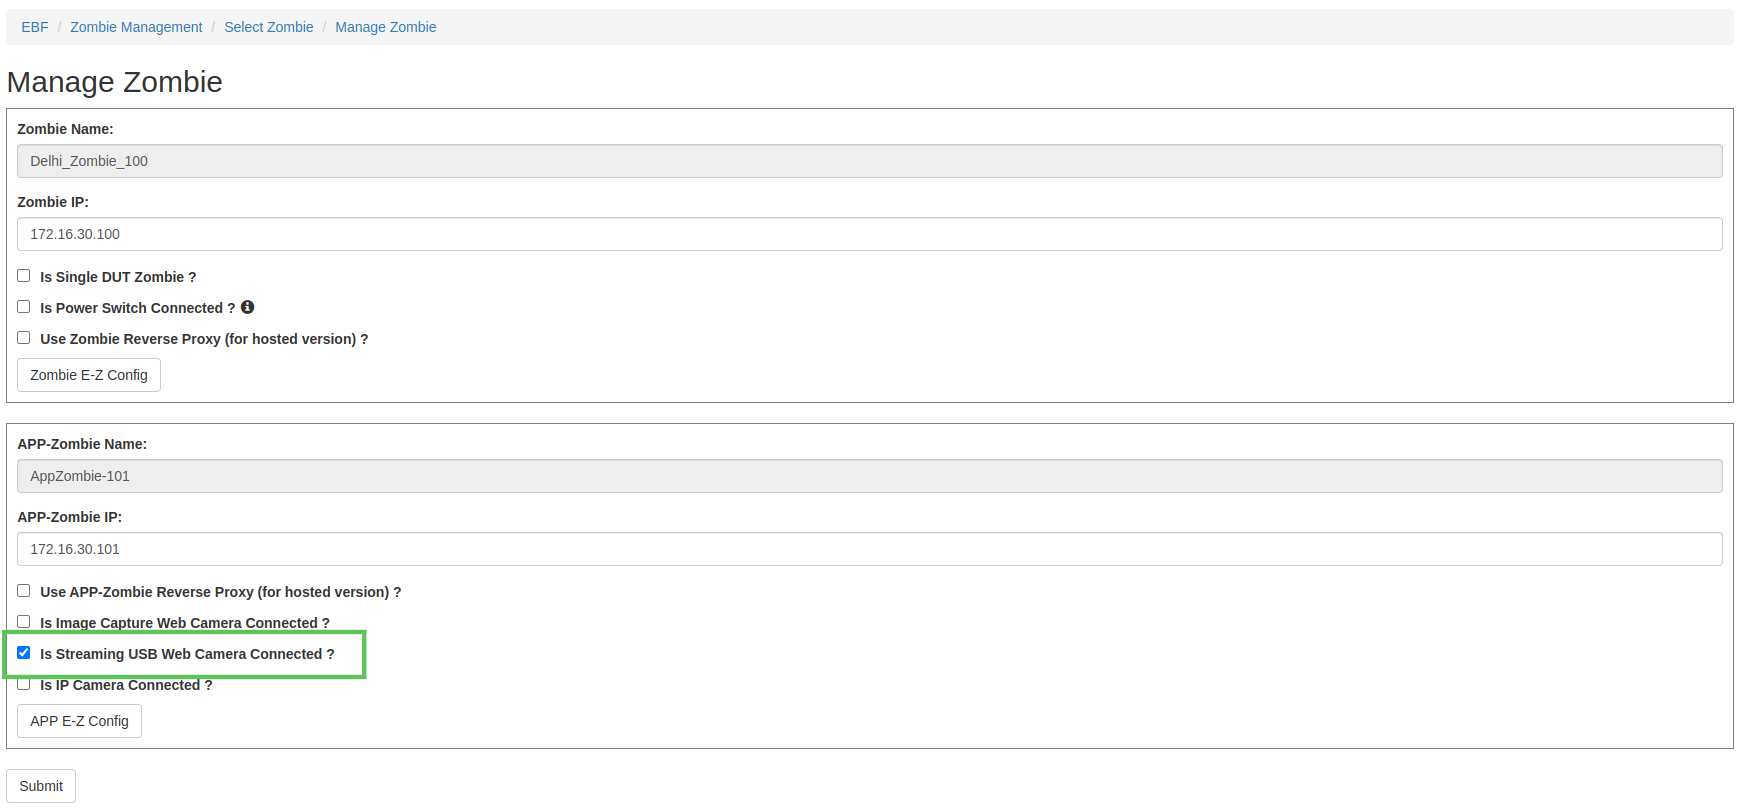
5 A confirmation message of updated Zombie details will be displayed on the screen.

6 Follow: How to access USB webcam Live Streaming
How to Connect a USB webcam for Image Capture
1 Connect Local Lan of Zombie and APP-Zombie using an ethernet cable.
2 Connect USB Webcam to USB port of APP-Zombie for image capture.
How to Configure USB webcam for Image Capture
Following are the steps to configure a USB webcam on the EBF server:
1 Login to the EBF homepage/Dashboard through a web browser with credentials.
Username: <username>
Password: <password>
2 Click on the Edit Zombie option from the Zombies drop-down list on EBF Dashboard to edit Zombie details.
3 Select the Zombie from the drop-down list on the Select Zombie page to edit Zombie details.
4 Tick the USB webcam checkbox for image capture, if a camera is connected to the APP Zombie then click on submit button.
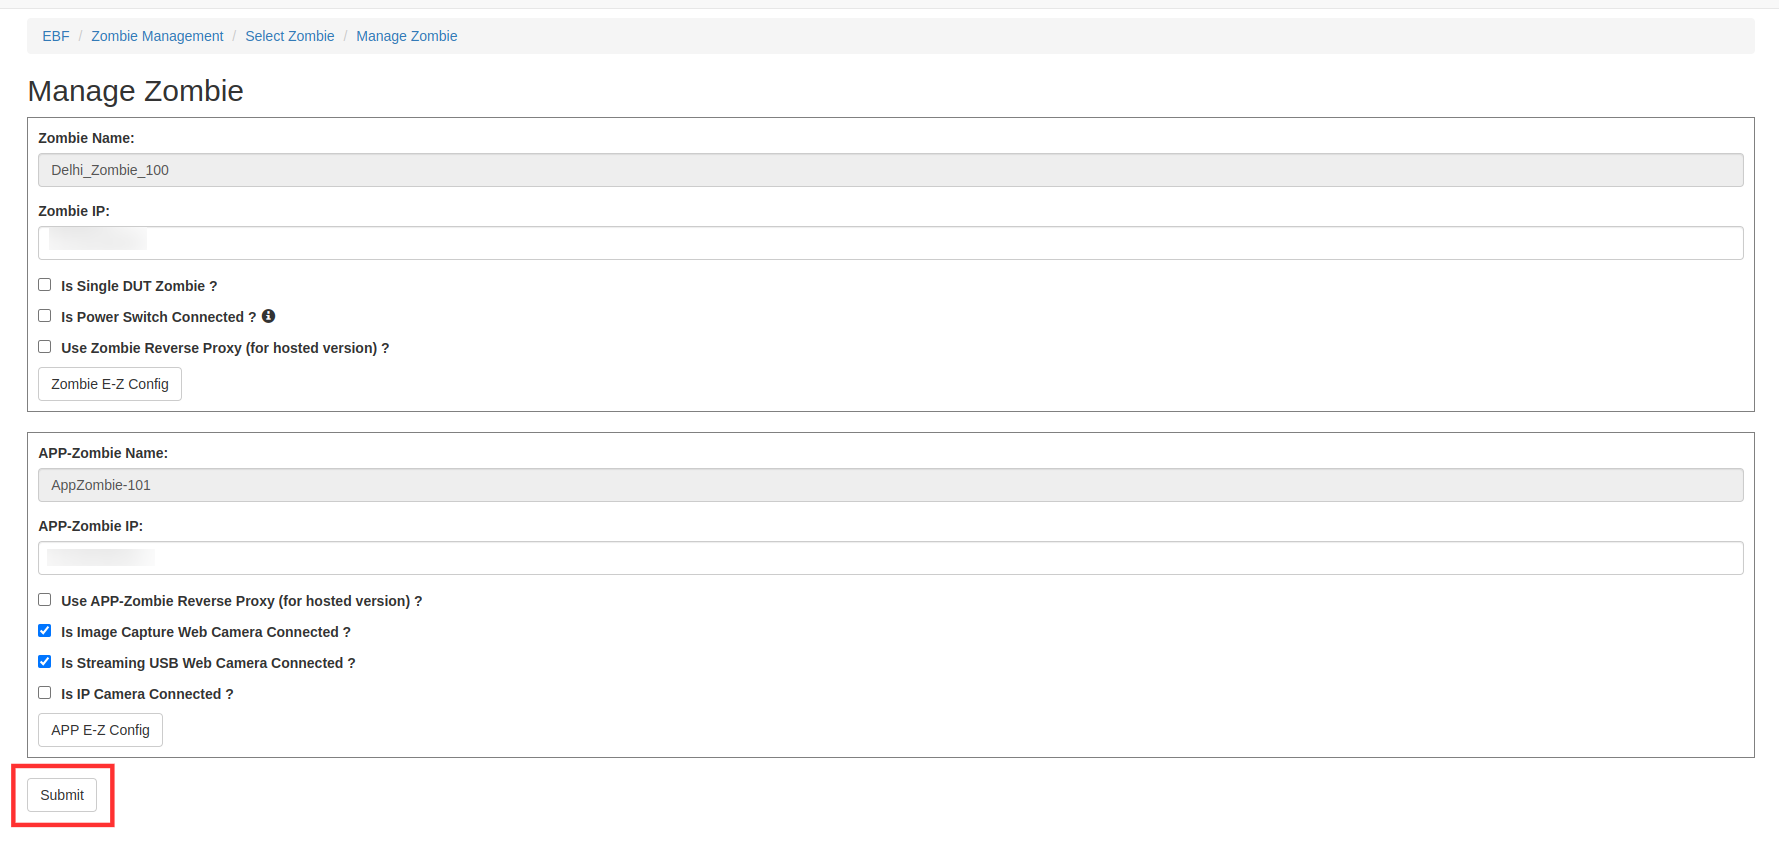
5 A confirmation message of updated Zombie details will be displayed on the screen.
6 Follow: How to capture image from USB webcam
How To Setup USB Network Gate
Setup Network Gate on Zombie E-Z Config
1 Launch the Zombie E-Z Config on any web browser(Google Chrome, Microsoft Edge) to do this and navigate to the following URL.
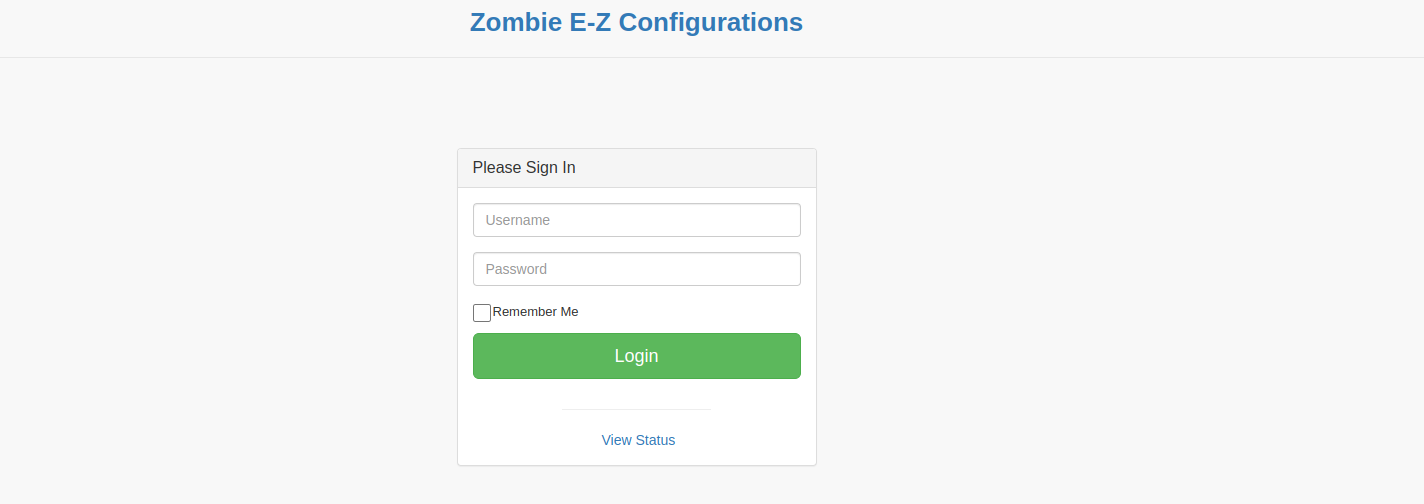
2 Login to the Zombie E-Z Config application with the credentials:
Username: <Username> (admin)
Password: <Password> (admin123)
3 Now from the left navigation panel click on advance settings.
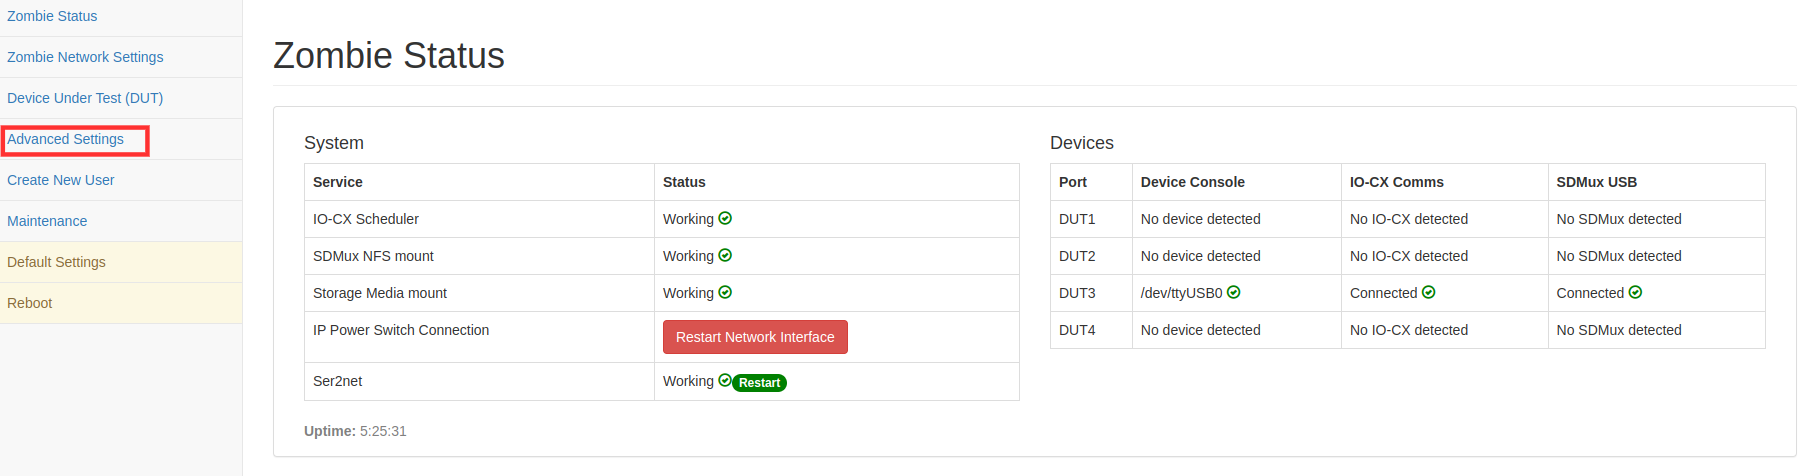
4 On Next Page click on the ‘Edit’ check box to edit detail on Zombie E-Z Config.
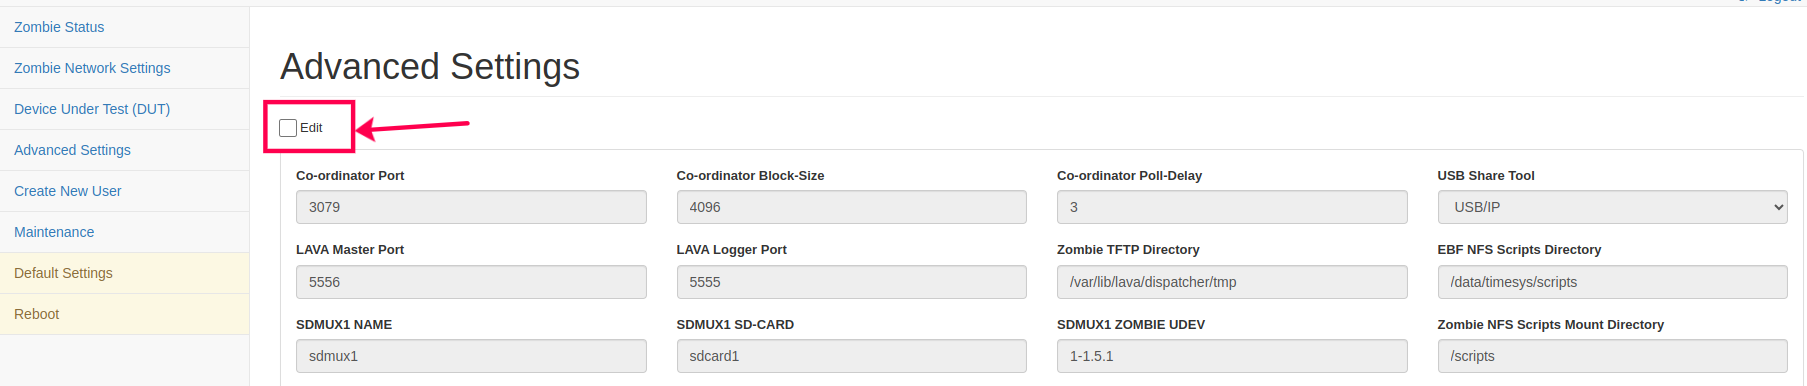
5 Now change the USB share tool from USB/IP to USB Network Gate and then after that save the settings.
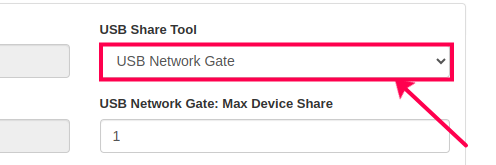
6 From the left navigation panel click on zombie status.
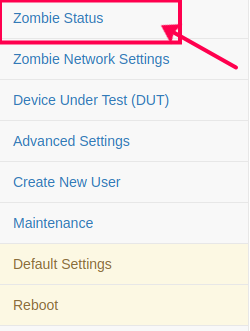
7 On the status page go to the USB device section and click on the Un-Licensed.

8 Now provide the registration name and activation code then click on activate button to activate the USB Network Gate licensed.
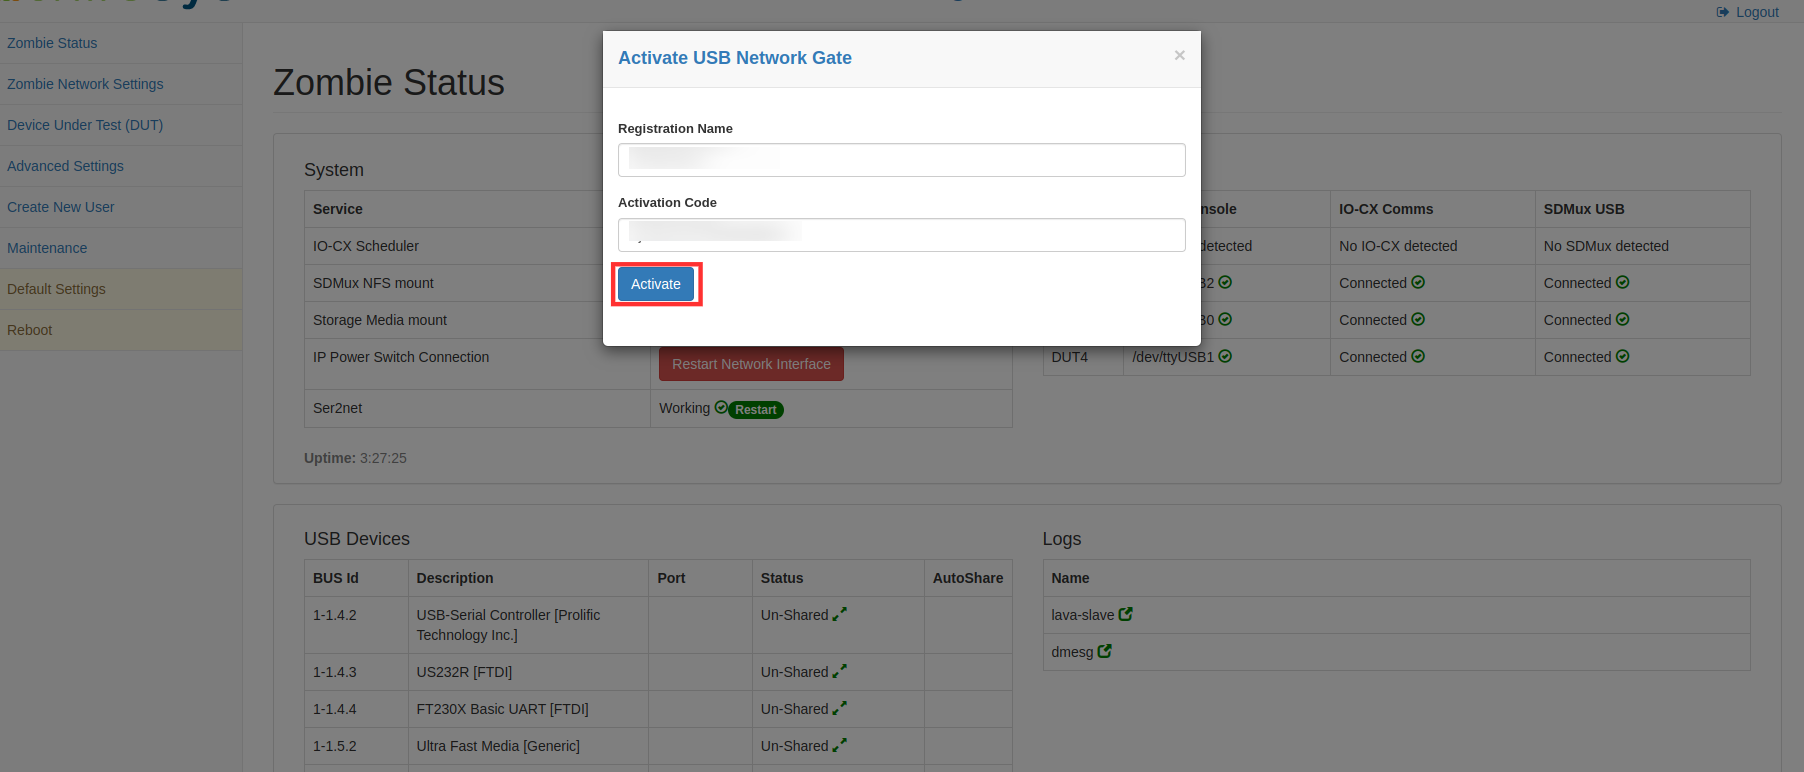
9 After successful code activation you will able to share and un-share the USB device.

NOTE: only one device can be shared at a time.
Setup Network gate on APP-Zombie
1 Launch the APP-Zombie E-Z Config on any web browser(Google Chrome, Microsoft Edge) to do this and navigate to the following URL.
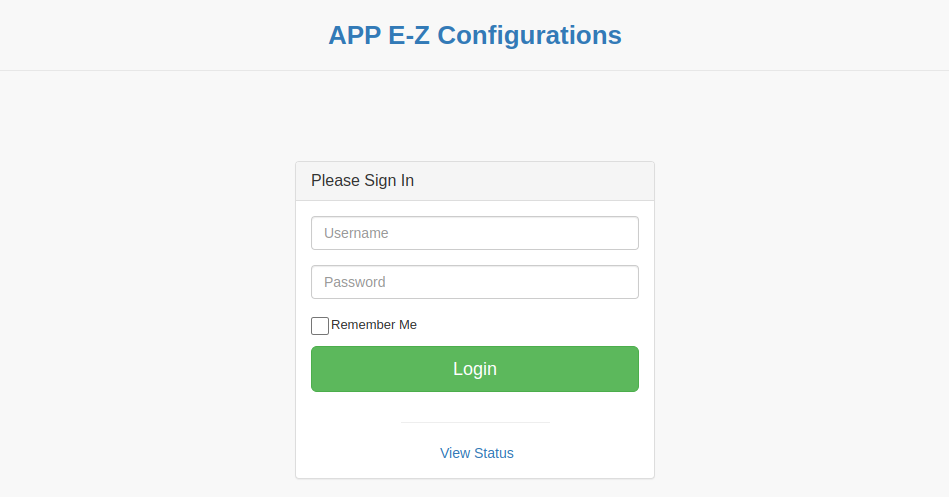
2 Login to the APP-Zombie E-Z application with the credentials:
Username: <Username> (admin)
Password: <Password> (admin123)
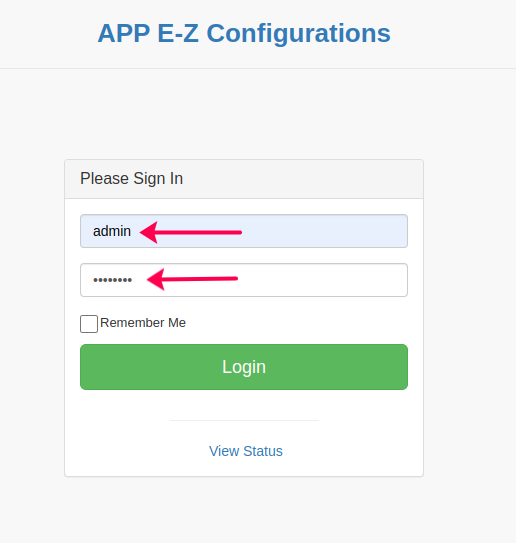
3 Now from the left navigation panel click on the USB Device Sharing Settings.
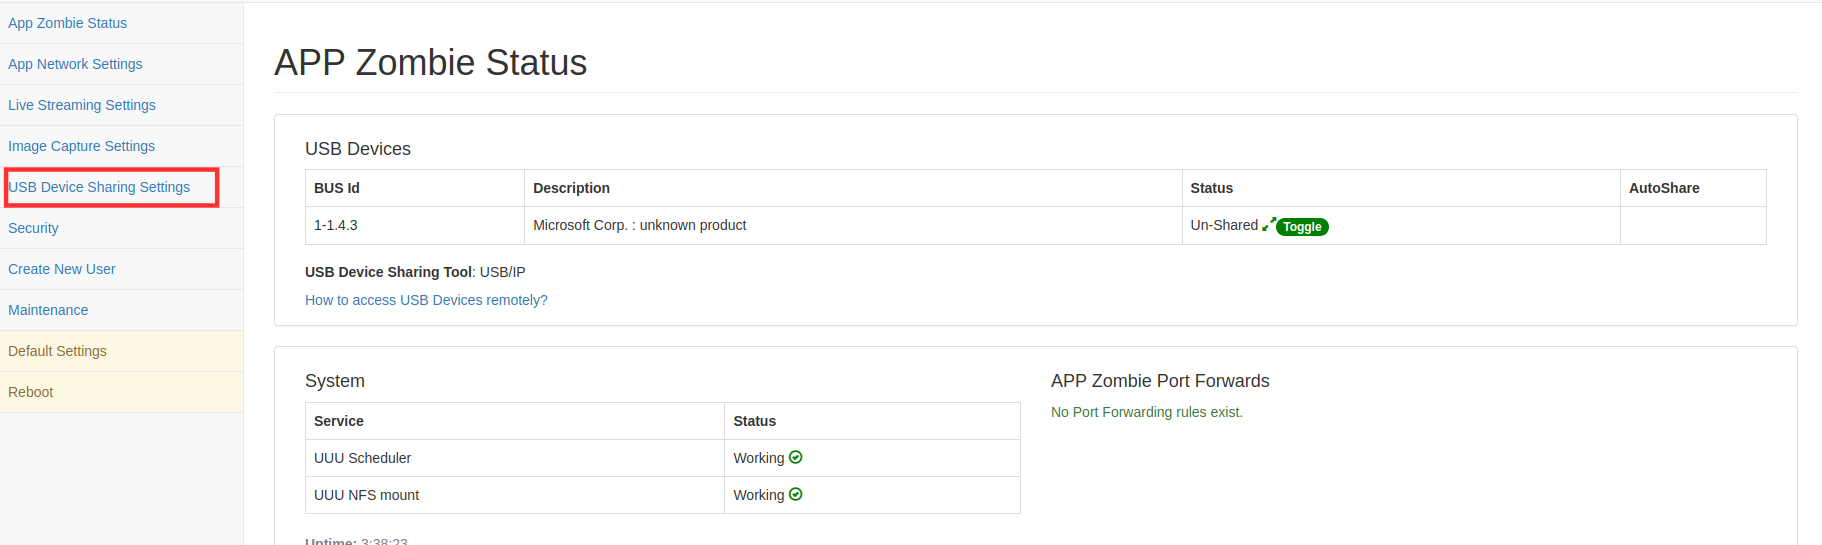
4 Now change the USB share tool from USB/IP to USB Network Gate and then after that save the settings.

5 On the status page go to the USB device section and click on the Un-Licensed.

6 Now provide the registration name and activation code then click on activate button to activate the USB Network Gate license.
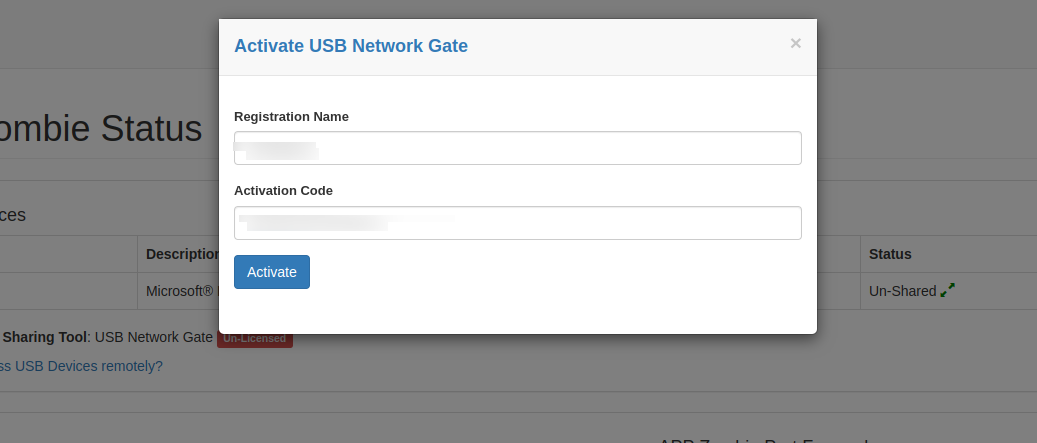
7 Un-shared USB devices are available on the screen

8 After successful code activation you will be able to share and un-share the USB device.
NOTE: only one device can be shared at a time.
USB/IP Management
We can achieve this functionality by using the USB-Over-IP feature of EBF and a one-time setup on your local Linux machine. Following are the steps to access a remote USB device on your local machine, given the USB is connected to any port of Zombie.
Steps to be performed on EBF and Zombie: Identify the USB device that you want to access remotely.
1 Login to the EBF homepage/Dashboard through a web browser with credentials.
Username: <username>
Password: <password>
2 After login, select the All Devices option under the Devices dropdown.
3 All Devices page will appear on the screen. Select the device name (rpi_demo is taken as reference) to view the Zombie worker.
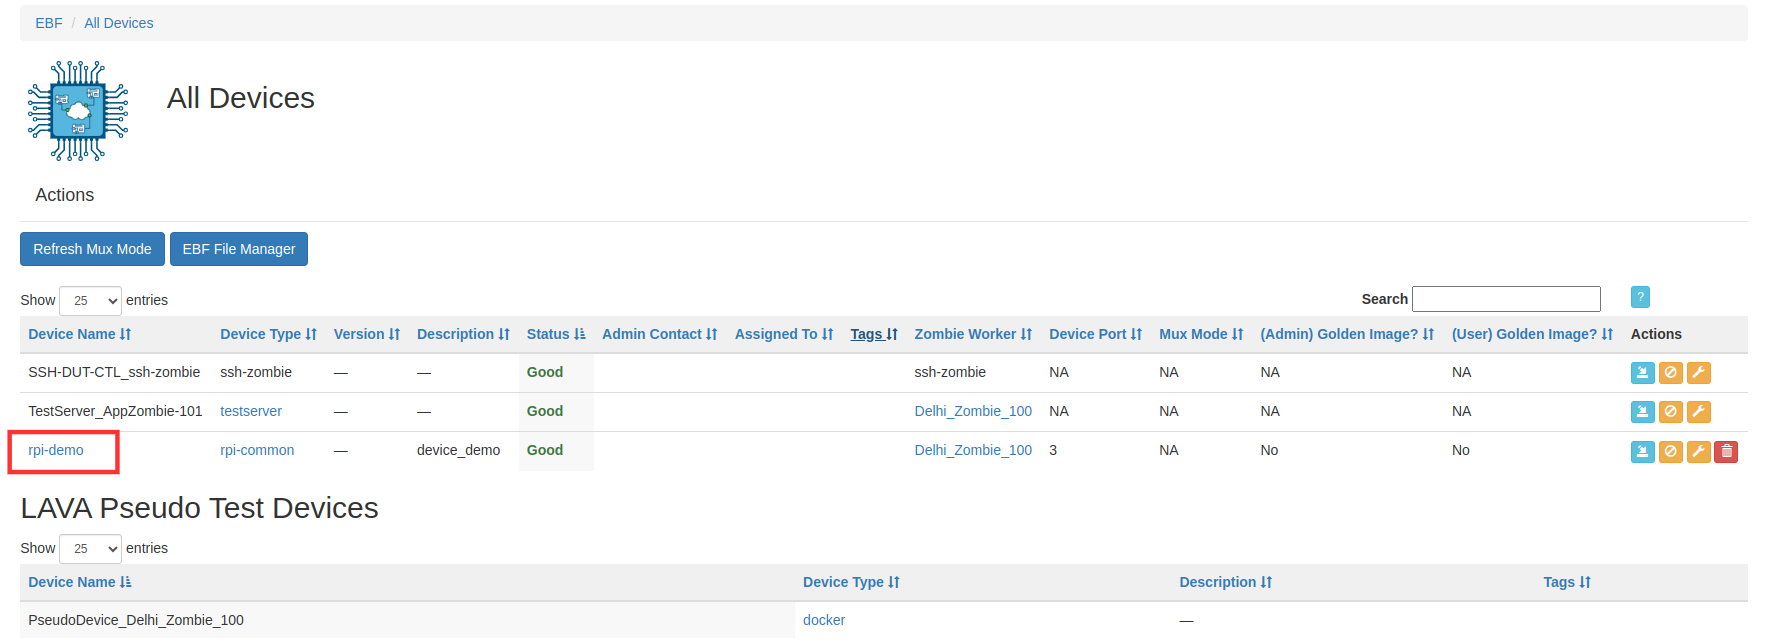
4 On the next page, select worker to view the zombie worker of the selected device.
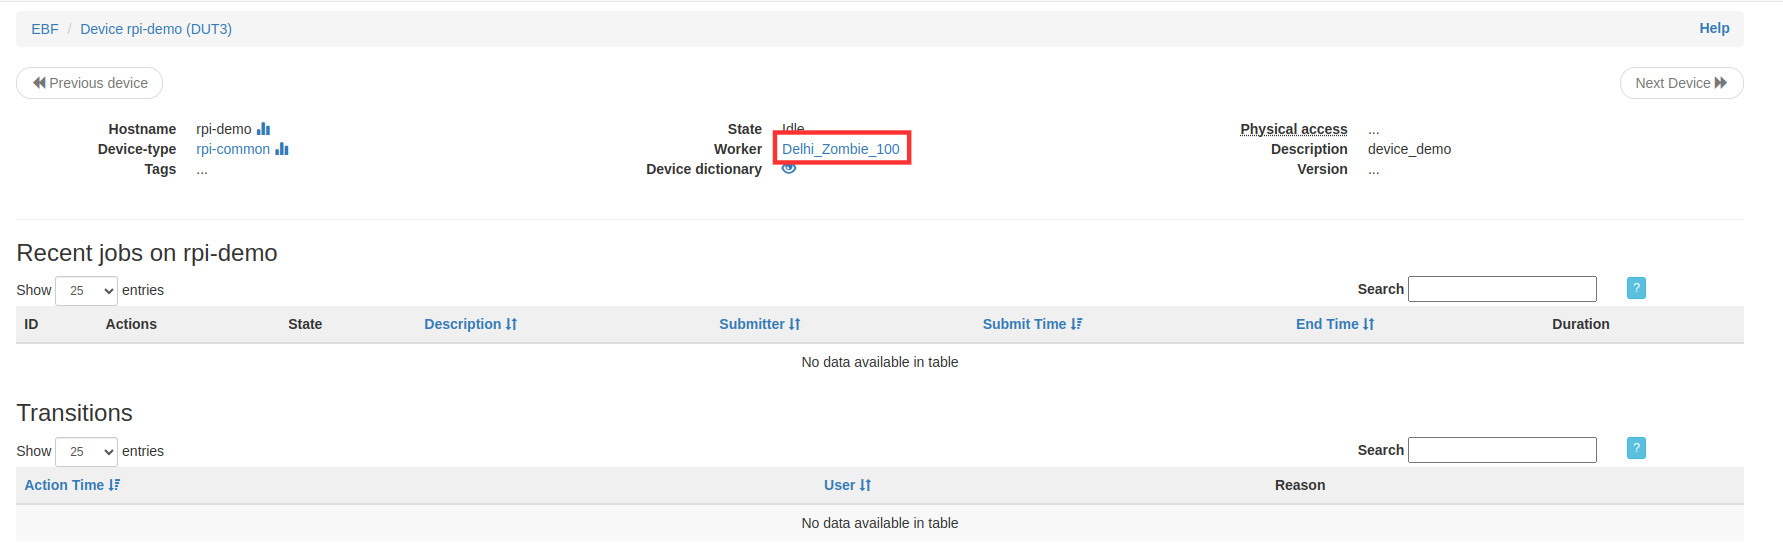
5 select Zombie EZ-Config to view the status of zombie’s in detail.
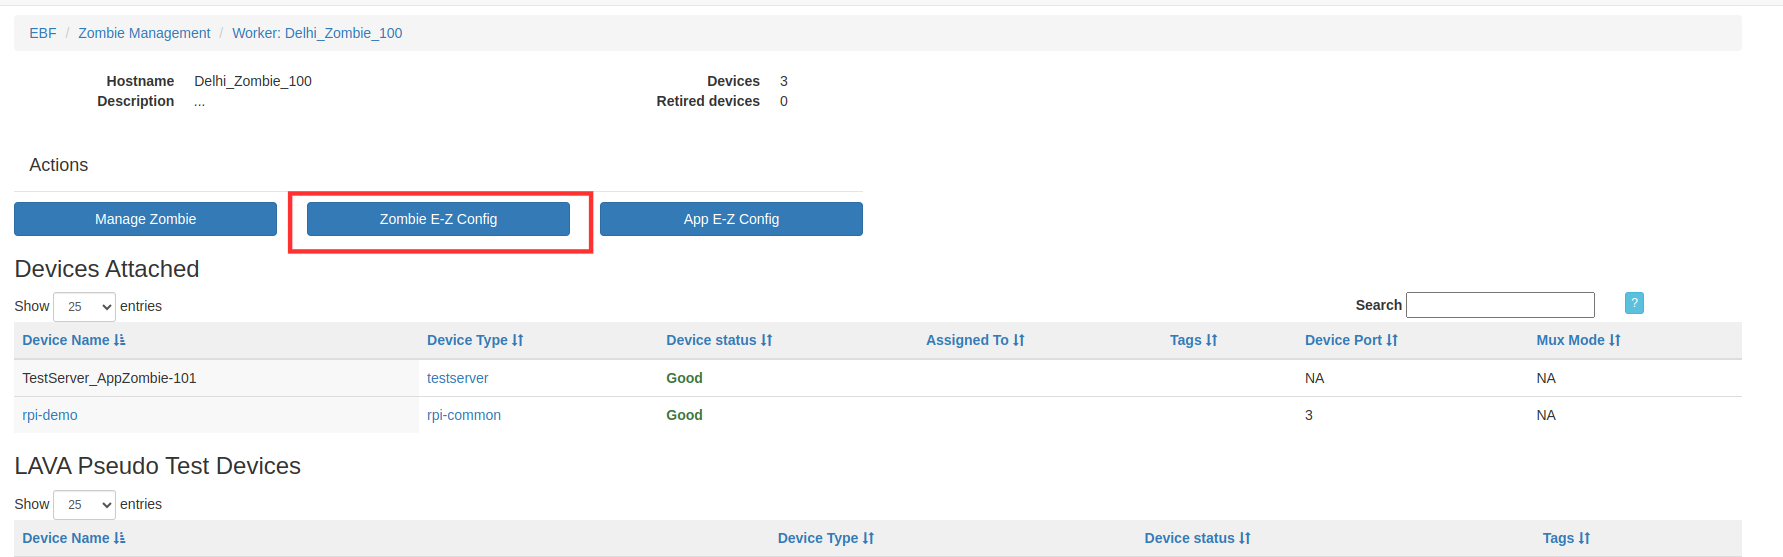
OR:
Click on the Zombie icon corresponding to the Zombie Status to login into Zombie.

6 Provide valid login credentials to login into zombie EZ-config.
7 On this page, under the USB Devices section, all the USB devices connected to that Zombie are listed.
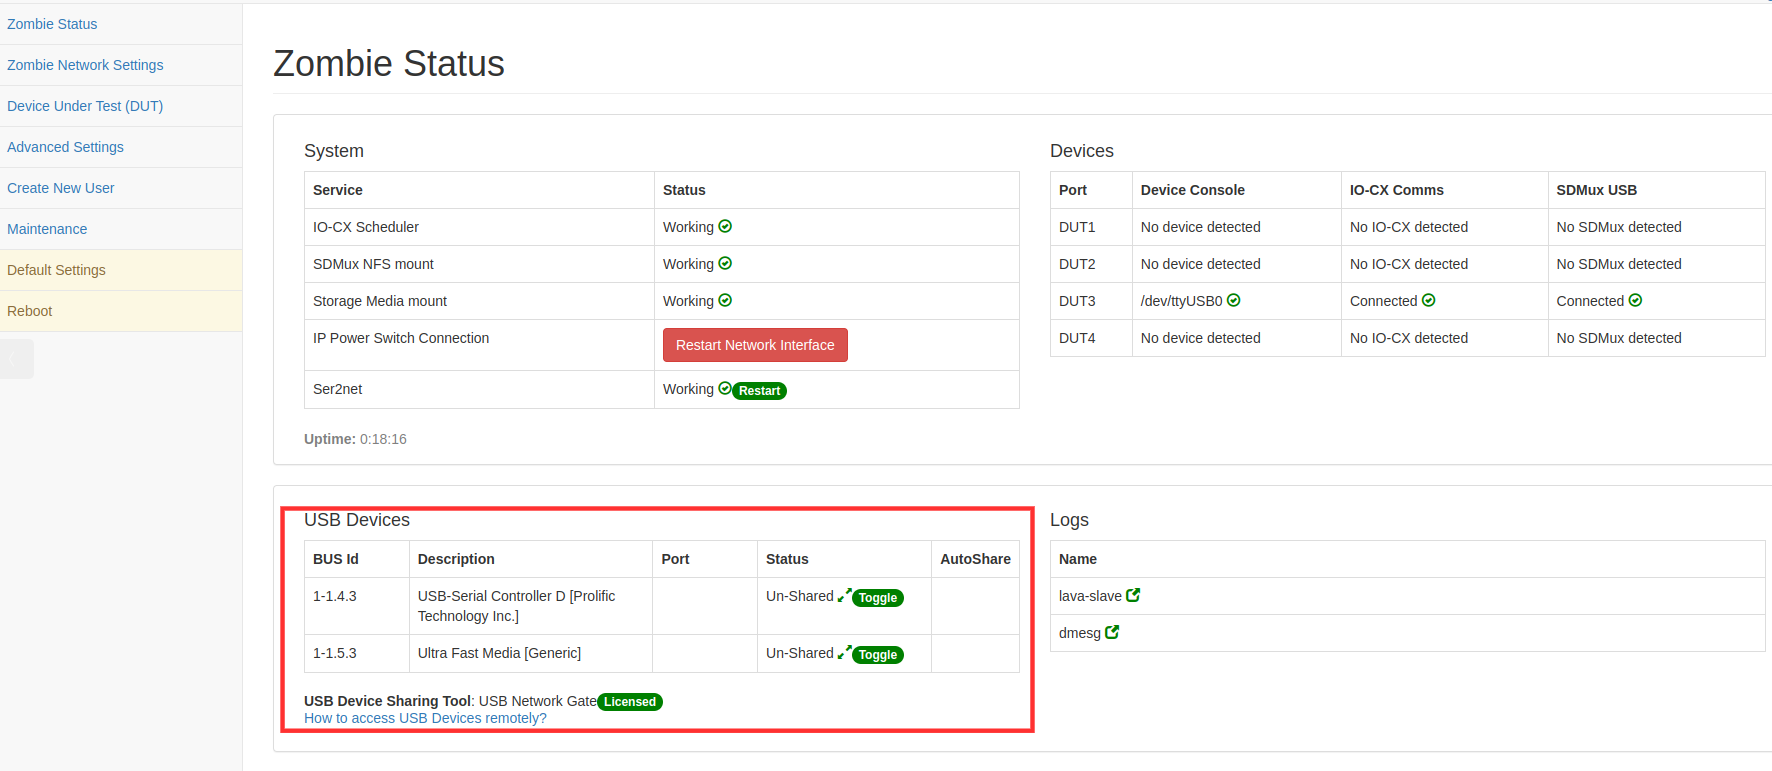
8 Then click on the Zombie Status tab.
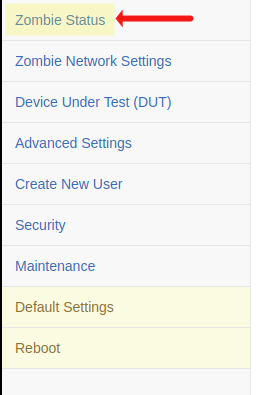
9 Identify your USB and click on the Toggle button.

10 USB’s status now gets changed to Shared. Now the USB is available to be accessed remotely.

11 This is all you need to do on EBF and Zombie. Now you have to setup your local Linux machine to access the USB.
Steps to perform on Local Linux Machine: Follow the steps mentioned in the link on the Zombie status page.
1 Follow the link as mentioned in the image below, and it will provide you all the information needed to install and use USB/IP.

2 Click on the link and follow all the steps mentioned.
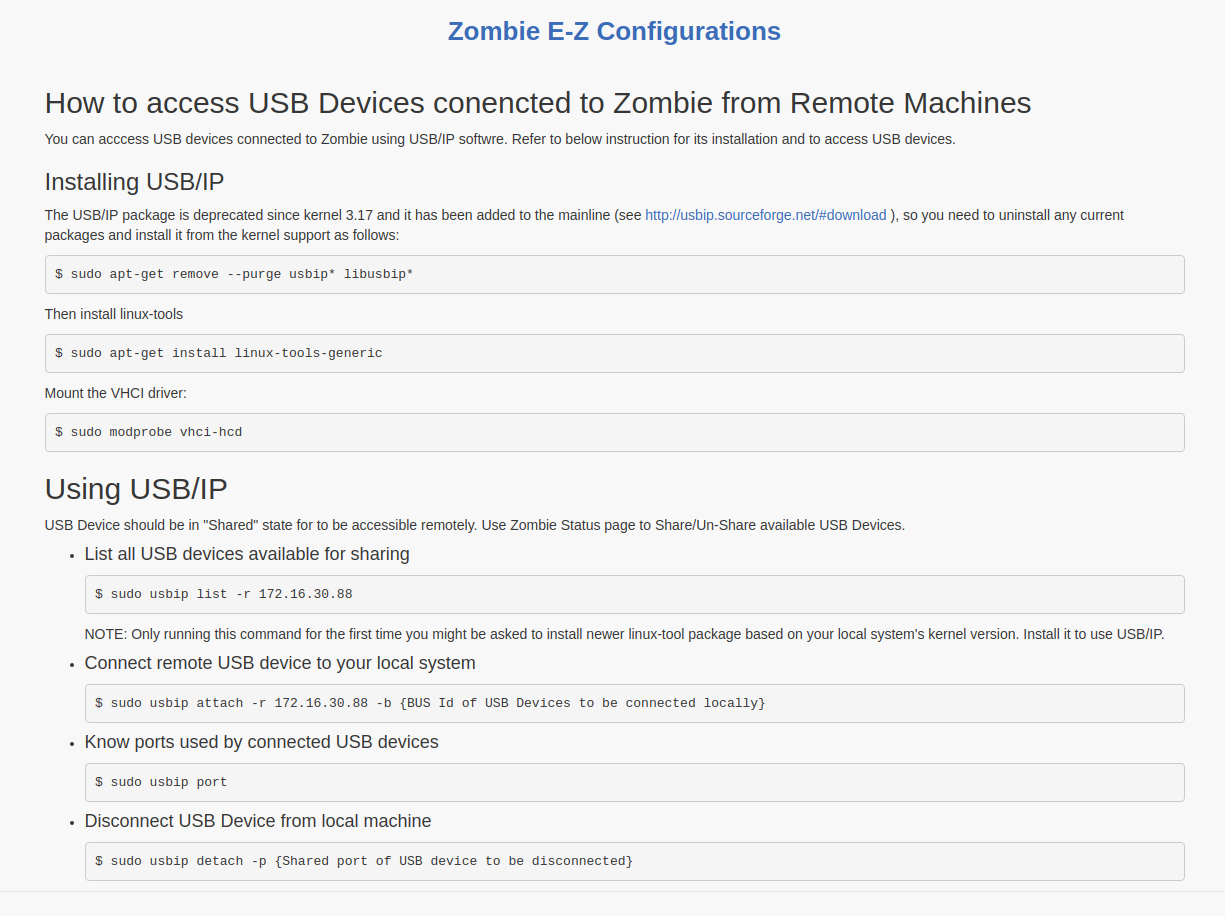
Install usbip utility in your local Linux machine (from where you want to access the remote USB).
After successfully attaching the remote USB to the local machine, it will start showing its entry in the system device tree.
Now you can access this USB from your Local machine.
To free the USB device after the user, click on the Toggle icon to un-share the target device.

NOTE: 1 USB Device can be accessed only by 1 user at a time.
How to Auto share USB/IP Devices On EBF
Go to All Devices
Select the Device from All Devices page.
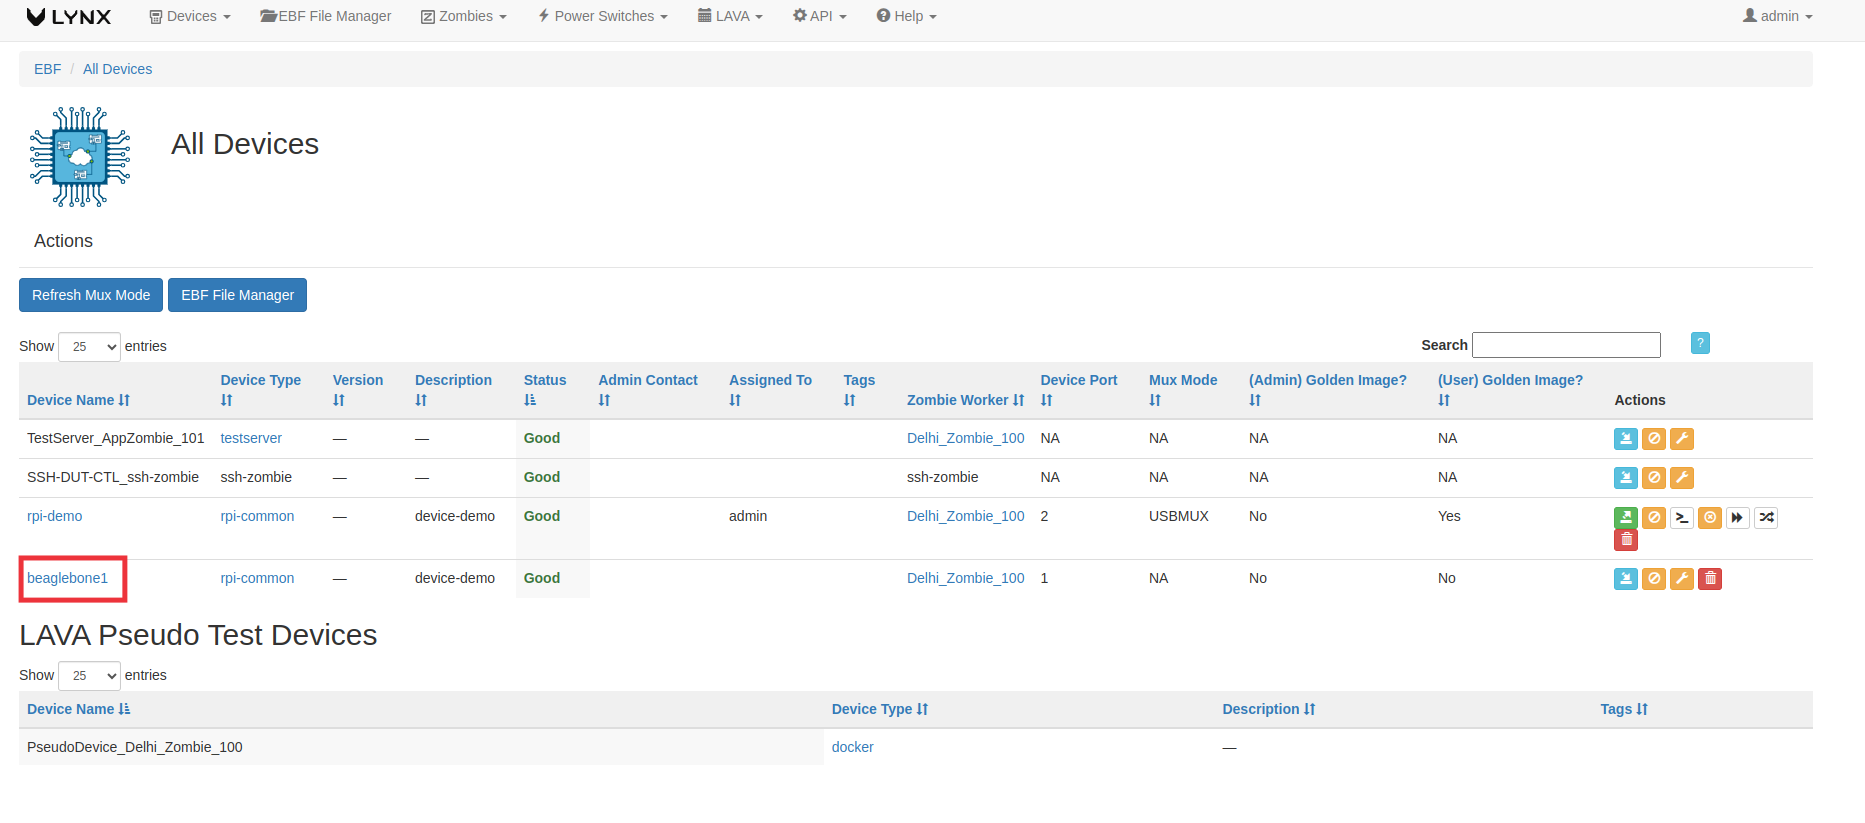
Select worker to view the Selected Worker.
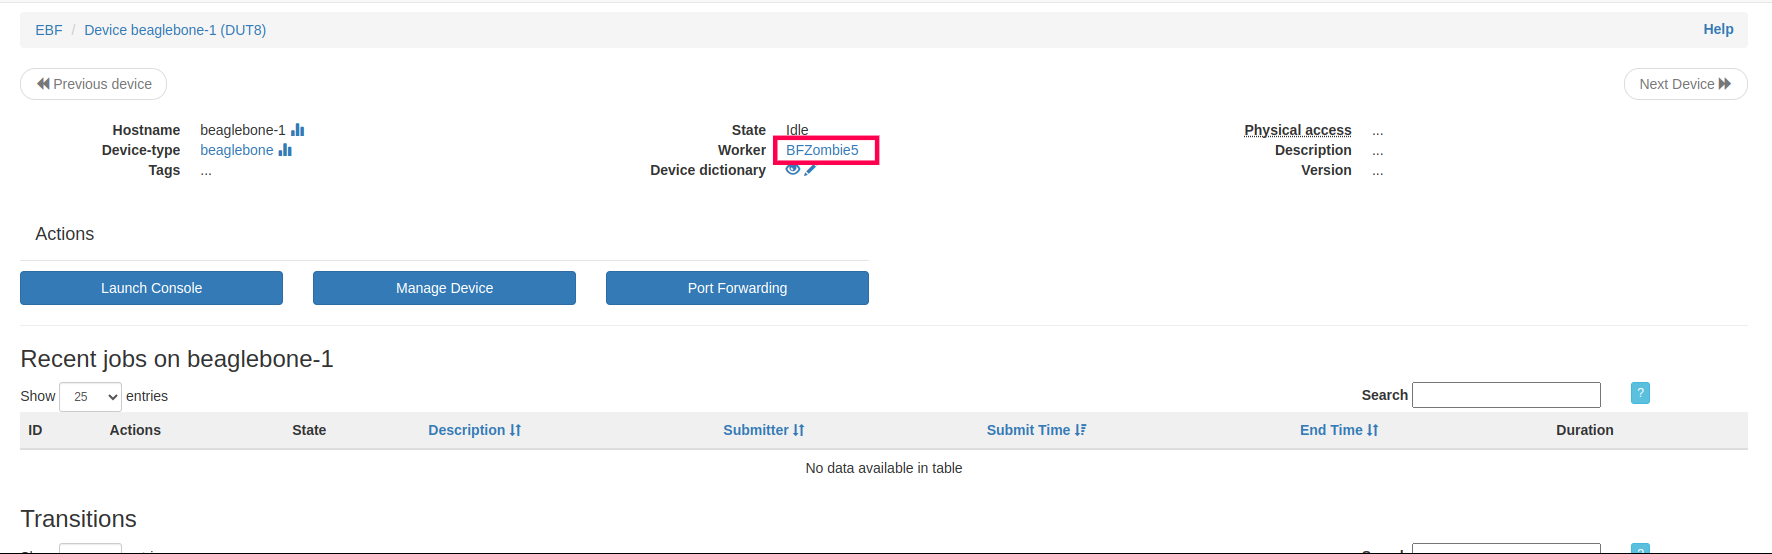
Select Zombie E-Z config to see the view the status page of the zombie.

On this page, USB Devices are visible under the column USB Devices.
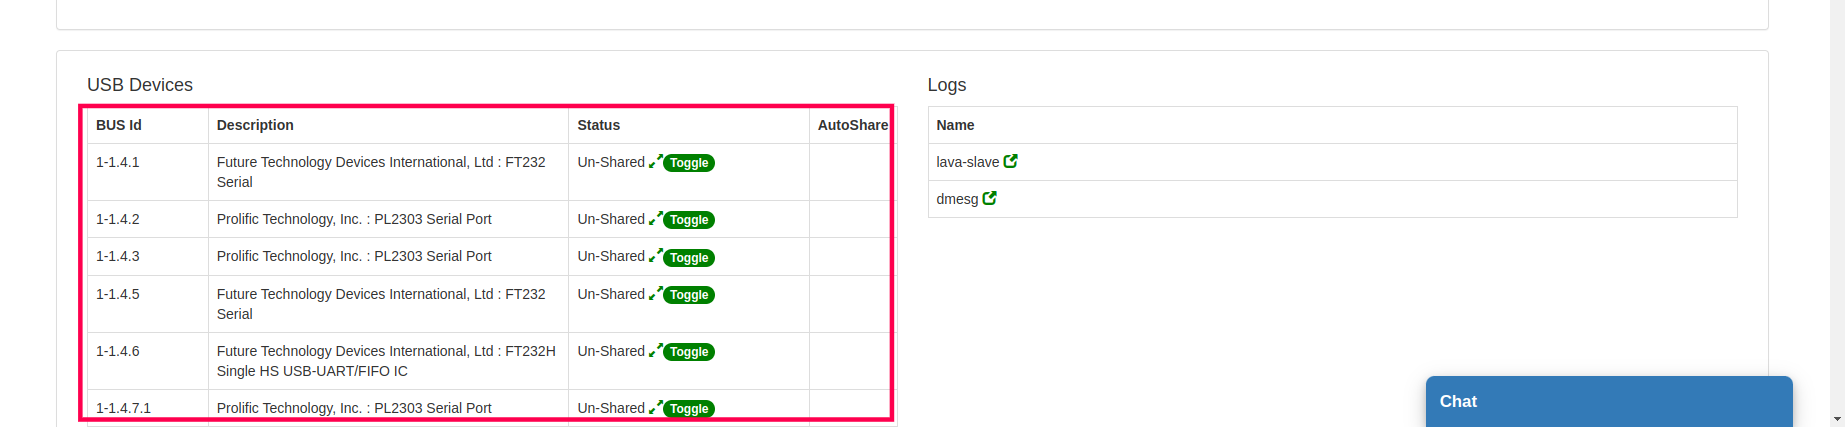
To Autoshare the USB Device, the device must be in the shared state.
Click on the Toggle button to share the device.
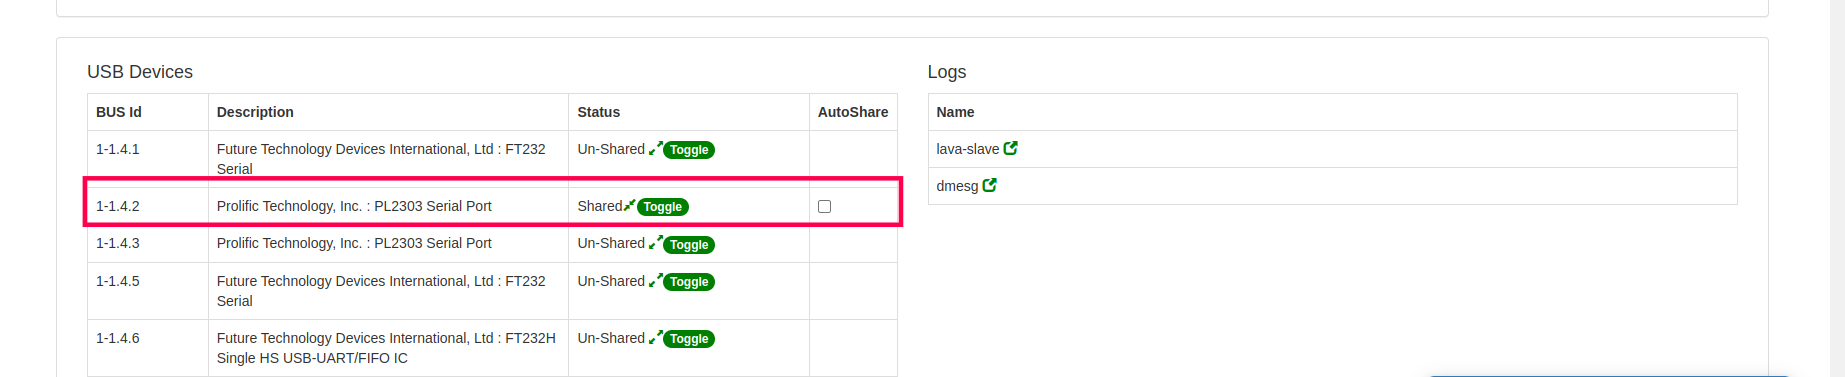
Check the Check-box to autoshare the device.
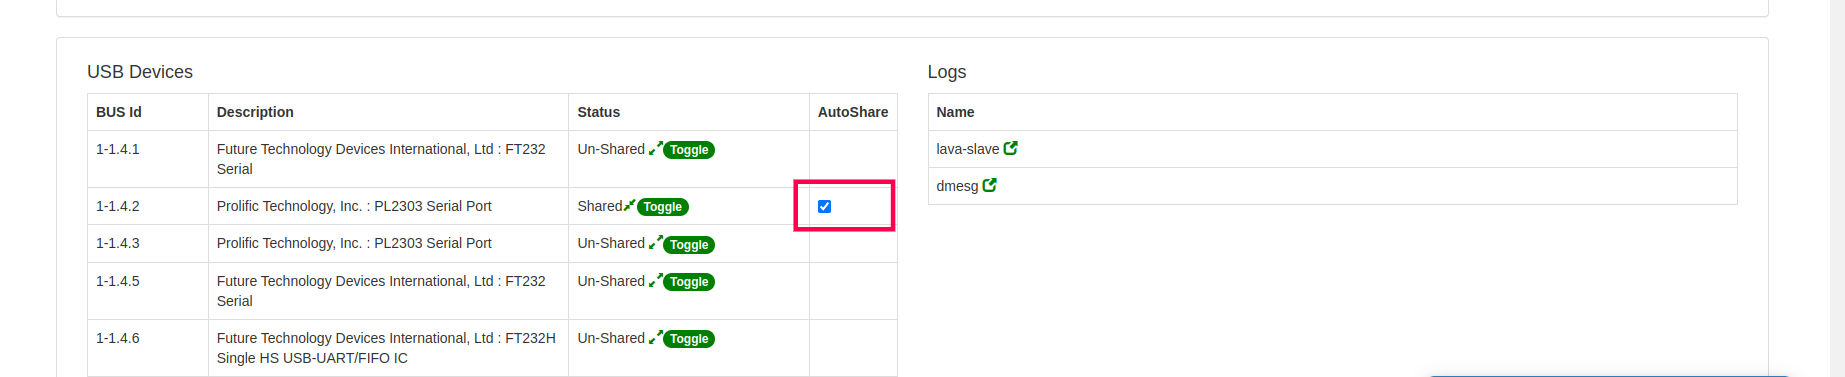
Enable KGDB Debugging
KGDB is a source-level debugger for the Linux kernel. This section will provide information about how a KGDB-enabled board can be debugged remotely using EBF. We can achieve this functionality by using the USB-Over-IP feature of EBF and a one-time setup on your local Linux machine.
Steps to be performed on EBF and Zombie: Identify the board that you want to debug.
1 Login to the EBF homepage/Dashboard through a web browser with credentials.
Username: <username>
Password: <password>
2 After login, click on the All Devices option under the Devices dropdown.
3 Click on the device name connected to the concerned Zombie that you want to debug.
4 On the next page, select worker to view the zombie worker of the selected device.
5 Select Zombie EZ-Config to view the status of zombies in detail.
OR:
1 Click on the View Zombie status icon under the Actions column of the concerned Zombie.
2 Click on the Arrow to go to the login page of E-Z config page.
3 Now the user will be redirected to the Zombie login page.
4 After successful login On this page, under the USB Devices section, all the USB devices connected to that Zombie are listed.
5 Identify your device and click on the Toggle button.
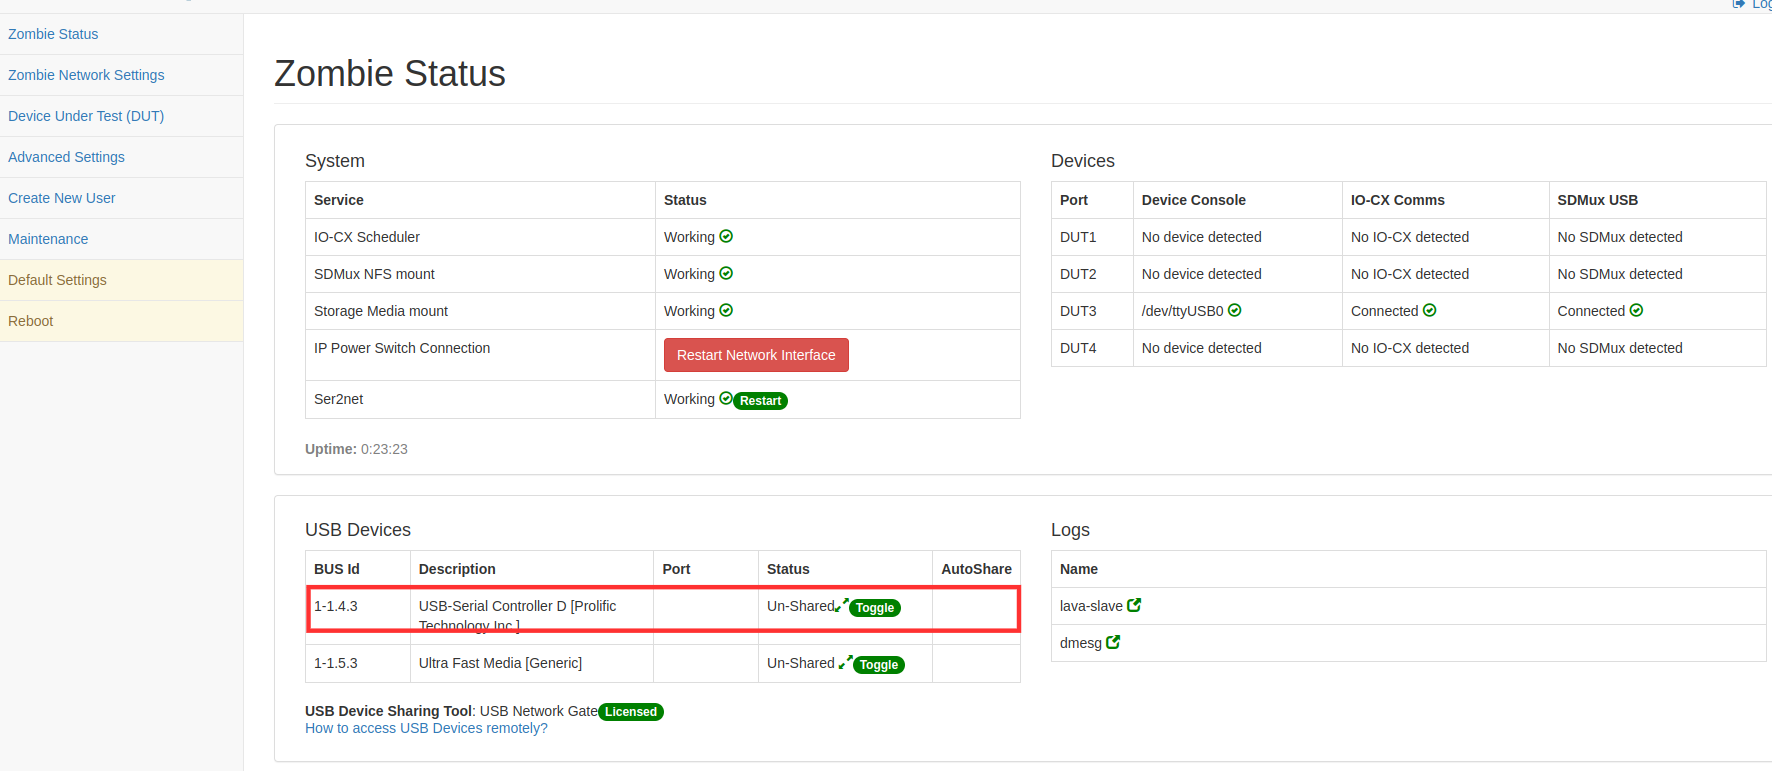
6 Device’s status now gets changed to Shared. Now the device is available to be accessed remotely.

7 This is all you need to do on EBF and Zombie. Now you have to setup your local Linux machine to debug the board.
Steps to perform on Local Linux Machine: Follow the steps mentioned in the link on the Zombie status page.
1 Follow the link as mentioned in the image below (present at the bottom of the Zombie Status page), and it will provide you all the information needed to install and use ‘usbip’.
2 Click on the link and follow all the steps mentioned.
Install usbip utility in your local Linux machine (from where you want to access the device connected on EBF).
After successfully attaching the remote device serial console to a local machine, it will start showing its entry in the system device tree.
Now you can access this device from your local machine.