Following are the steps to flash a new image with the help of a boot media-SD card:
1 Login to the EBF homepage/Dashboard through a web browser with credentials.
Username : <username>
Password : <password>
2 After login successfully refer user_guide.html#how-to-access-a-device-s-web-console to perform console launch.
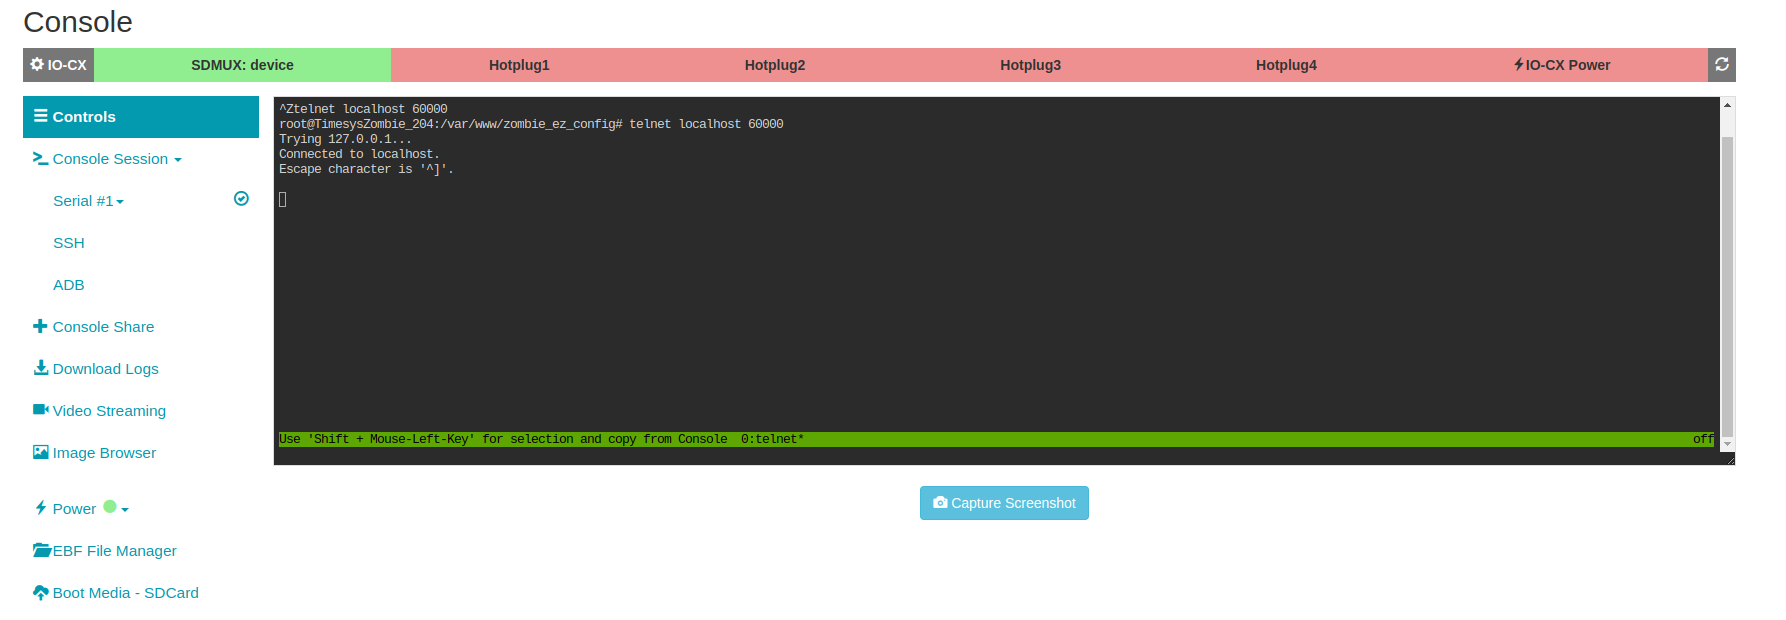
3 The following Web Console session will appear on the screen if the IO-CX board is connected.
NOTE: For SDCard Flash it’s mandatory to have IOCX connected to the Device. If IOCX is not connected then the following Console screen appears on the screen and the user cannot access Boot Media-SDCard functionality.
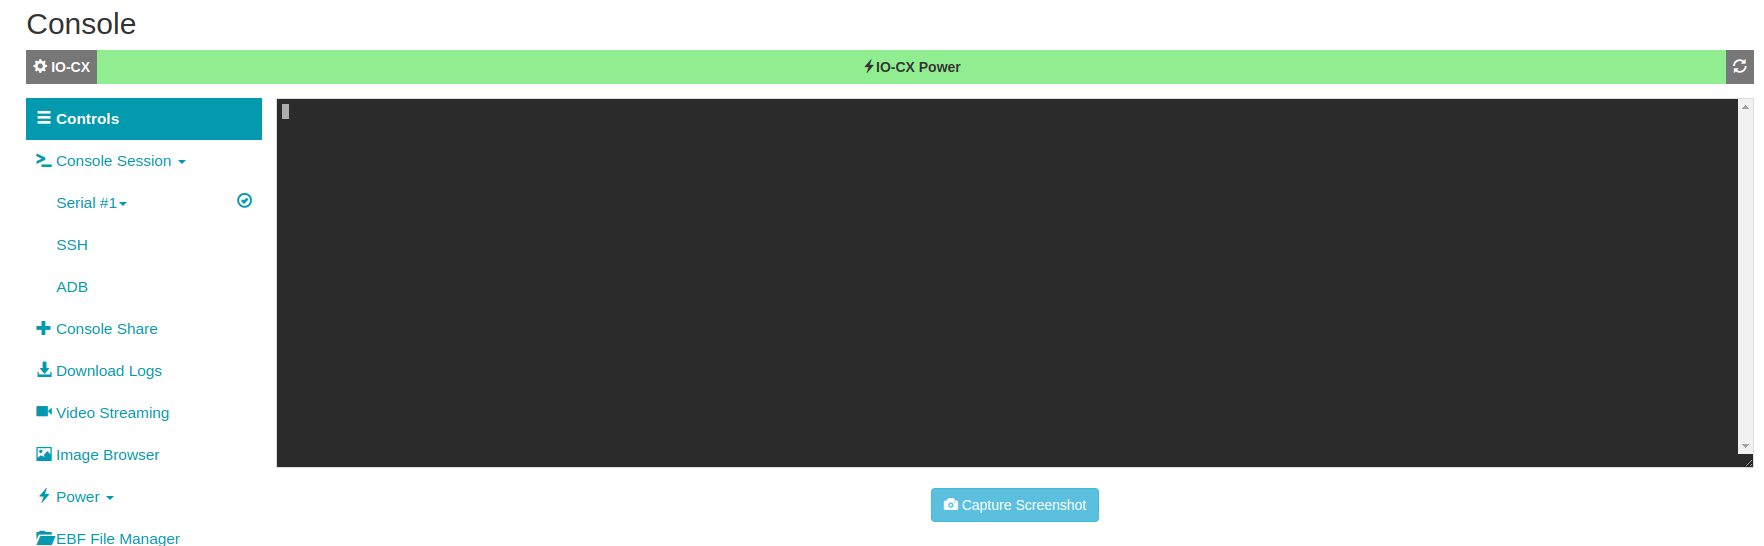
4 To upload an image on an SD card, first, turn off the power of the device(board) by clicking on the ‘OFF’ option. The ‘SDMUX: Zombie’ option will turn red as shown in the image below. Then click on the ‘boot media-SDCard’ option.

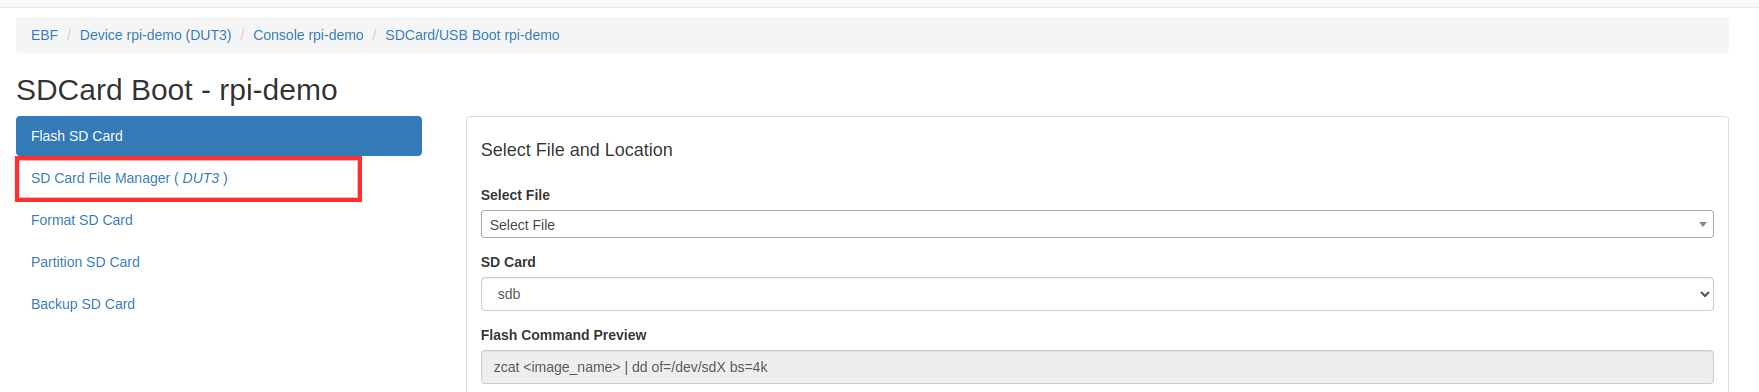
5 Now the user will be redirected to the SDCard-boot page to Flash an Image.
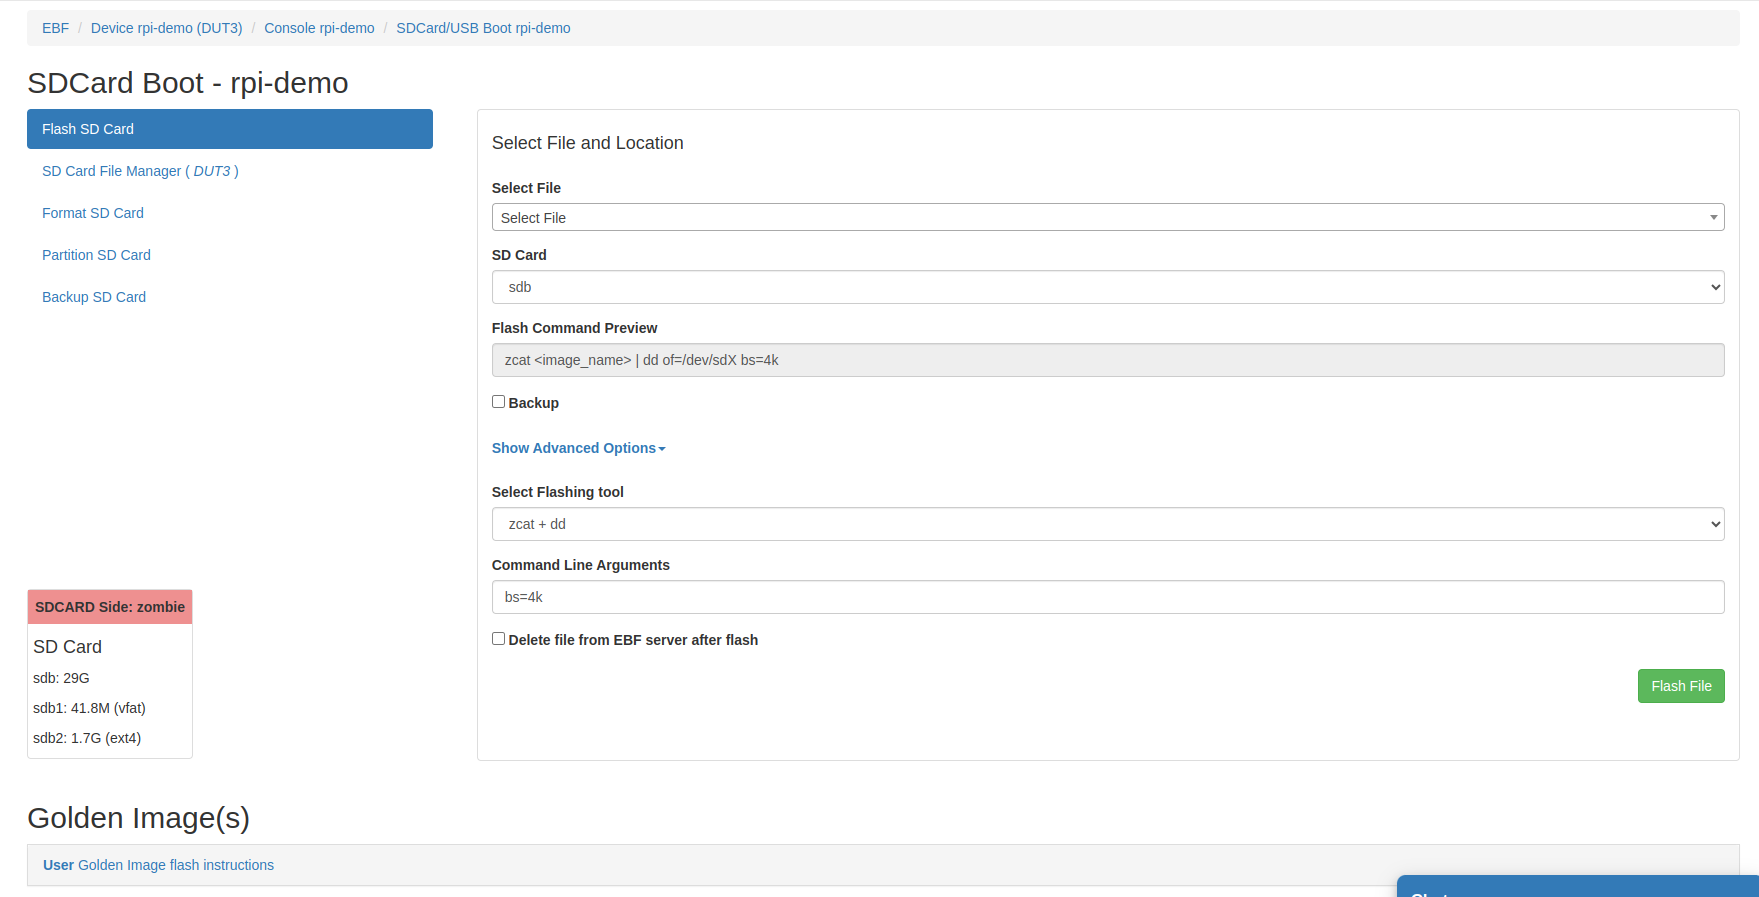
There are two ways to Flash an Image.
Select image from local Computer.
Select image from EBF server.
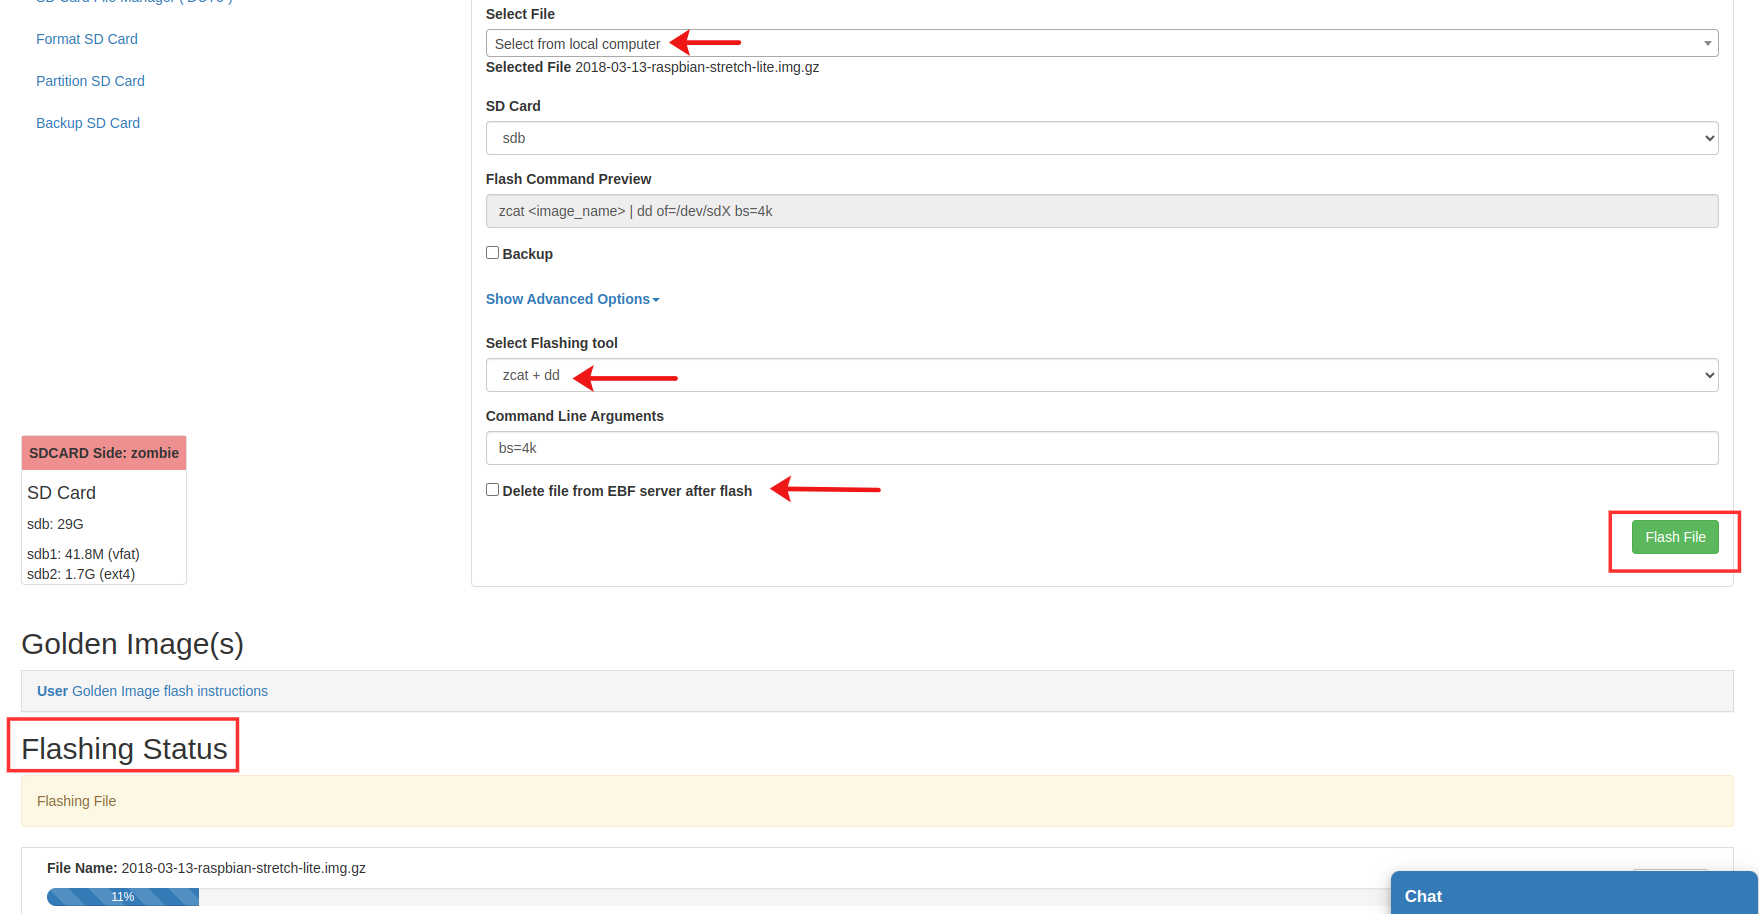
6 Now flash an image Selecting Image from Local Computer.
From Select file drop-down and choose “select from local computer”.
Now choose the desired file to flash into the SD card.
From the SD card drop-down menu choose the target partition.
Select flashing tool as per requirement(zcat + dd/gunzip + dd/zstdcat + dd/dd/bmaptool/tar/unzip/cp). If you don’t select, it will be auto-selected according to the file extension of the chosen file.
Give command-line argument if needed.
Check the “pre-format(mkfs)” check the box if want to format the partition before flashing an image otherwise unchecked.
Check the “Delete file from EBF server after flash” check box if want to delete the file after flashing from ebf server otherwise unchecked.
Now click on the flash file button to flash the image into the SD card.
During flash the flash status of the image should be visible on the screen.
7 After successful image upload, select the Launch console button to start the Console session.
8 Now Go to SD card file manager and see the target partition where the file was flashed.
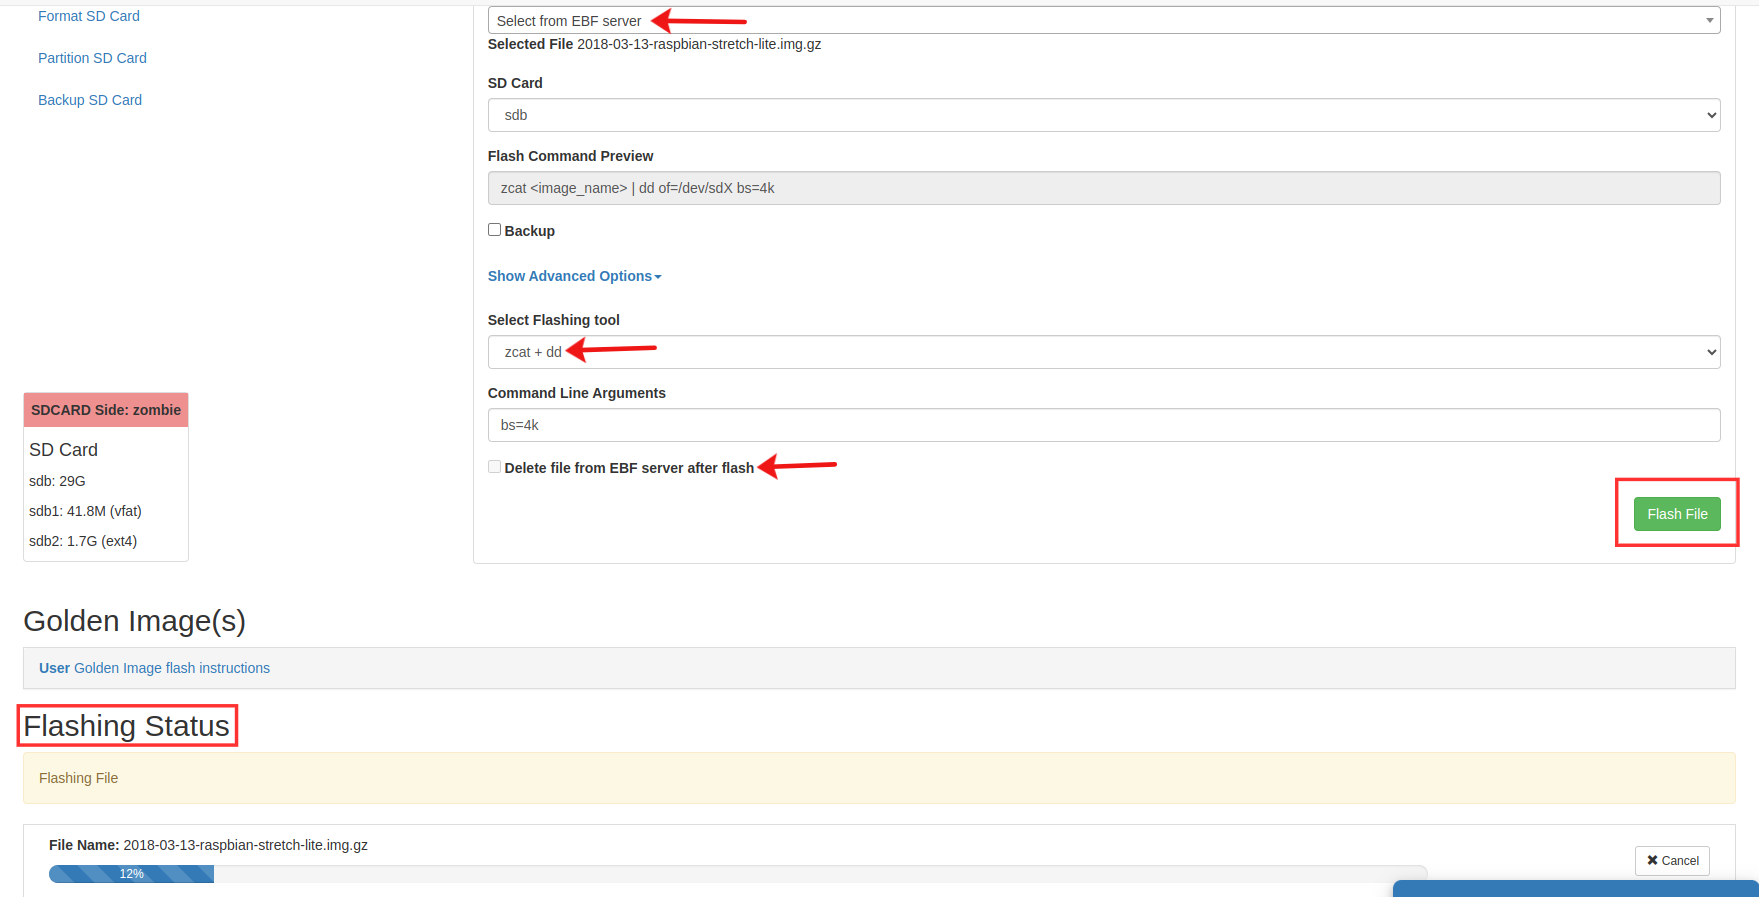
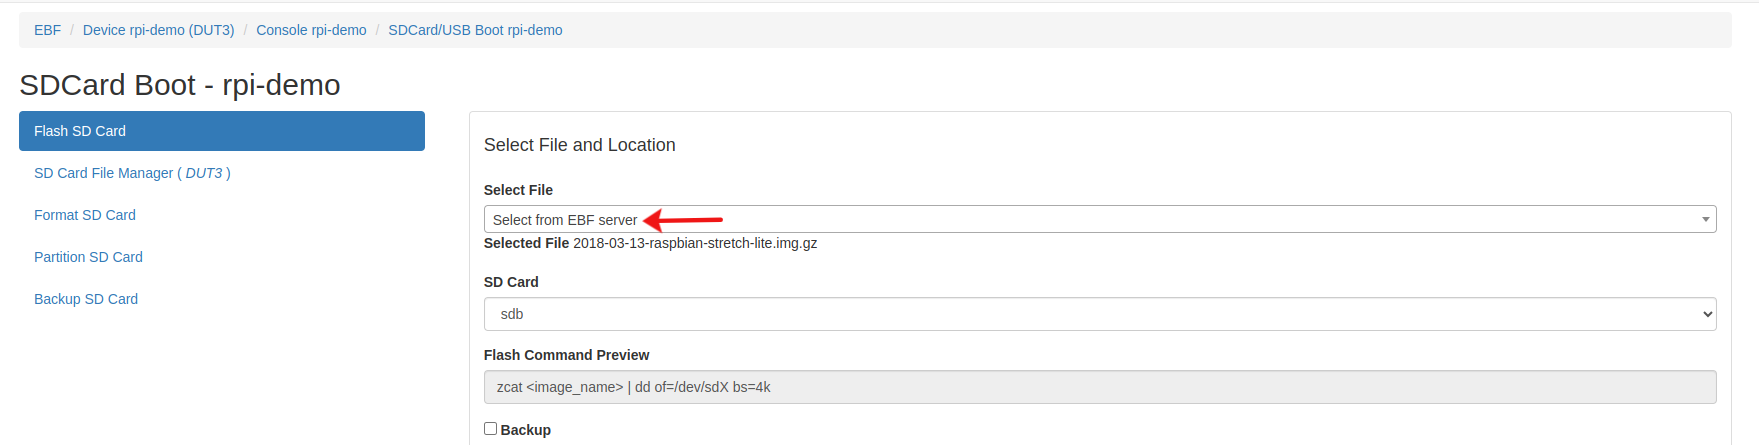
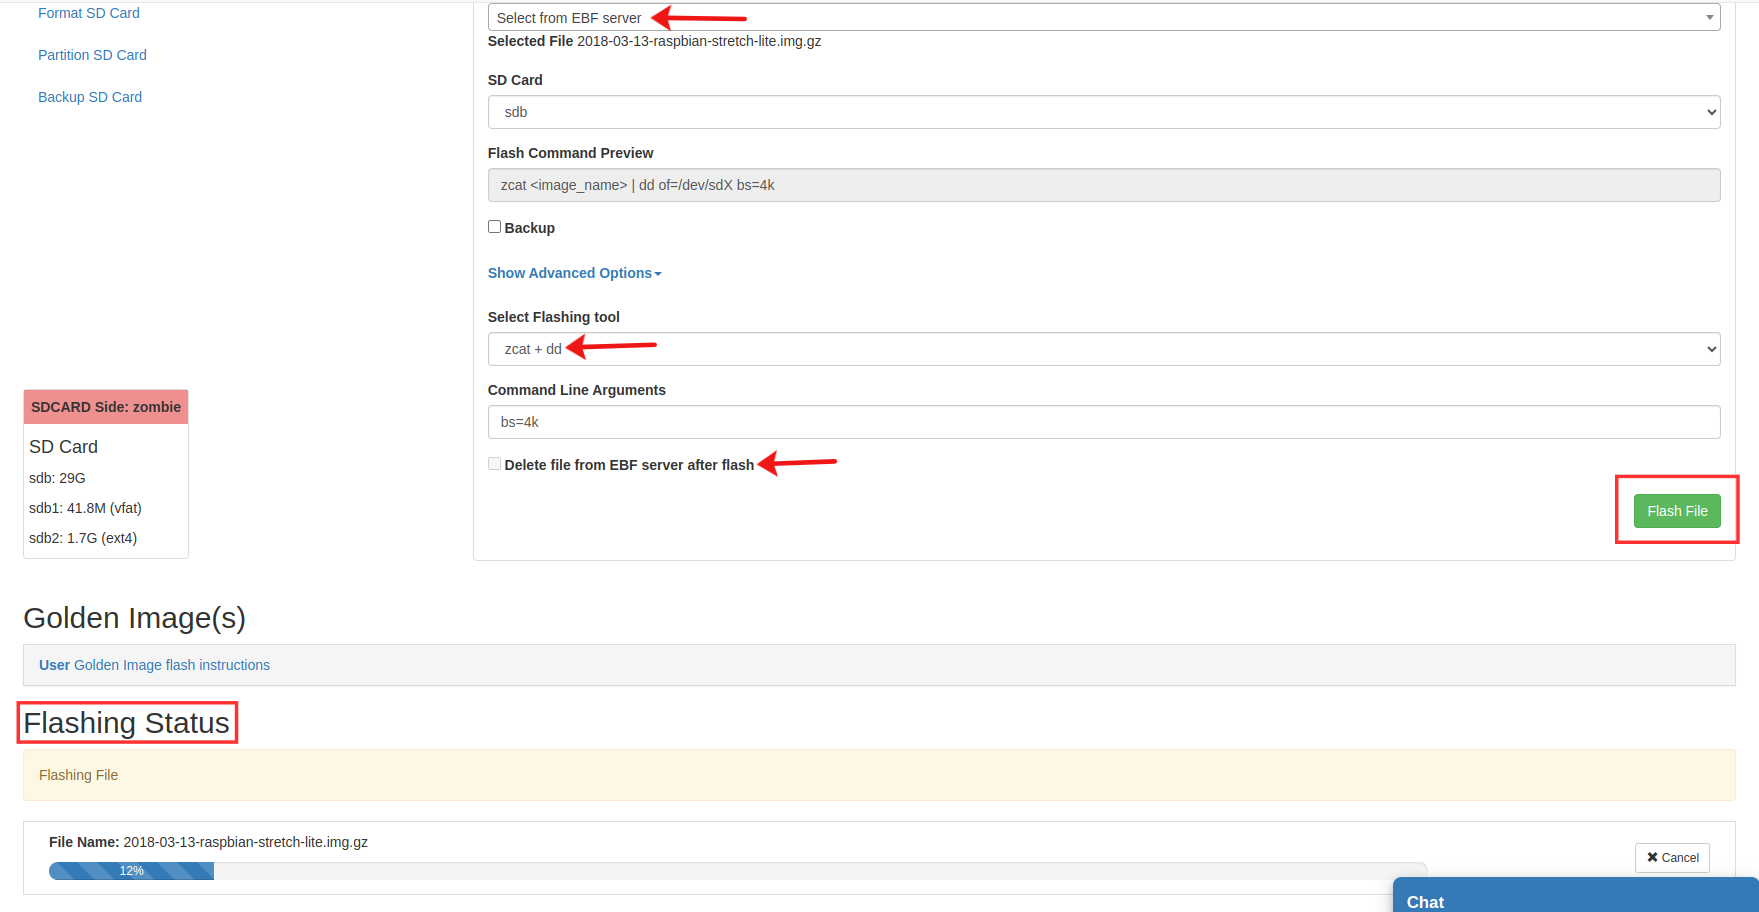
9 Now flash an image Selecting Image from EBF Server.
From Select file drop-down and choose “select from EBF Server”.
Now select the desired file to flash into the SD card.
From the SD card drop-down menu choose the target partition.
Select flashing tool as per requirement(zcat + dd/gunzip + dd/zstdcat + dd/dd/bmaptool/tar/unzip/cp). If you don’t select, it will be auto-selected according to the file extension of the chosen file.
Give command-line argument if needed.
Check the “pre-format(mkfs)” check the box if want to format the partition before flashing an image otherwise unchecked.
Check the “Delete file from EBF server after flash” check box if want to delete the file after flashing from EBF server otherwise unchecked.
Now click on the flash file button to flash the image into the SD card.
During flash the flash status of the image should be visible on the screen.
10 After successful image upload, select the Launch console button to start the Console session.
11 Now Go to the SD card file manager and see the target partition where the file was flashed.
