Add a New Device
The following are the steps to add a new device to the EBF-TAS server:
1 Login to the EBF home page/dashboard (find your URL from the administrator) through the web browser with your credentials
Username : <username>
Password : <password>
2 This would open up the EBF Dashboard.
3 There are two ways to add a new device to the web server:
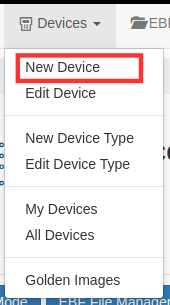
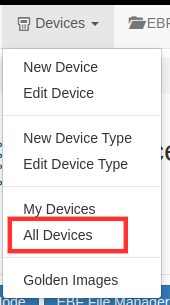
Select the ‘New Device’ option from the ‘Devices’ drop-down list.
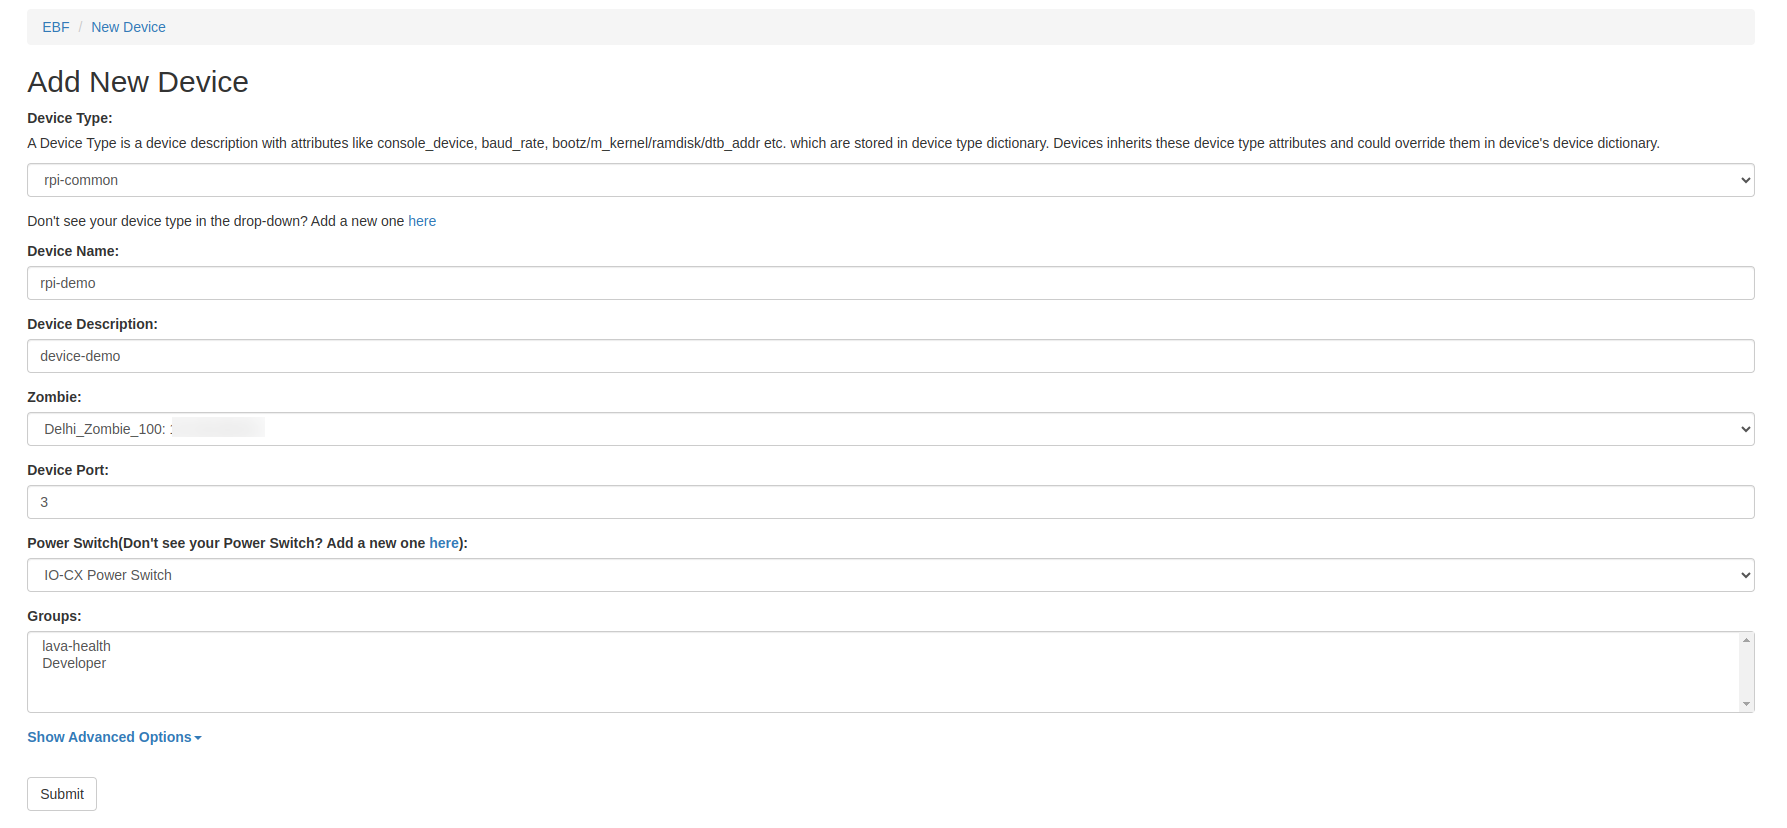
The ‘Add New Device’ page will appear on the screen.
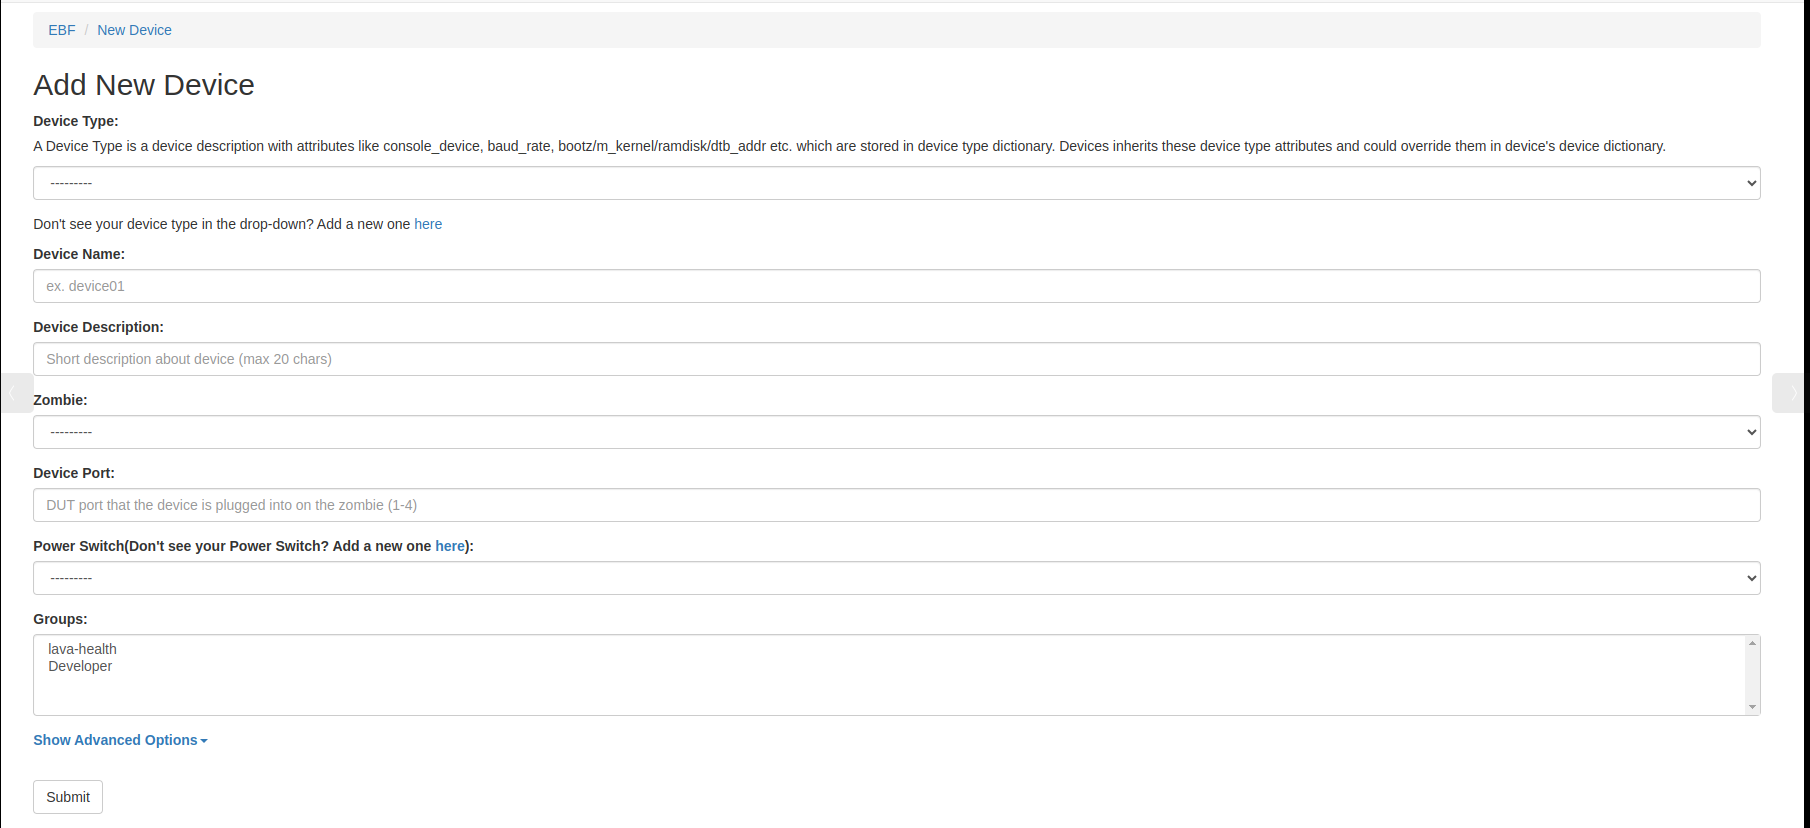
Fill in the necessary fields available on the screen:
You can also restrict user to release device by selecting and deselecting the checkbox Allow Device Force Release. if admin select it then any one can release this device forcefully if he deselected it then no once can release this device excepted admin.

You can give your own hotplug names.
The device could also be assigned a static IP address during Test job execution. To enable this feature, check Do you want to assign Device static IP address during test execution? And enter the Device’s Network interface as shown in the image below.

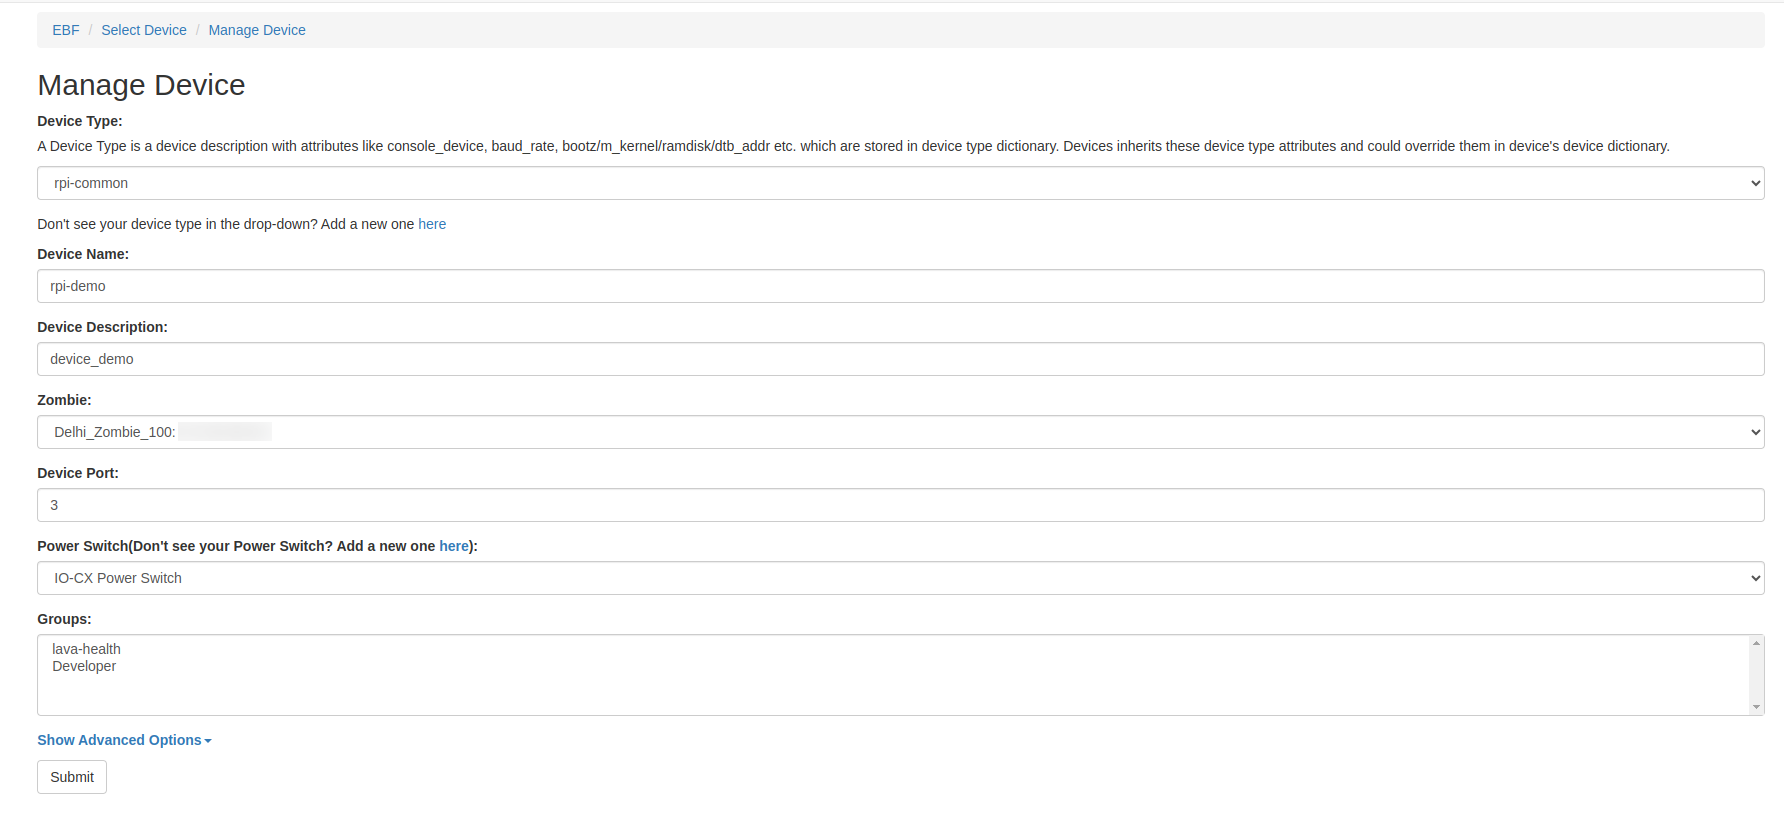
Device type: A device type is a generic description of a device and identifies different qualities of that device.
In EBF, a particular DUT is an instance of a device type. For example, if beaglebone-black is a device type, then it can have many device instances like bbb01, bbb02, BBB, etc that share the same device type with the same set of commands. When adding a device, a device type needs to be added corresponding to the device to be added. The device type can be added only by the admin.
Device name: <Device name> .Choose a meaningful, unique name
Device Description: Add a Short Description of the device.
Zombie: <Zombie Name:IP Address>
Device Port: DUT port that the device is plugged into on the zombie(1-4)
Power Switch Type: Power Switch type can be an IP-controlled Power Switch or an IO-controlled Switch.
Power Port: Power port that the device is plugged into on the power strip
Device Version: Add the device version of your device to the optional field.
Physical Owner: Choose Physical Owner from the drop-down menu in the optional field.
Console Port: Console port number is assigned automatically to the device as per the defined range.
Allow Device Force Release. if admin select it then any one can release this device forcefully if he deselected it then no once can release this device excepted admin.
Hotplug Label: You can give the name of hotplugs.
Do you want to assign a Device static IP address during test execution? By default, when the device boots up during test job execution, it gets an IP address from Zombie through DHCP. When this checkbox is selected, the device is assigned a static IP address.
Network Interface: Device network interface used for connecting with the Zombie network. It is required when Do you want to assign a Device static IP address during test execution? is selected.
Tags: Provide a tag name to this device. This tag helps EBF identify a particular device if there are multiple devices of the same type.
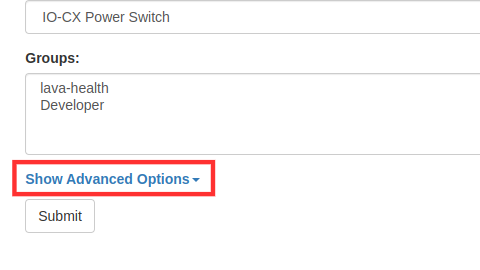
Groups Admin can assign a group to a device. So that the device is visible for all users in that group.
Click on the Submit button after filling in all the fields.
1 The new device will be added to the EBF server after clicking on the ‘Submit’ button.
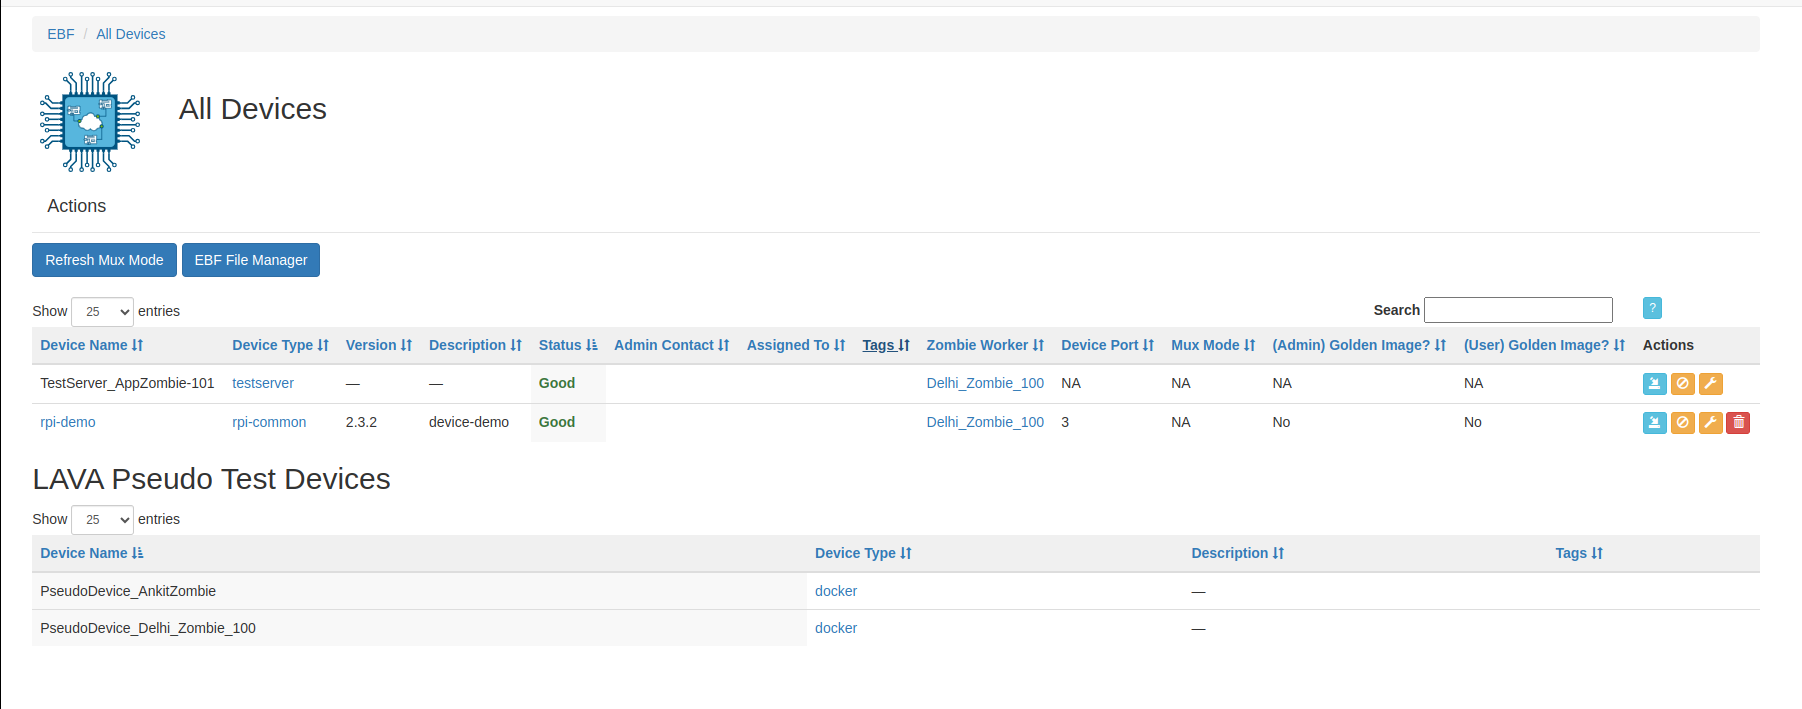
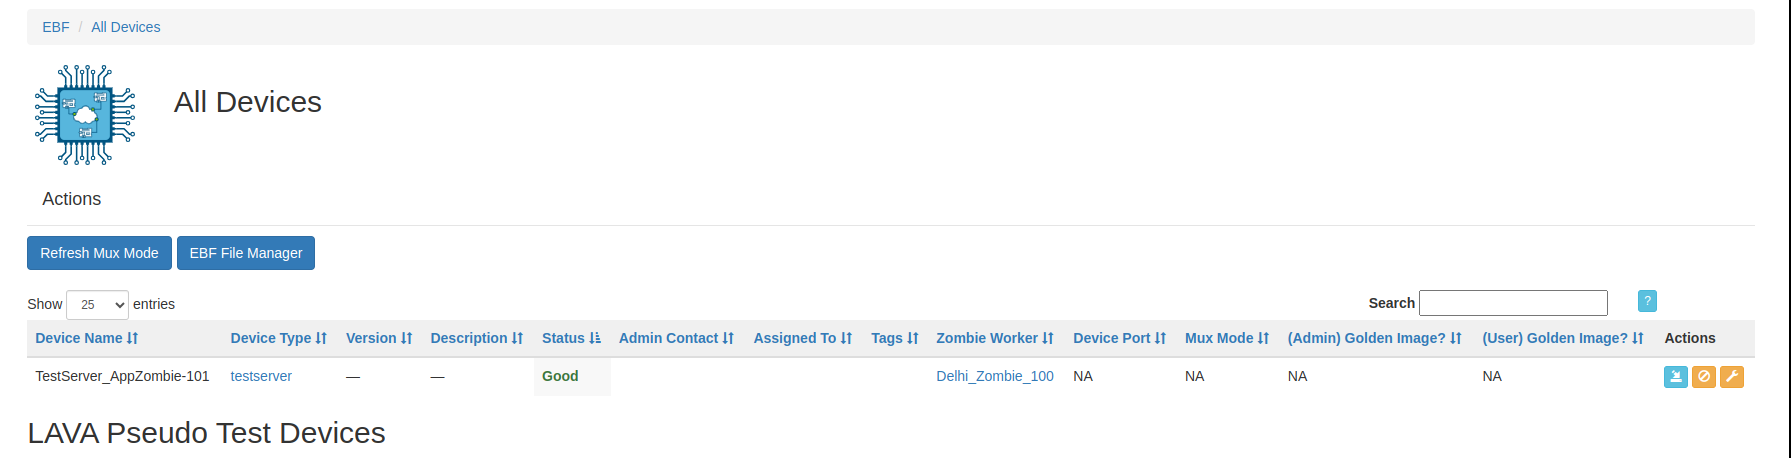
2 The user can view new devices added by selecting: Devices -> All Devices option on the EBF Dashboard.
3 The new device added is listed on the ‘All Devices’ page.
How to edit the details of an available device
The following are the steps to edit the details of the added Device on the EBF server:
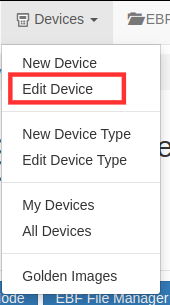
1 Select the ‘Edit Device’ option from the ‘Devices’ drop-down list on the EBF dashboard to edit Device details.
2 Select Device from the drop-down list on the ‘Select Device’ page to edit Device details.

3 ‘Manage Device ’ page will appear on the screen. Edit device details.
4 Click on the ‘Submit’ button, and a confirmation message ‘Updated Device‘ will appear on the screen.

How to Delete an available device
The following are the steps to edit the details of the added Device on the EBF server:
1 Select the ‘All Devices’ option from the ‘Devices’ drop-down list on the EBF dashboard to delete a device.
2 Select the Device you want to delete.
3 Click on the ‘Delete icon’ of the corresponding device you want to delete.
4 A confirmation pop-up will appear on the screen. Click on the ‘OK’ button to delete the device.

5 After deleting the device successfully, the device will no longer appear on the screen.
How to edit Device Dictionary
The device dictionary is created with every new device added. The user can view the device dictionary under the Advanced options available on the Edit Device page.
The following are the steps to view or edit the Device dictionary:
1 Go to Devices -> Edit Device
2 Select the device from the drop-down list.
3 The Manage device page will appear on the screen.
4 Click on the Advanced options tag.
5 Select click here to view Device dictionary.
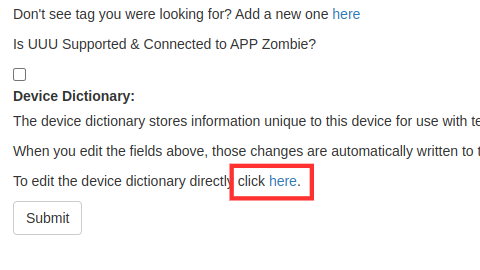
6 The Device dictionary will appear on the screen.
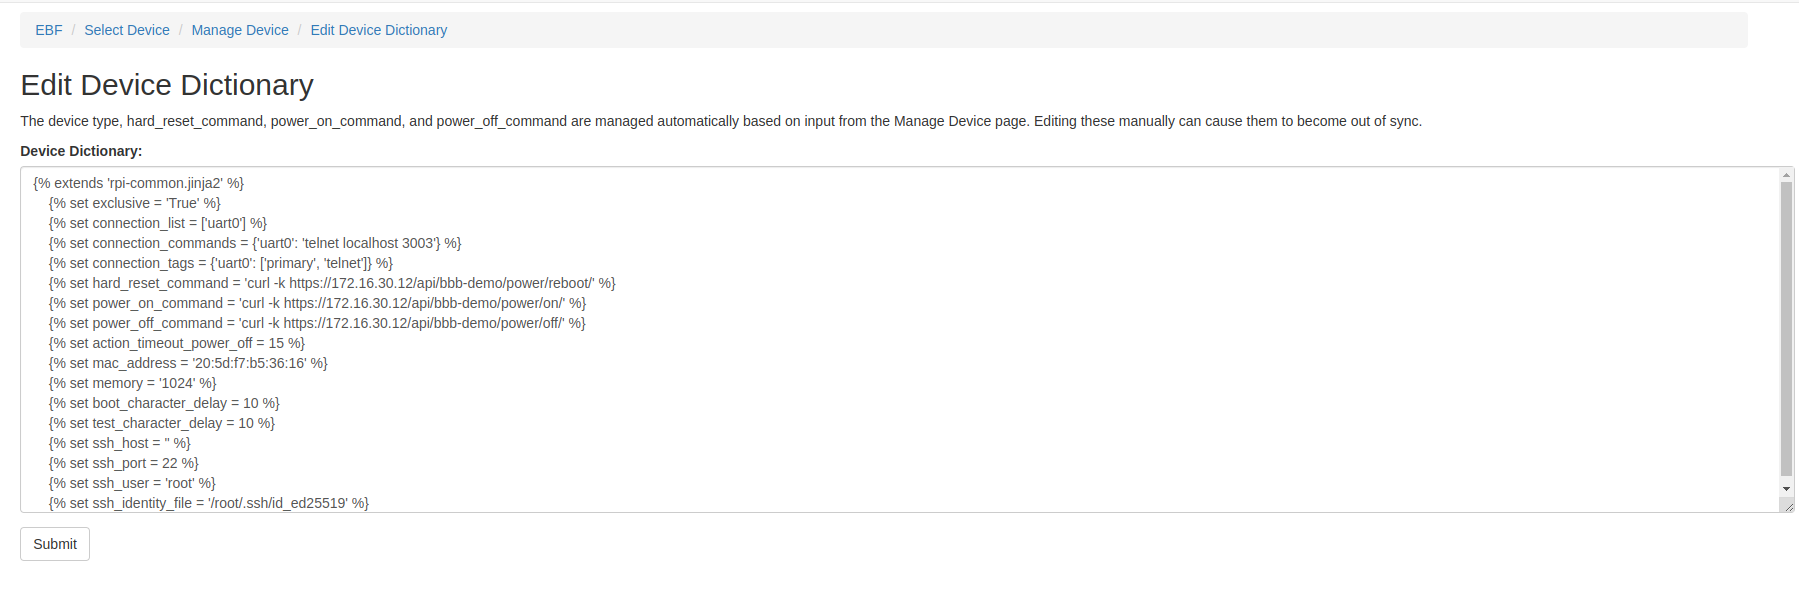
7 The user can view and edit the Device dictionary of the device. The following are the fields in the device dictionary that are created by default while adding a new device.
{% extends 'beaglebone-black.jinja2' %}
{% set exclusive = 'True' %}
{% set hard_reset_command = 'curl  http://192.168.12.81/api/bbb09/power/reboot/' %}
{% set power_on_command = 'curl  http://192.168.12.81/api/bbb09/power/on/' %}
{% set power_off_command = 'curl  http://192.168.12.81/api/bbb09/power/off/' %}
{% set action_timeout_power_off = 15 %}
Must parameters in Device Dictionary are:
{% set connection_command = 'telnet localhost 3006' %}*
{% set mac_address = '50:54:30:14:34:52' %}*
{% set memory = '1024' %}*
Specifications:
Set connection_command=’telnet localhost <telnet PORT from 3003-3006> ‘
set mac_address = ‘<Provide unique Mac Address>’
Set memory =’<set memory> ’
Other parameters for reference:
{% set bootloader_prompt = '=>' %}
{% set interrupt_prompt = 'Press SPACE to abort autoboot in 2 seconds' %}
{% set interrupt_char = ' ' %}
{% set console_device = 'ttyS0' %}
{% set boot_message = 'Starting kernel' %}
{% set shutdown_message = 'Restarting system' %}
Specifications:
Bootloader_prompt: It is set by default in the Device type of the device, but if the prompt varies, then the user can set the bootloader prompt in the device dictionary.
set bootloader_prompt = ‘=>’
Interrupt_prompt: If the device has an interrupt prompt, then the user can set the interrupt prompt in the device dictionary if required.
set interrupt_prompt = ‘Press SPACE to abort autoboot in 2 seconds’
Interrupt_char: If the device requires stopping at the bootloader prompt, then set the interrupt char in the device dictionary.
set interrupt_char = ‘ ‘
Console_device: It is set by default in the Device Type of the device, but if the prompt varies, then the user can set console_device in the device dictionary.
set console_device = ‘ttyS0’
Boot_message: This confirms that the booting process has passed the boot prompt and the board is available to take the next command from the framework. The following is one of the scenarios where it can be useful:
If the device requires a boot message at the time of login, then the user can set boot_message in the device dictionary.
set boot_message = ‘Starting kernel’
Shutdown_message: When the board reboots, log messages are generated. This variable contains a unique substring from the logs, which confirms that the system has rebooted.
set shutdown_message = ‘Restarting system’
Device booting precedence
The boot parameters are selected for booting the device as per the order described below:
Device Dictionary
Device Type
base-uboot.jinja2
base.jinja2
Device Dictionary: The boot parameters provided in the device dictionary for booting the device are of the highest precedence. For example, if the bootloader prompt is defined in the Device dictionary, then the device tries to boot from the defined value of the bootloader prompt in the device dictionary.
{% set bootloader_prompt = '=>' %}
Device Type: If the bootloader prompt parameter provided in the device dictionary doesn’t boot the device, or if the parameter is not defined in the device dictionary of the device, then the value for the bootloader prompt mentioned in the device type of the device boots the device.
{% set bootloader_prompt = bootloader_prompt|default('U-Boot') %}
base-uboot.jinja2: If the device doesn’t boot from the defined value of bootloader prompt in the device dictionary and device type, then the device takes the value of bootloader prompt from base-uboot.jinja2 file and tries to boot the device.
bootloader_prompt: {{ bootloader_prompt|default('=>') }}
base.jinja2: The boot parameters defined in base.jinja2 are of the lowest precedence. If the device is not booted from the above three values, then the device tries to boot from the value of the bootloader prompt provided in base.jinja2 file.
{% set base_menu_bootloader_prompt = 'Start:' -%}
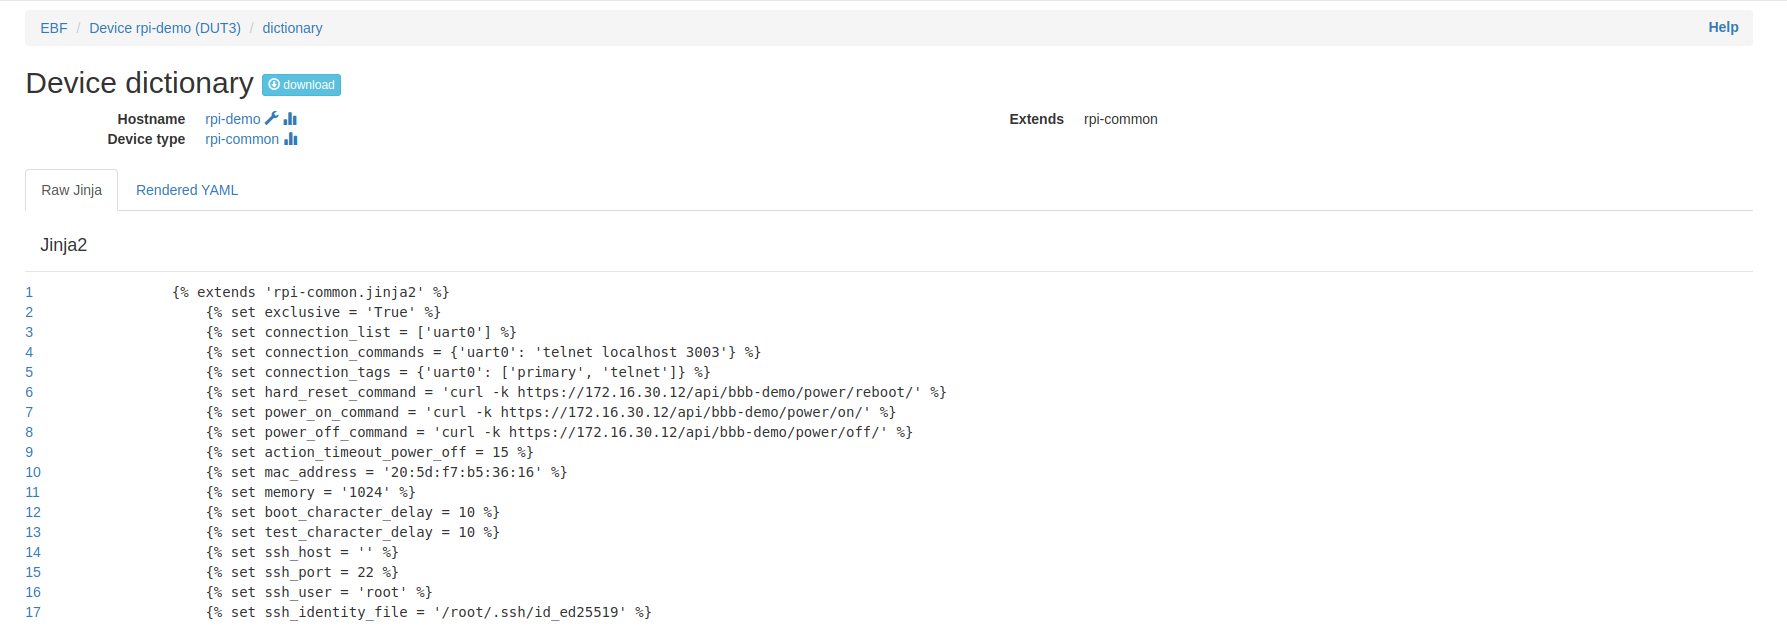
How to View Device Dictionary
The following are the steps to view the device dictionary of a device.
Log in to the EBF server through a web browser using user credentials.
Username: <Username>
Password: <Password>
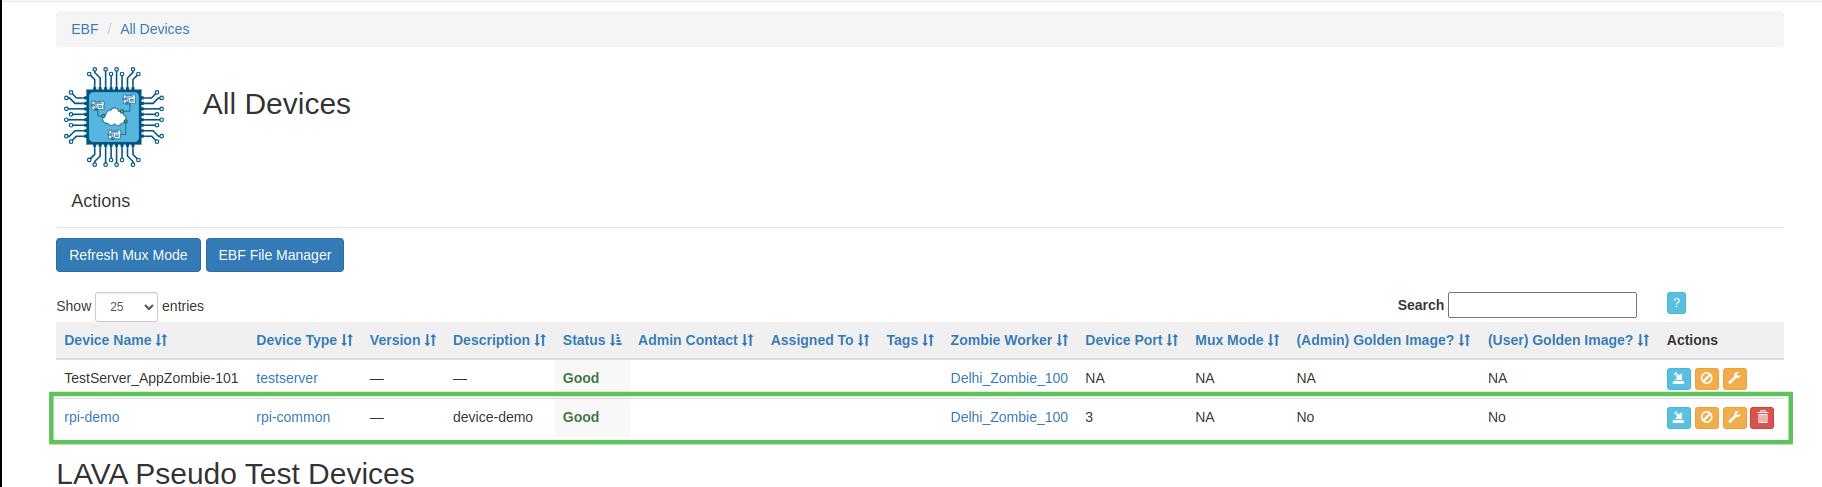
2 Go to Devices -> All Devices.
3 The All Devices page will appear on the screen. Select the device name(here, rpi-demo is taken as a reference) to view the device dictionary.
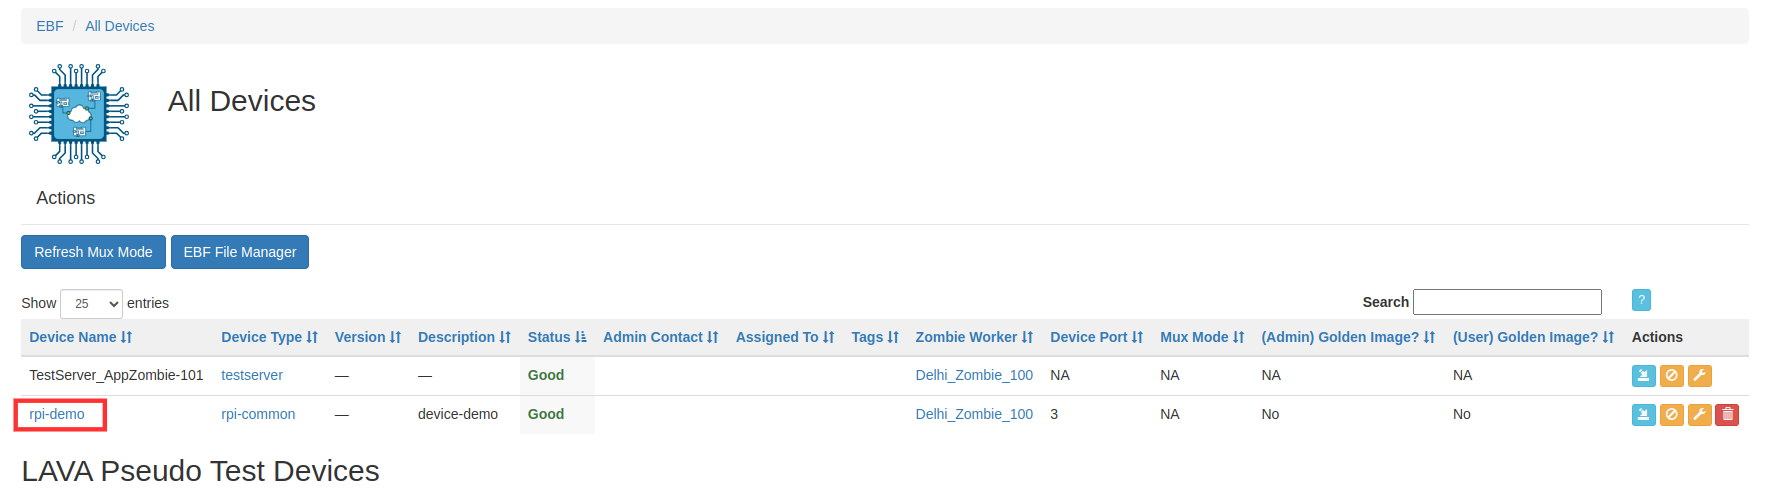
4 On the next page, select the Device Dictionary tag to view the Device Dictionary of the selected device.

5 Device Dictionary of the selected device will be displayed on the screen.